Alpha Technologies AlphaNet IDH4 for XM2, XM2-HP, and XM2-300HP Series - Quick Start Guide User Manual
Page 5
5
746-257-B0-001 Rev. A (2/2014)
Fig. 9, Inverter Moodule / Ribbon Cable Connection
Fig. 6, Connecting the Transponder to the Inverter Module
IDH4L Installation / Replacement Procedure in XM2-300HP Power Supplies
1. Before removing the Inverter Module (IM), verify the power supply device address is correct.
The power supply device address must not be set to zero and no two power supplies monitored by a single IDH4 Series
can have the same address. Power supplies must have 1, 2, 3, 4 or 5 as an address.
To verify the power supply’s address, go to the LCD display on the inverter module and enter the "Setup" menu. Scroll
to the "Device Address" menu item and verify the device address is set to something other than 0 (Zero).
2. Switch OFF the power supply’s battery breaker.
NOTE:
With the battery breaker in the OFF position, the power supply will not go into inverter mode.
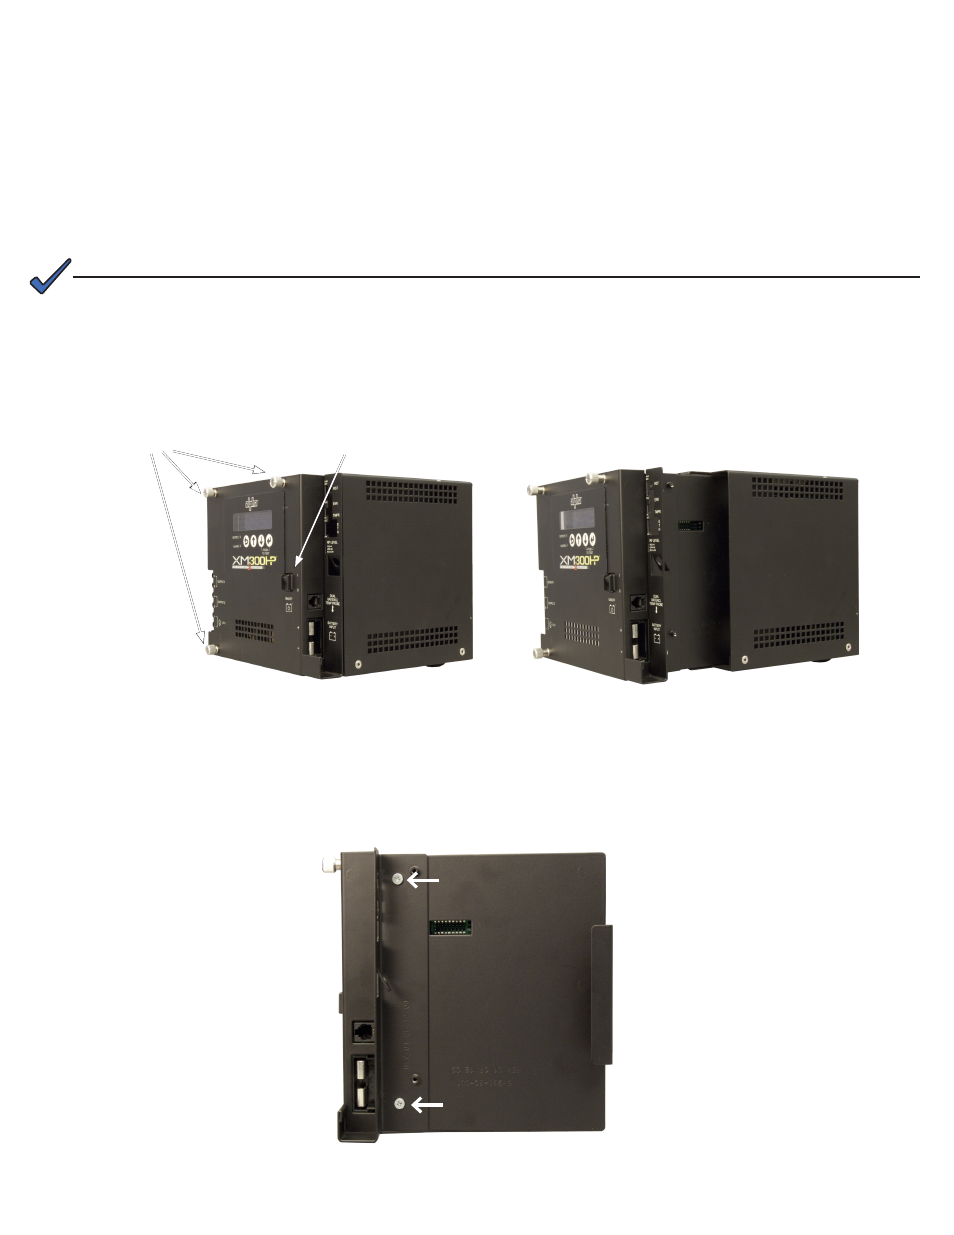
Fig. 7, Removing the Inverter Module from the Power Supply
4. Loosen the Inverter Module thumbscrews.
5. Slide the Inverter Module out of the power supply.
6. Loosen the two Phillips captive screws to remove the IDH4L sheet metal from the Inverter Module.
Captive Screw
Captive Screw
Fig. 8, Removing the IDH4L Sheet Metal from the Inverter Module
3. Unplug all Inverter Module connections (e.g. battery cable, remote temperature sensor).
Inverter Module
Thumbscrews
Power Supply
Battery Breaker