Operation, Graphic file considerations, Configuring the output – Extron Electronics GSS 100 Setup Guide User Manual
Page 2: Uploading (adding) an image, Selecting an image to display, Gss 100 • setup guide
2
Operation
Graphic File Considerations
z
The only valid file formats for stored images are *.bmp and *.jpg.
z
Valid file names are up to 240 alphanumeric characters with no spaces.
z
Progressive *.jpg images are not supported.
z
Bitmap (*.bmp) images must be formatted as 24-bit RGB.
z
The GSS 100 does not scale images. An 800 x 600 BMP file does not fill a 1024 x 768 output. Thus, images should be mastered at
the output resolution of the GSS.
z
1080i and 1080p files need to be mastered at a resolution of 1440 x 1080 instead of 1920 x 1080.
Configuring the Output
Resolution
640 x 480
through 1080p
Default
Cycle
Next
Output
Config
1024 x
768 @60
Sync
RGBHV
Next
Output sync format
• RGBHV • RGBS
10 sec.
RGB Delay
0.0 to 5.0 seconds in
0.1 second increments
Sync polarity
• H-/V- • H+/V-
• H-/V+ • H+/V+
RGB Dly
0.0 Sec
H Pol V
Neg Neg
Switch
Effect
Menu x2
1
2
3
5
9
7
Next
4
6
Next
8
10
1.
On the front panel, with the LCD displaying the default display cycle, press the
Menu button twice to display the Output Configuration menu.
2.
Press the Next button to display the Resolution submenu.
3.
Rotate the Adjust/Select knob to select the output resolution of the stored images.
4.
Press the Next button to display the Sync submenu.
5.
Rotate the Adjust/Select knob to select between RGBHV and RGBS.
6.
Press the Next button to select the Polarity submenu.
7.
Rotate the Adjust/Select knob to select among the sync polarities.
8.
Press the Next button to select the RGB Delay submenu.
9.
Rotate the Adjust/Select knob to set how long the GSS mutes the RGB output
before displaying the RGB pass-through input.
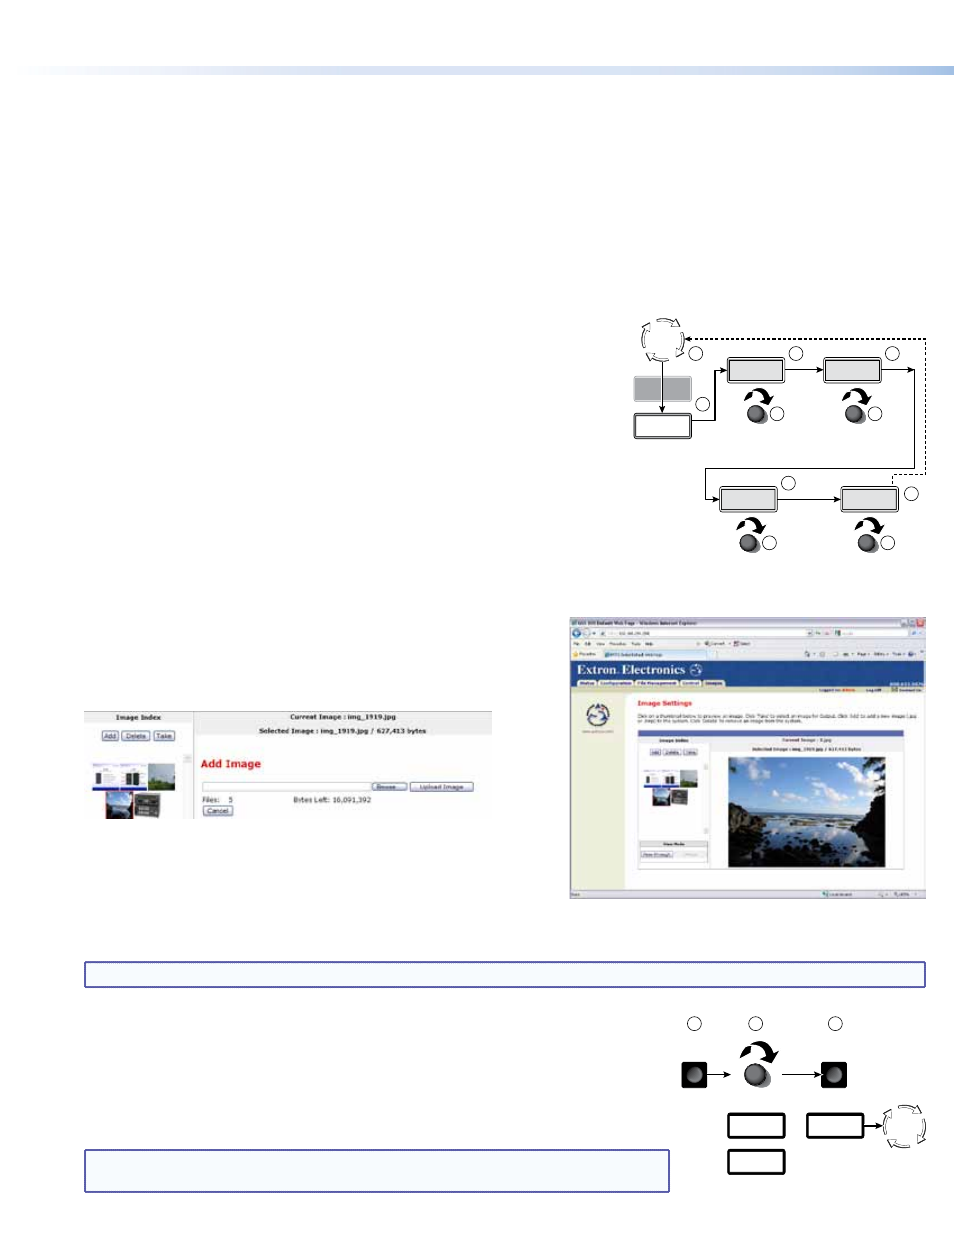
Uploading (Adding) an Image
1.
Connect the GSS to a PC or to a network and open the embedded web
pages. See the GSS 100 User Guide for more detail.
2.
Click the Images tab to access the Image Settings page.
3.
Click the Add button. The Add Image field appears.
4.
Click the Browse button. The Choose File window appears.
5.
Browse through your system and select the desired image file.
6.
Click the Open button. The complete file location and name appear in
the Add Image field.
7.
Click the Upload Image button. After several seconds, a thumbnail of the uploaded image appears in the Image Index portion
of the page and the image is available for display.
NOTE
: Do NOT navigate away from the page until the thumbnail appears.
Selecting an Image to Display
Select
PassThru
Loading
Image
Select
Filename
IMAGE
TAKE
ADJUST/
SELECT
or
Default
Cycle
3
2
1
1.
On the front panel, press the Image button.
2.
Rotate the Adjust/Select knob to select either
PassThru
or one of the previously loaded
images by file name.
3.
Press the Take button. The LCD shows
Loading Image
and then returns to the default
display cycle once the image is loaded.
TIP
: As an alternative, you can select an image using the embedded web pages of
the GSS 100. On the Images tab, click a thumbnail and click the Take button.
GSS 100 • Setup Guide