Warning, Removing the front panel, Heating element cleaning/ replacement – John Wood SpaceSaver (2.5 Gallon) User Manual
Page 12
12
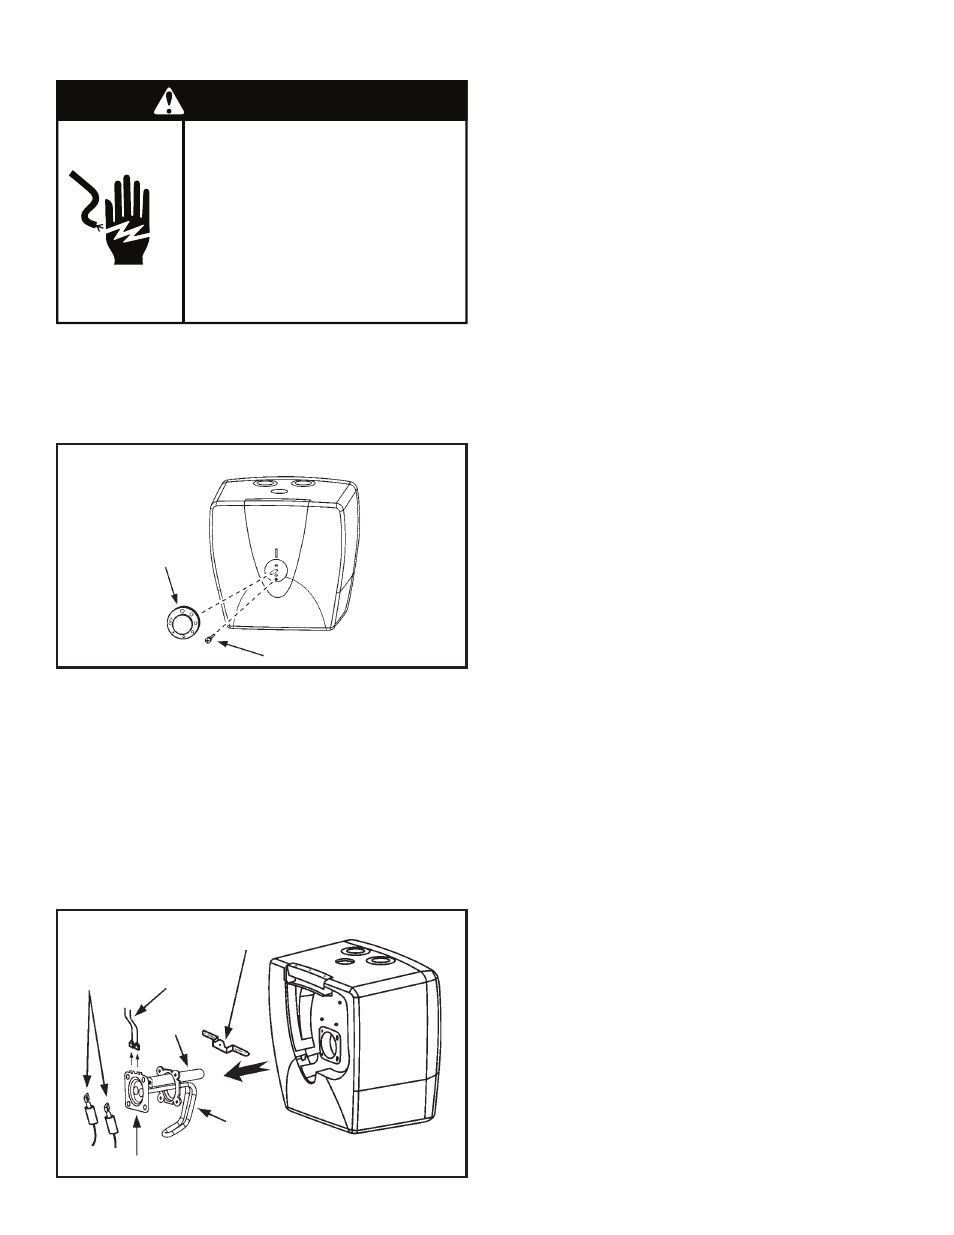
Removing the Front Panel
1. Disconnect the electrical power and follow “Draining
and Flushing Instructions”.
2. Remove the temperature knob by pulling it straight out.
3. Using a Philips screwdriver, unscrew the bottom screw
securing the front panel (see Figure 11).
4. Lift up and remove front panel.
Heating Element Cleaning/
Replacement
To remove the element from the tank in order to clean or
replace it:
1. Disconnect the electrical power and follow “Draining
and Flushing Instructions”.
2. Remove the front panel, see the “Removing the Front
Panel” section in this manual. Remove the insulation
pad.
3. Remove the two screws securing the ground wires
(green wire and green/yellow wire) from the element,
taking careful note of the original location of the wires.
4. Remove the two screws from the mounting bracket,
(see Figure 12) being careful not to drop the screws
into the unit, as they will be difficult to retrieve. Remove
bracket and set screws aside.
5. Remove the two spade connectors from the element.
6. Using a 10mm wrench, remove the four nuts around
the element flange. Set nuts and lockwashers aside.
7. Lift element up to clear the four mounting bolts, rotate
180° clockwise, and lift out.
8. Discard the old gasket and clean the area around
the element opening. Remove any sediment from or
around the element opening and inside the tank.
9. If you are cleaning the element you have removed,
do so by scraping or soaking in vinegar or a deliming
solution.
NOTE: Replacement elements must (1) be the same
voltage and (2) no greater wattage than listed on the rating
plate on the side of the water heater.
10. A new gasket must be used in all cases to prevent a
possible water leak. Place the new element gasket on
the mating surface of the element flange.
11. Install the element by reversing the removal procedure
being sure that the four bolts fit into the element flange.
NOTE: The element flange must be positioned such that
the ground wire connections are located towards the top of
the water heater.
12. Replace the four lockwashers and 10mm nuts. Tighten
until snug. DO NOT OVERTIGHTEN.
13. Place unit back on wall mounting bracket hooks.
Reconnect the water inlet and outlet, open the nearest
hot water tap and follow “Draining and Flushing
Instructions”. Never use this water heater unless it
is completely full of water. To prevent damage to the
tank and heating element, the tank must be filled with
water. Water must flow from the hot water faucet before
turning “ON” power. The manufacturer will not warrant
any elements damaged by failure to follow instructions.
14. Check element for water leaks. If leakage occurs,
tighten element or repeat Steps 7 and 8, remove
element and reposition gasket. Then repeat Steps 10
through 15.
15. Replace the two spade connectors on element into
their original positions.
16. Replace the two ground wires to the element flange
(green wire and green/yellow wire)
17. Replace the mounting bracket with the center rise
facing outward (see Figure 12).
18. Replace the front panel, lining up the three tabs at the
top with the slots in the casing.
19. Replace the retaining screw and the temperature knob.
20. Reconnect the electrical power.
Figure 12
Water Piping
Installation
MOUNTING BRACKET
GROUND
WIRES
SPADE
CONNECTORS
ANODE
HEATING
ELEMENT
ELEMENT FLANGE
Figure 11
Removing the
Front Panel
TEMPERATURE
CONTROL
KNOB
BOTTOM SCREW
Failure to do so can result in
death or electrical shock.
Replace all parts and panels
before operating.
Disconnect power before
servicing.
Electric Shock Hazard
WARNING