Sample cycle, Operation, Start-up – Xylem 780 LIQUID SAMPLER User Manual
Page 4
4
Sample cycle
Sample cycle
Sample cycle
Sample cycle
Sample cycle
The sample sequence is presented below:
Function:
Purge
Suction
Volume adjustment Sample pump out
Purge
(outlet to sample can)
Signal:
–––––T 1–––––
––––Level––––
–––––T 2–––––
–––––T 3–––––
––––T 1–––––
Compressor:
xxxxxxxxxxxxxxxxxxxxxxxxxxxxxxxxxxxxxxxxxxxxxxxxxxxxxxxxxxxxxxxxxxxxxxxxxxxxxx
Pressure
xxxxxxxxxxxxxx
xxxxxxxxxxxxxxxxxxxxxxxxxxxxxxxxxxxxxxxxxxxxx
Vacuum
xxxxxxxxxxxxxxx
Level detection
x
Outlet valve open
xxxxxxxxxxxxxx
Alarm
–––––––T 4––––––––
Operation
Operation
Operation
Operation
Operation
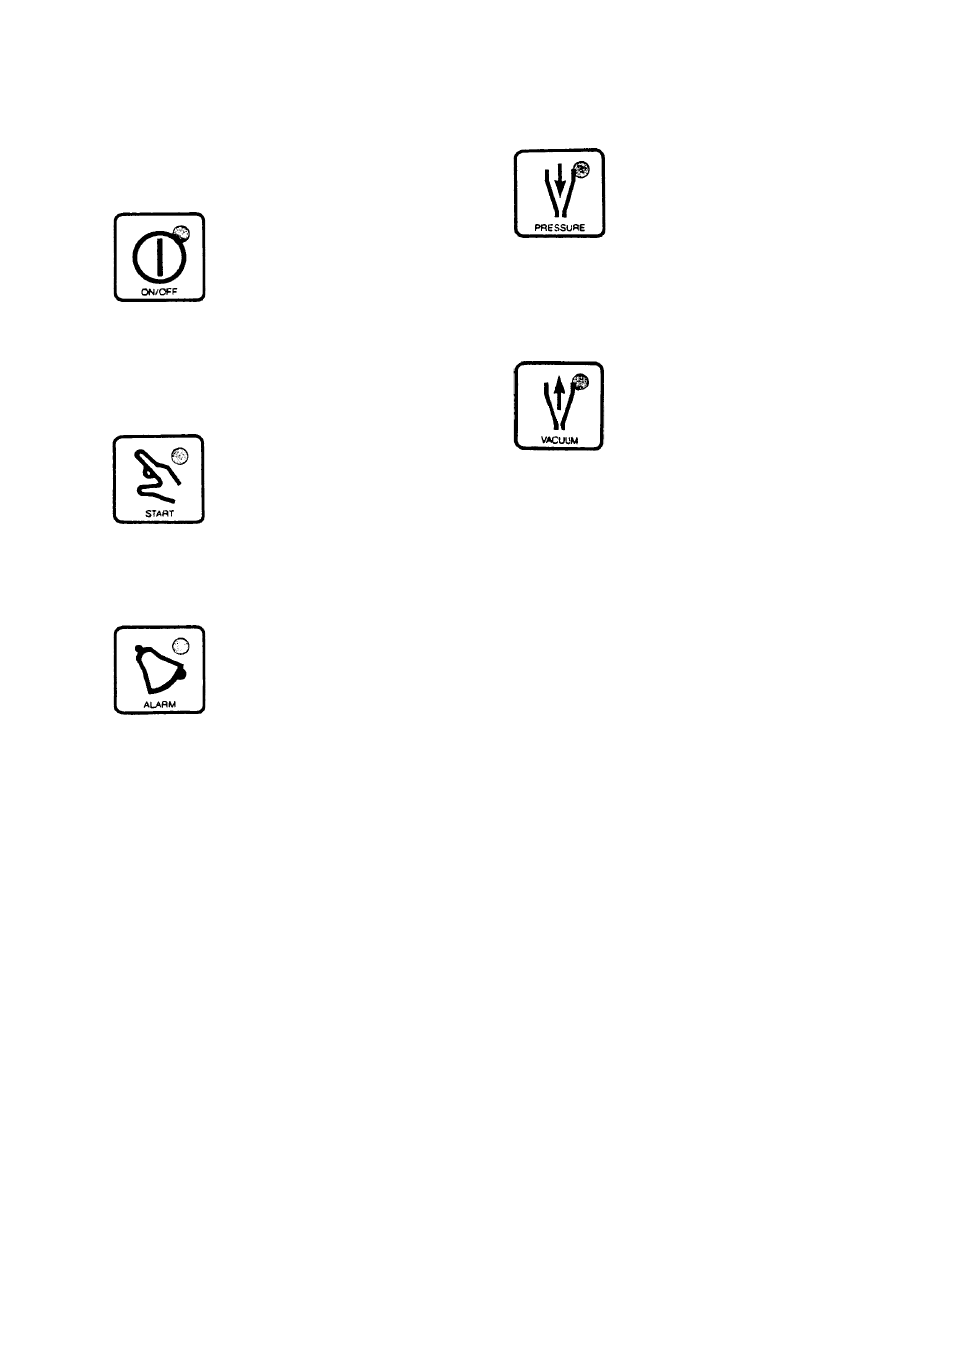
The sampler is operated on the control panel. The symbols
have the following meaning and function.
Start/stop of the sampler.
The function is an electrical memory function, so the
chosen position (start or stop) is maintained also after a
power failure. The sampler will continue taking samples or
will stop according to the previous position. The green LED
indicates that the sampler is on and ready (stand by) when
a start signal occurs.
Manuel sampling.
By depressing the start key, a sample cycle is started. This
function is always active and can be used alone or together
with an external control signal. The green LED indicates
that the sampler is in operation.
Alarm (reset).
The ALARM key resets the sample cycle.When there is an
alarm, the light diode flashes (yellow), as described in
section 9. It continues to flash until the key is activated to
reset the alarm.
Pressure indicator
This LED (green) indicates that the compressor has
pressurized the sample glass in order to:
* to purge out the previous sample from the sample tube.
* to purge out excess liquid during adjustment of the
sample volume.
* to flush the set sample volume into the sample can.
Vacuum indicator.
This LED (green) indicates that there is vacuum in the
sample glass when
* the sampler pulls up the sample in the sample glass.
Start-up
Start-up
Start-up
Start-up
Start-up
When the sampler is mounted and electrical connections
completed, the sampler is ready for start-up.
Ensure that the sample tube is immersed in the channel or
basin where the sample will be taken. Position the outlet
tube so that it reaches the sample container.
Adjust the sample volume from 20 ml – 0,5 l. The
adjustment is made by loosen the nut and pushing the
measuring pipe until the lower edge of the pipe is on the
level with the line on the sample glass, which corresponds
to the desired flow.
Connect the power supply when the measuring pipe has
been adjusted to the correct height. The ON/OFF key
activates the green diode light and the sampler is ready for
start (standby) when the “Start” key is pressed.
When the sampler is started, the green diode light will light.
During operation the compressor will be audible. The green
diode lights in the symbols for pressure and the vacuum,
indicate the internal valves are controlling the compressor.