Operation instructions, Mounting the weapon, Controls – Armasight NWWWWZ000411I11 WWZ 4x GEN 1+ Night Vision Rifle Scope User Manual
Page 5: Focusing your device
5
MOUnTIng THE wEAPOn
1) Loosen the screws on the 7/8” weaver mount of the WWZ Scope.
2) Place the sight on the weaver base of the firearm.
3) Re-tighten the screws.
nOTE:
After a round of firing the fixing screws may need to be re-tightened.
To provide you with greater flexibility when mounting your WWZ Scope on the mount system, we
have installed a small rail with a fixing projection on the base of the mount bracket, together with the
determined weaver rail indents that are used for mounting. The mount bracket has two grooves that
can accept this rail. You can shift the mounting position of your WWZ Scope by an extra 1/3 of an inch
by simply turning the rail around.
To add additional inches to the WWZ Scope weapon
mount, please follow the instructions below:
1) Remove the two screws that attach the rail to the
mounting bracket.
2) Remove the rail from the groove.
3) Turn the rail around.
4) Put the rail into the other groove.
5) Re-tighten the two screws on the rail.
nOTE:
Occasionally, you may find that the rail does not slide out easily. If this occurs, rotate one of the
removed screws into the threaded aperture in the center of the fixing projection. This will work
as a jack and release the rail out of the groove.
3. OPERATIOn InSTRUCTIOnS
COnTROlS
The Armasight WWZ Scope weapon sights feature simple, easy-to-operate controls and adjustments.
To turn on the sight, rotate the operation switch from the OFF position.
To turn off the sight, rotate the operation switch to the fixed OFF position.
To adjust the reticle brightness, do the following:
1) Turn the sight on.
2) Look into the eyepiece (you will be able to see the reticle brightness through the viewfinder). Rotate
the operation switch to gradually adjust the reticle brightness until the desired level of brightness is
reached.
FOCUSIng yOUR DEVICE
To focus the WWZ Scope, turn the diopter ring clockwise until it stops. Then, while looking through the
eyepiece, aim the sight towards an object in the distance and begin slowly rotating the diopter ring in
a counterclockwise direction, until the image becomes sharp and clear.
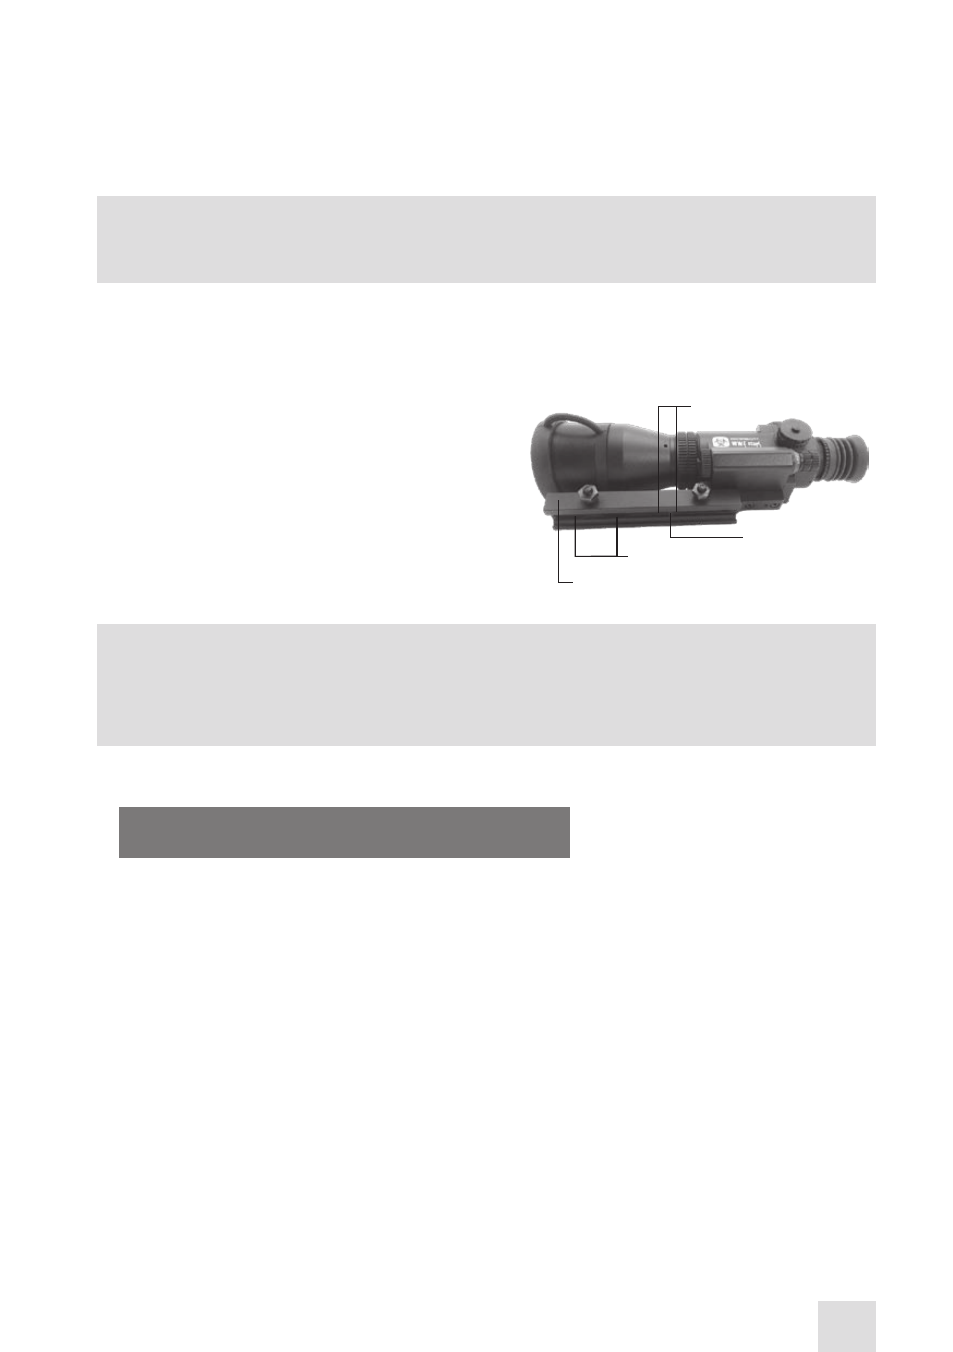
grOOveS
rail with a
Fixing prOjectiOn
ScrewS
7/8”weaver
mOunting SyStem