9 installing a hard disk drive – Asus Vintage User Manual
Page 33
A S U S V i n t a g e - S 8 0 0
A S U S V i n t a g e - S 8 0 0
A S U S V i n t a g e - S 8 0 0
A S U S V i n t a g e - S 8 0 0
A S U S V i n t a g e - S 8 0 0
2 - 1 7
2 - 1 7
2 - 1 7
2 - 1 7
2 - 1 7
2.9
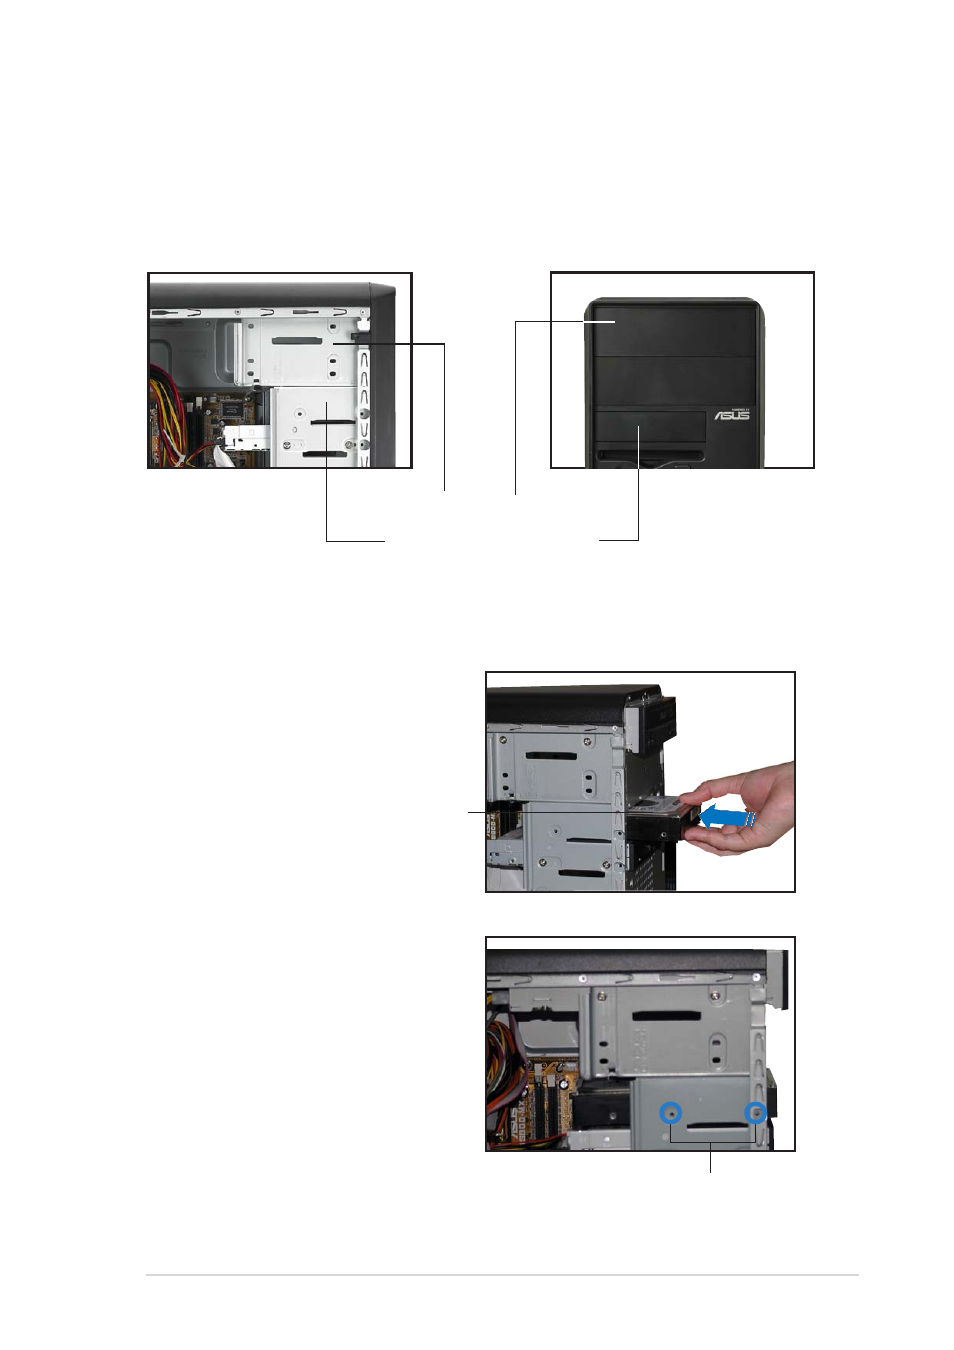
Installing a hard disk drive
The chassis has one 3.5-inch hard disk drive (HDD) bay right under the
5.25-inch bay. The following figures show the internal and external views of
the HDD bay location.
5 . 2 5 - i n c h D r i v e b a y
5 . 2 5 - i n c h D r i v e b a y
5 . 2 5 - i n c h D r i v e b a y
5 . 2 5 - i n c h D r i v e b a y
5 . 2 5 - i n c h D r i v e b a y
3 . 5 - i n c h H D D d r i v e b a y
3 . 5 - i n c h H D D d r i v e b a y
3 . 5 - i n c h H D D d r i v e b a y
3 . 5 - i n c h H D D d r i v e b a y
3 . 5 - i n c h H D D d r i v e b a y
I n t e r n a l v i e w
I n t e r n a l v i e w
I n t e r n a l v i e w
I n t e r n a l v i e w
I n t e r n a l v i e w
E x t e r n a l v i e w
E x t e r n a l v i e w
E x t e r n a l v i e w
E x t e r n a l v i e w
E x t e r n a l v i e w
To install an IDE HDD:
1.
Place the chassis upright.
2.
With the HDD label side up,
carefully insert the drive into
the 3.5-inch bay.
H D D l a b e l s i d e
H D D l a b e l s i d e
H D D l a b e l s i d e
H D D l a b e l s i d e
H D D l a b e l s i d e
3.
Push the drive into the bay
until its screw holes align with
the holes on the bay marked
HDD.
4.
Secure the drive with two
screws.
H D D s c r e w h o l e s
H D D s c r e w h o l e s
H D D s c r e w h o l e s
H D D s c r e w h o l e s
H D D s c r e w h o l e s