6 central processing unit (cpu) – Asus A8N5X User Manual
Page 24
1 - 1 0
1 - 1 0
1 - 1 0
1 - 1 0
1 - 1 0
C h a p t e r 1 : P r o d u c t i n t r o d u c t i o n
C h a p t e r 1 : P r o d u c t i n t r o d u c t i o n
C h a p t e r 1 : P r o d u c t i n t r o d u c t i o n
C h a p t e r 1 : P r o d u c t i n t r o d u c t i o n
C h a p t e r 1 : P r o d u c t i n t r o d u c t i o n
2.
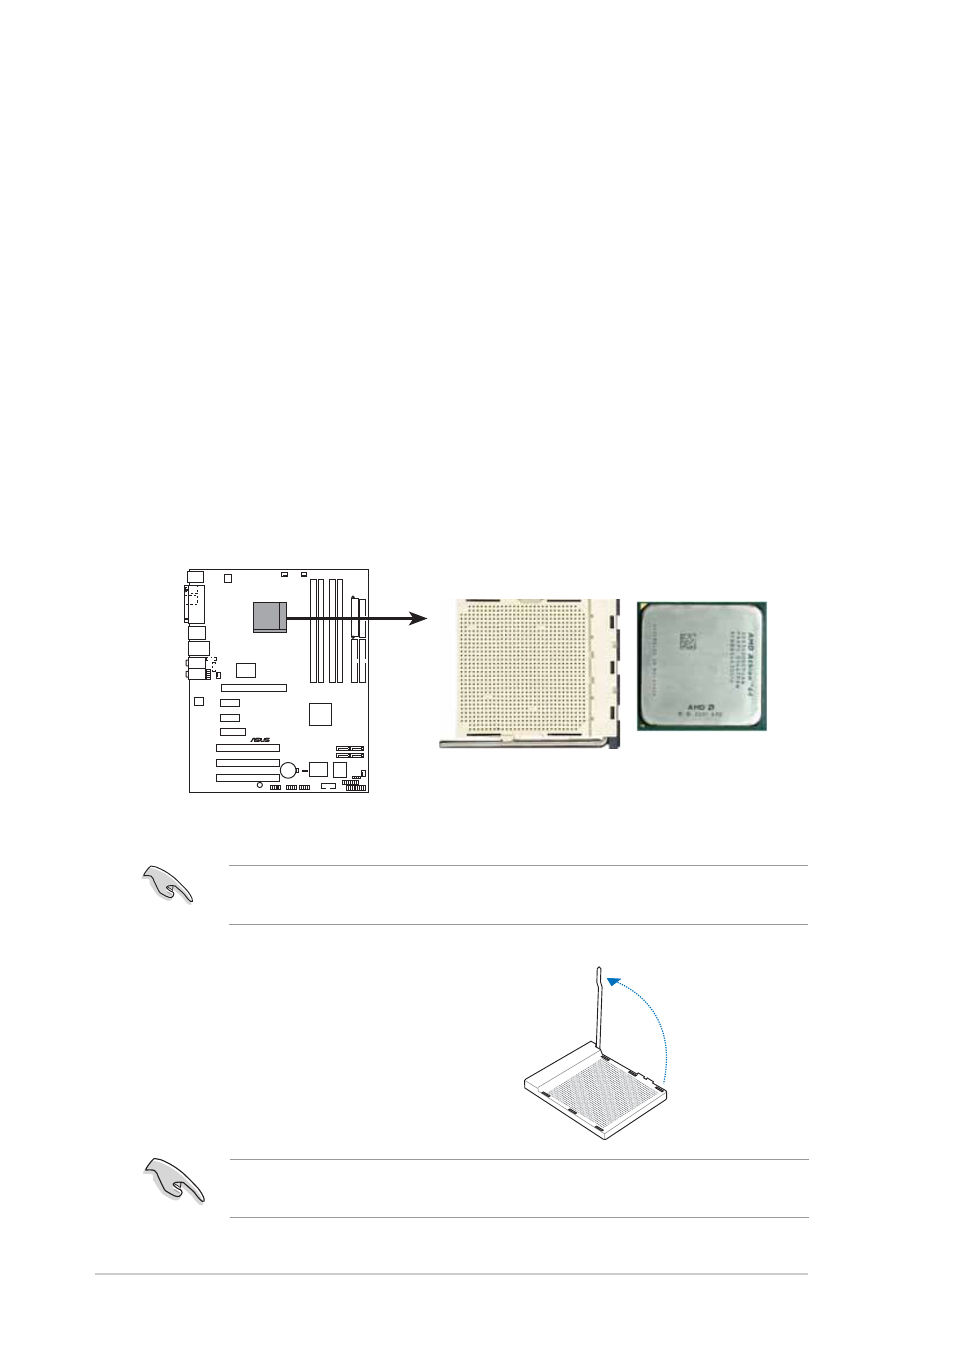
Unlock the socket by pressing
the lever sideways, then lift it up
to a 90
°-100° angle.
Make sure that the socket lever is lifted up to 90
°-100° angle, otherwise
the CPU does not fit in completely.
1.6.2
1.6.2
1.6.2
1.6.2
1.6.2
Installling the CPU
Installling the CPU
Installling the CPU
Installling the CPU
Installling the CPU
To install a CPU:
1.
Locate the CPU socket on the motherboard.
1.6
Central Processing Unit (CPU)
1.6.1
1.6.1
1.6.1
1.6.1
1.6.1
Overview
Overview
Overview
Overview
Overview
The motherboard comes with a surface mount 939-pin Zero Insertion Force
(ZIF) socket designed for the AMD Athlon™ 64FX, AMD Athlon 64™ or AMD
Sempron™ processor.
The 128-bit-wide data paths of these processors can run applications
faster than processors with only 32-bit or 64-bit wide data paths.
Take note of the marked corner (with gold triangle) on the CPU. This mark
should match a specific corner on the socket to ensure correct installation.
Before installing the CPU, make sure that the socket box is facing
towards you and the load lever is on your left.
A8N5X
®
A8N5X CPU Socket 939