5 removing the power supply unit – Asus S-presso User Manual
Page 25
2 - 5
2 - 5
2 - 5
2 - 5
2 - 5
A S U S S - p r e s s o
A S U S S - p r e s s o
A S U S S - p r e s s o
A S U S S - p r e s s o
A S U S S - p r e s s o
2.5
Removing the power supply unit
You must remove the power supply unit (PSU) before you can install a
central processing unit (CPU) and other system components.
To remove the PSU:
1.
Disconnect the power plugs on
the motherboard.
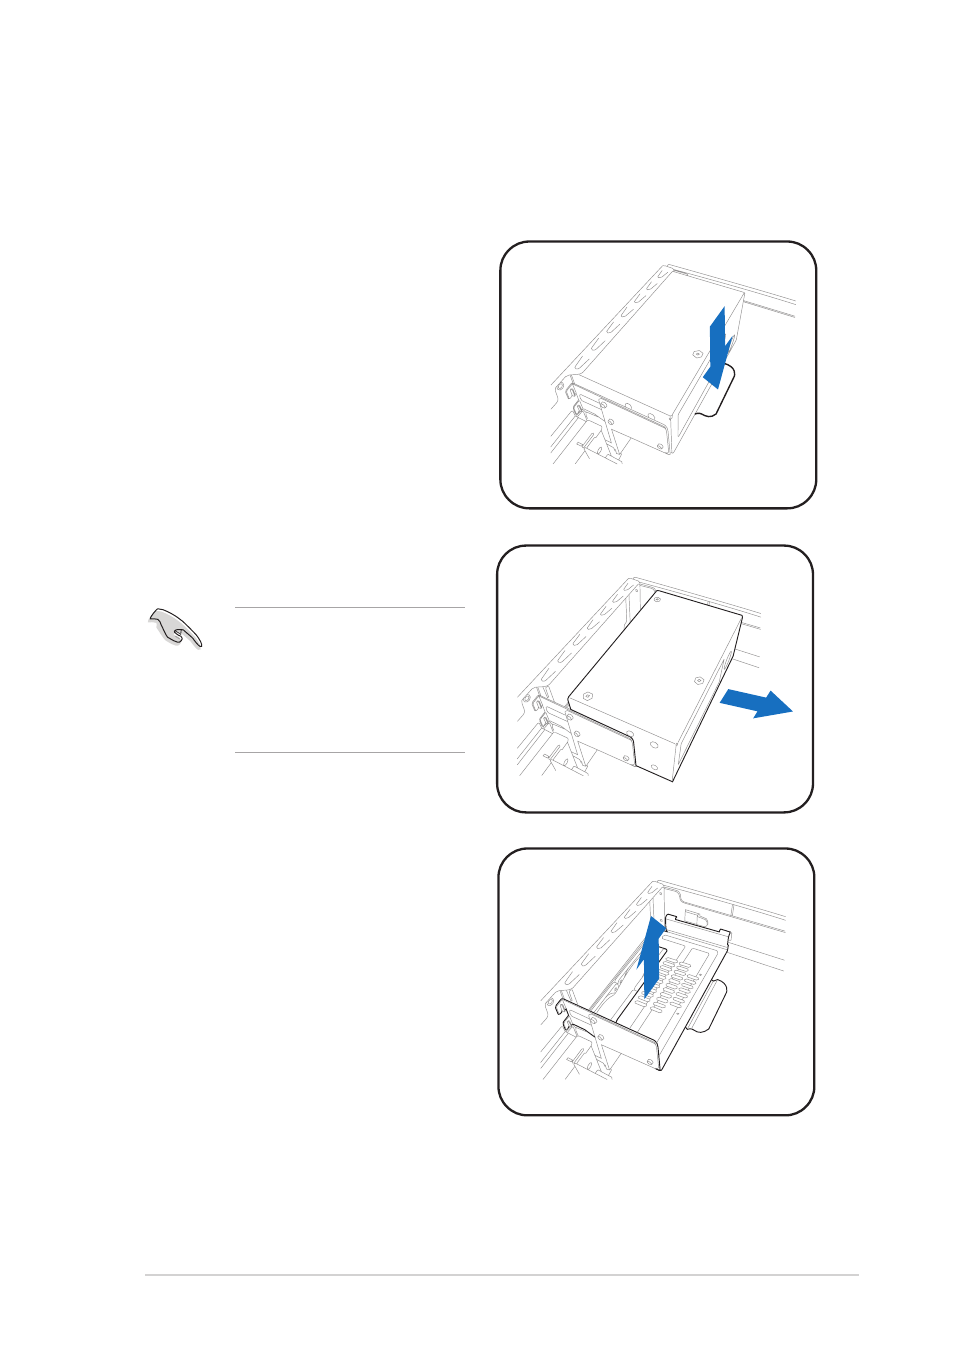
2.
Locate the lever that secures
the PSU.
3.
Push down the lever to release
the PSU.
4.
Slide the PSU out of the metal
tray.
When removing the PSU,
make sure to hold or
support it firmly. The unit
might accidentally drop and
damage the other system
components.
5.
Set the PSU aside.
6.
Lift up the metal tray and set it
aside.
See also other documents in the category Asus Computers:
- CG8565 (410 pages)
- CG8565 (246 pages)
- CS5111 (26 pages)
- CS5120 (1 page)
- ET1611PUK (38 pages)
- S2-P8H61E (80 pages)
- P2-PH1 (80 pages)
- P1-P5945G (80 pages)
- P2-P5945GCX (90 pages)
- CG8270 (76 pages)
- CG8270 (534 pages)
- CG8270 (362 pages)
- CG8270 (218 pages)
- CG8270 (536 pages)
- CG8270 (72 pages)
- P3-P5G31 (100 pages)
- P3-PH4 (80 pages)
- P2-M2A690G (80 pages)
- P2-M2A690G (8 pages)
- P4-P5N9300 (82 pages)
- P4-P5N9300 (1 page)
- P2-P5945GC (92 pages)
- P1-P5945GC (92 pages)
- P3-P5G33 (98 pages)
- T3-P5945GCX (80 pages)
- T3-P5945GC (80 pages)
- P2-M2A690G (94 pages)
- T3-PH1 (80 pages)
- T3-PH1 (82 pages)
- T5-P5G41E (76 pages)
- T5-P5G41E (82 pages)
- S1-AT5NM10E (68 pages)
- P6-P7H55E (67 pages)
- ES5000 (174 pages)
- T4-P5G43 (104 pages)
- T-P5G31 (92 pages)
- BT6130 (2 pages)
- BT6130 (60 pages)
- BT6130 (54 pages)
- CG8265 (350 pages)
- CG8265 (210 pages)
- CM1740 (330 pages)
- CM1740 (70 pages)
- CM1740 (198 pages)
- P6-M4A3000E (59 pages)