4 removing the cover – Asus S-presso User Manual
Page 24
2 - 4
2 - 4
2 - 4
2 - 4
2 - 4
C h a p t e r 2 : B a s i c i n s t a l l a t i o n
C h a p t e r 2 : B a s i c i n s t a l l a t i o n
C h a p t e r 2 : B a s i c i n s t a l l a t i o n
C h a p t e r 2 : B a s i c i n s t a l l a t i o n
C h a p t e r 2 : B a s i c i n s t a l l a t i o n
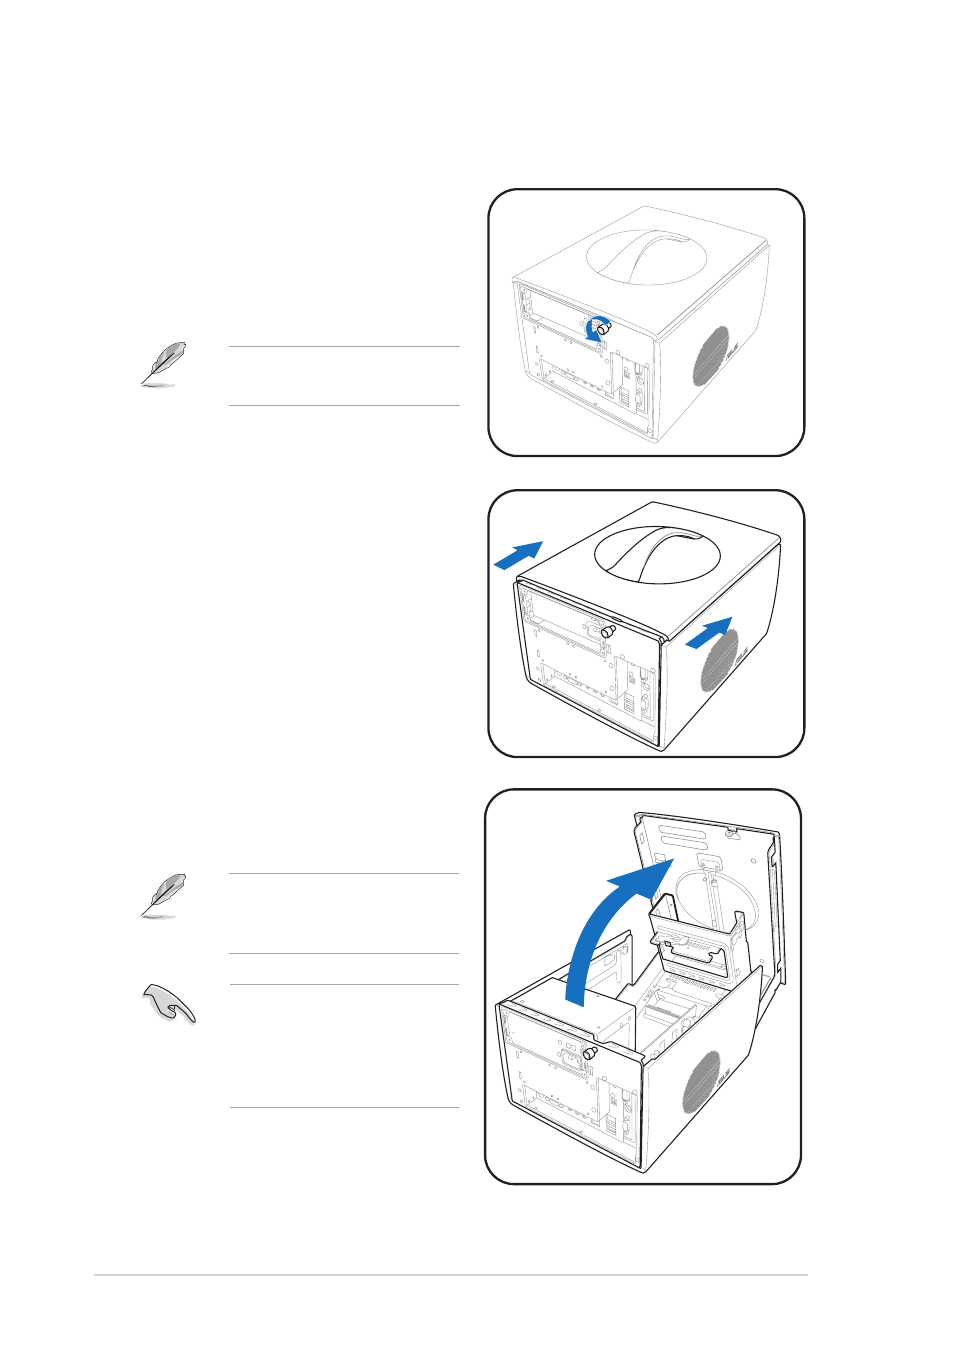
4.
Lift the cover to expose the
internal components of your
system.
3.
Firmy grip the top handle and
push the cover about 1 cm
forward.
2.4
Removing the cover
To remove the cover:
1.
On the rear panel, locate the
thumbscrew that secures the
cover to the chassis.
2.
Turn the thumbscrew
counterclockwise unti it gets
loose.
The thumbscrew cannot be
removed from the chassis.
When fully open, the cover
remains tilted at an angle of
about 35º. Do not push
down further to prevent
damage to the system.
The cover does not
completely disengage from
the chassis.
- CG8565 (410 pages)
- CG8565 (246 pages)
- CS5111 (26 pages)
- CS5120 (1 page)
- ET1611PUK (38 pages)
- S2-P8H61E (80 pages)
- P2-PH1 (80 pages)
- P1-P5945G (80 pages)
- P2-P5945GCX (90 pages)
- CG8270 (72 pages)
- CG8270 (76 pages)
- CG8270 (534 pages)
- CG8270 (362 pages)
- CG8270 (218 pages)
- CG8270 (536 pages)
- P3-P5G31 (100 pages)
- P3-PH4 (80 pages)
- P2-M2A690G (80 pages)
- P2-M2A690G (8 pages)
- P4-P5N9300 (82 pages)
- P4-P5N9300 (1 page)
- P1-P5945GC (92 pages)
- P2-P5945GC (92 pages)
- P3-P5G33 (98 pages)
- T3-P5945GCX (80 pages)
- T3-P5945GC (80 pages)
- P2-M2A690G (94 pages)
- T3-PH1 (80 pages)
- T3-PH1 (82 pages)
- T5-P5G41E (76 pages)
- T5-P5G41E (82 pages)
- S1-AT5NM10E (68 pages)
- P6-P7H55E (67 pages)
- ES5000 (174 pages)
- T4-P5G43 (104 pages)
- T-P5G31 (92 pages)
- BT6130 (2 pages)
- BT6130 (60 pages)
- BT6130 (54 pages)
- CG8265 (350 pages)
- CG8265 (210 pages)
- CM1740 (198 pages)
- CM1740 (330 pages)
- CM1740 (70 pages)
- P6-M4A3000E (59 pages)