10 installing a floppy disk drive – Asus V3-P5G33 User Manual
Page 40
2-22
Chapter 2: Basic installation
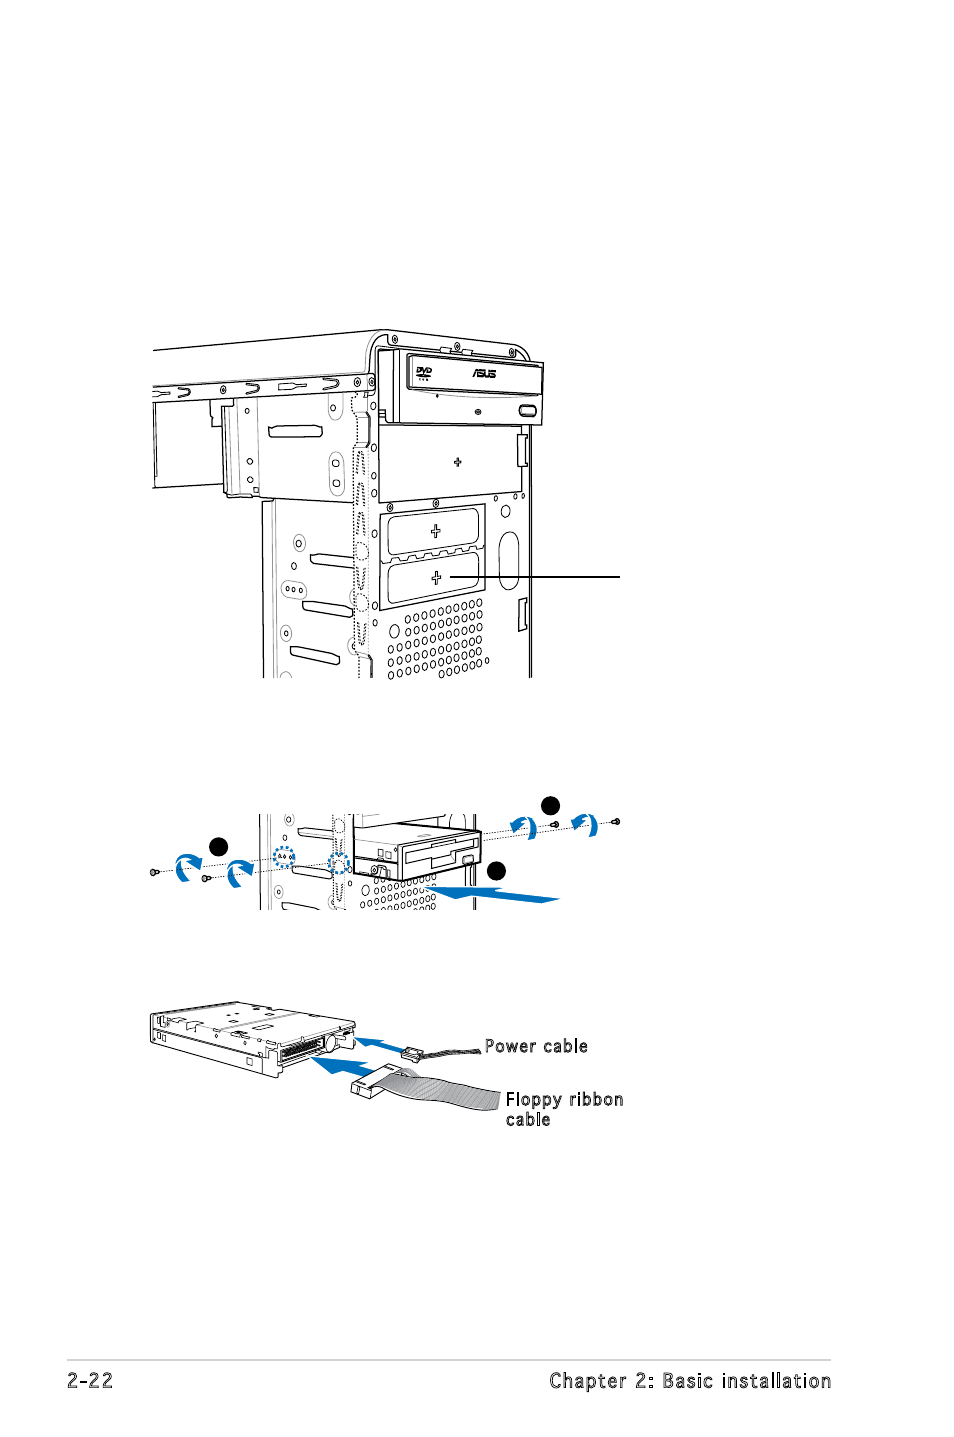
2.10 Installing a floppy disk drive
The system comes with one 3.25-inch drive bay for a floppy disk drive.
To install a floppy disk drive:
1. Remove the drive slot metal plate cover.
2. Carefully insert the floppy disk drive into the floppy drive bay until the
screw holes align with the holes on the bay.
3. Secure the floppy disk drive with two screws on both sides.
4. Connect the floppy disk drive signal cable to the signal connector at
the back of the drive.
5. Connect the other end of the signal cable to the floppy disk drive
connector on the motherboard. See page 4-6 for the location of the
floppy disk drive connector.
6. Connect a 4-pin power cable from the power supply unit to the power
connector at the back of the floppy disk drive.
Floppy ribbon
cable
Power cable
3
3
2
3
3
2
remove the metal
plate cover and
install the card
reader module
here
- CG8565 (410 pages)
- CG8565 (246 pages)
- CS5111 (26 pages)
- CS5120 (1 page)
- ET1611PUK (38 pages)
- S2-P8H61E (80 pages)
- P2-PH1 (80 pages)
- P1-P5945G (80 pages)
- P2-P5945GCX (90 pages)
- CG8270 (218 pages)
- CG8270 (536 pages)
- CG8270 (72 pages)
- CG8270 (76 pages)
- CG8270 (534 pages)
- CG8270 (362 pages)
- P3-P5G31 (100 pages)
- P3-PH4 (80 pages)
- P2-M2A690G (80 pages)
- P2-M2A690G (8 pages)
- P4-P5N9300 (1 page)
- P4-P5N9300 (82 pages)
- P1-P5945GC (92 pages)
- P2-P5945GC (92 pages)
- P3-P5G33 (98 pages)
- T3-P5945GC (80 pages)
- T3-P5945GCX (80 pages)
- P2-M2A690G (94 pages)
- T3-PH1 (80 pages)
- T3-PH1 (82 pages)
- T5-P5G41E (82 pages)
- T5-P5G41E (76 pages)
- S1-AT5NM10E (68 pages)
- P6-P7H55E (67 pages)
- ES5000 (174 pages)
- T4-P5G43 (104 pages)
- T-P5G31 (92 pages)
- BT6130 (60 pages)
- BT6130 (54 pages)
- BT6130 (2 pages)
- CG8265 (350 pages)
- CG8265 (210 pages)
- CM1740 (330 pages)
- CM1740 (70 pages)
- CM1740 (198 pages)
- P6-M4A3000E (59 pages)