Installing the cpu, Motherboard layout, Asus mn-sli deluxe – Asus M2N-SLI Deluxe User Manual
Page 2: Warning, M2n-sli deluxe
ASUS MN-SLI Deluxe
2.
Installing the CPU
Follow these steps to install a CPU.
1. Locate the 940-pin AM socket on the motherboard.
. Lift up the socket lever to 90° angle.
1.
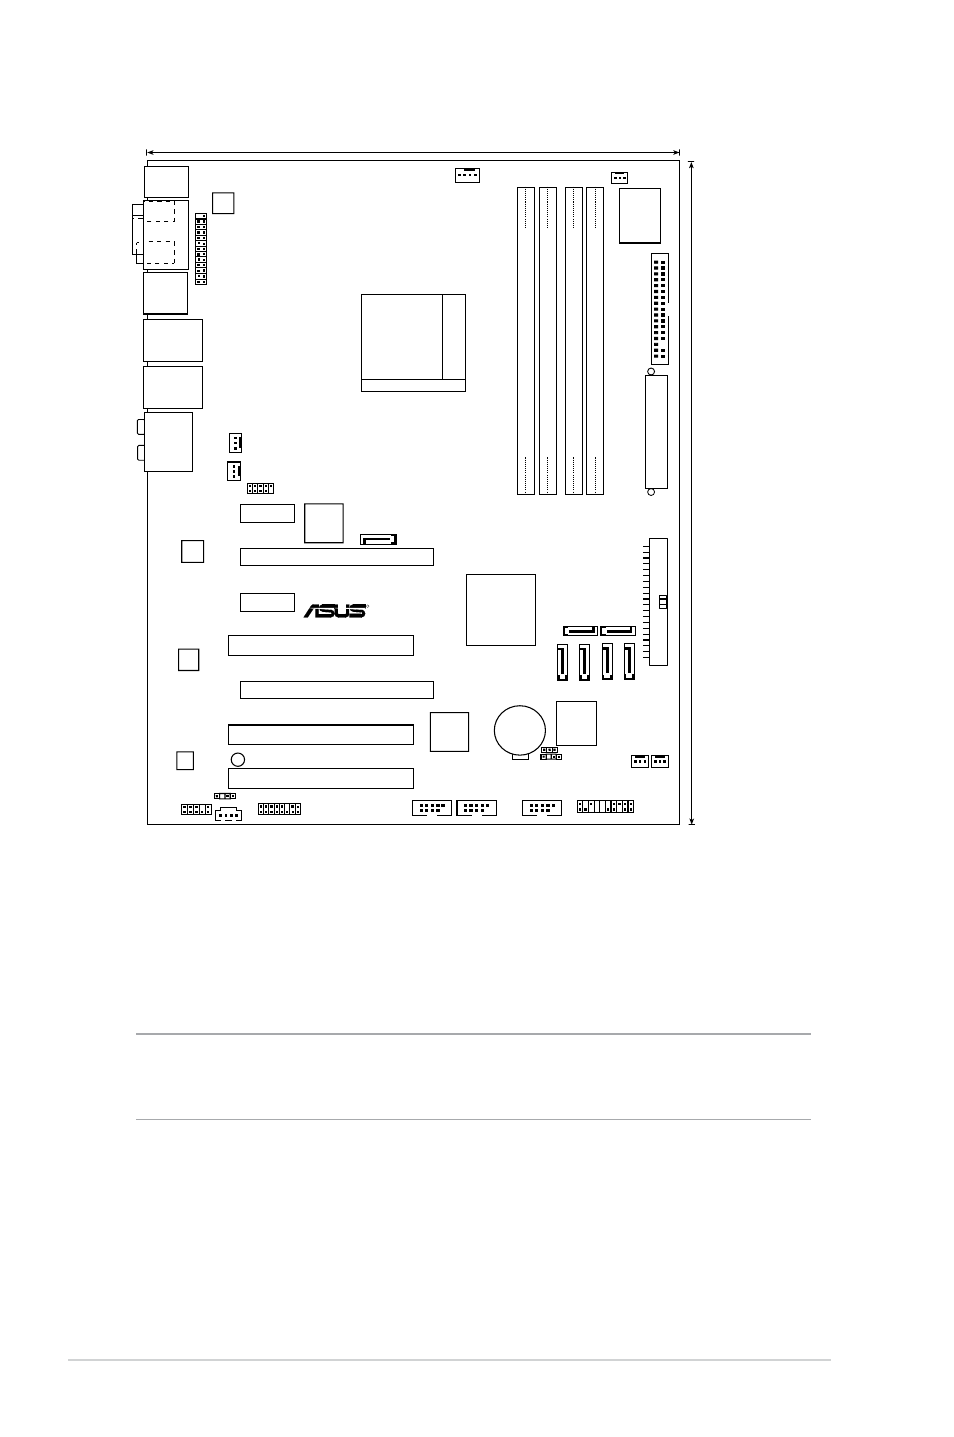
Motherboard layout
3. Position the CPU above the socket such that the CPU corner with the
gold triangle matches the socket corner with a small triangle.
4. Carefully insert the CPU into the socket until it fits in place.
5. When the CPU is in place, push down the socket lever to secure the
CPU. The lever clicks on the side tab to indicate that it is locked.
WARNING!
The CPU fits only in one correct orientation. DO NOT force the CPU into the
socket to prevent bending the pins and damaging the CPU!
Socket
AM2
DDR2 DIMM_B1 (128 bit,240-pin module)
DDR2 DIMM_B2 (128 bit,240-pin module)
DDR2 DIMM_A1 (128 bit,240-pin module)
DDR2 DIMM_A2 (128 bit,240-pin module)
PCI1
PCI2
PCI3
PCIEX16_1
PCIEX16_2
PRI_IDE
PANEL
4Mb
BIOS
CR2032 3V
Lithium Cell
CMOS Power
AAFP
PCIEX1_2
PCIEX1_1
PS/2KBMS
T: Mouse
B: Keyboard
LAN1_USB12
LAN2_USB34
EATXPWR
FL
O
PP
Y
ADFP1
CD
IE1394_2
USB78
USB56
CLRTC
CHASSIS
SATA2
SATA1
SATA3
SATA4
SATA5
SATA6
SATA_RAID1
CH
A_
FA
N3
CH
A_
FA
N4
PWR_FAN
CHA_FAN1
CHA_FAN2
USB910
CPU_FAN
Super I/O
SPDIF_OUT
SPDIF_O1
SPDIF_O2
COM1
ESATA_1394
AUDIO
LP
T
ATX12V
24.5cm (9.6in)
30.5cm (12.0in)
NF570-SLI
ADI
1988B
Marvell
88E1116
Marvell
88E1116
JMicron
JMB363
TSB43AB22A
SB_PWR
R
M2N-SLI DELUXE
nVIDIA