Installing the xonar hardware, 1 preparing your computer, 2 installing the audio card – Asus Xonar D1 User Manual
Page 12: Installing the xonar hardware .1, Preparing your computer, Installing the audio card
1
ASUS Xonar D1
3.
Installing the Xonar Hardware
3.1
Preparing your computer
Before you proceed with the following installation steps, it’s recommended that you
disable your onboard audio device in your BIOS settings, or uninstall any other
sound cards on your PC. (For BIOS setting or uninstallation of other sound cards,
refer to the user manuals of your motherboard and sound card)
1. Power off your computer and disconnect the power cord.
. Open the computer’s case.
. Remove the metal brackets from one unused PCI slot for the audio card.
3.2
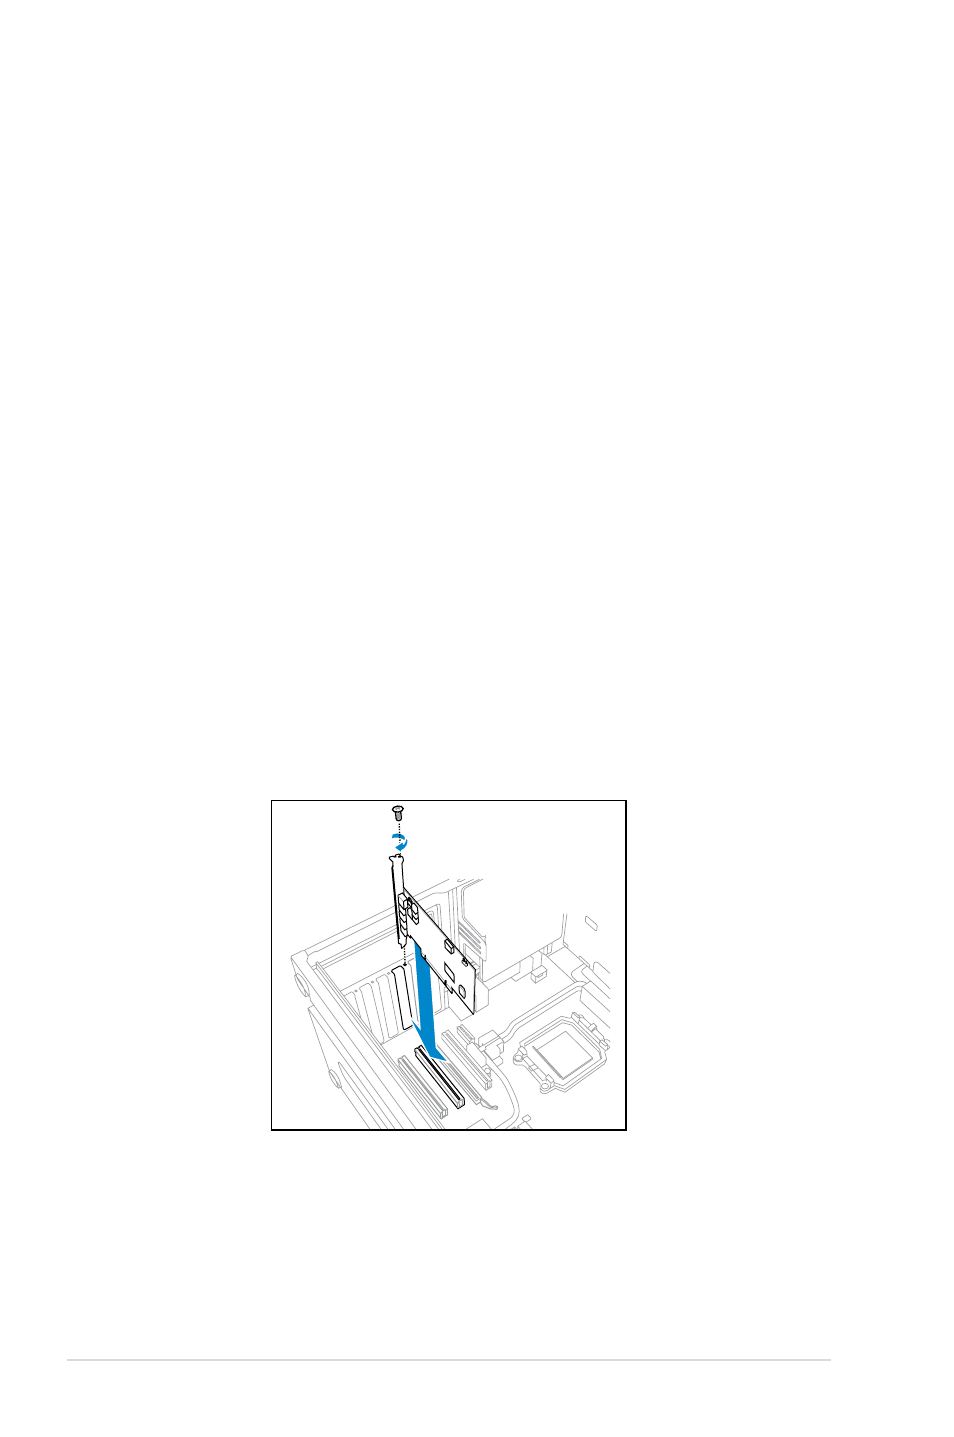
Installing the audio card
1. Face the bracket of the Xonar D1 audio card toward the back panel of your
computer and insert the audio card gently into an available PCI Express
slot. Make sure it’s completely inserted into the PCI Express slot. (Warning!
Do not force the audio card into the slot. Make sure that the gold pins of
the card's PCI Express connector are aligned with the motherboard’s PCI
Express connector before you insert the card into the PCI Express slot. If it
does not fit properly, gently remove it and try again.)
. Secure the audio card bracket to the back of your computer with the screw
that you removed. Refer to section .1.