Removing the storage drive assembly – Asus P1-PH1 User Manual
Page 4
4
4
4
4
4
Q u i c k i n s t a l l a t i o n g u i d e
Q u i c k i n s t a l l a t i o n g u i d e
Q u i c k i n s t a l l a t i o n g u i d e
Q u i c k i n s t a l l a t i o n g u i d e
Q u i c k i n s t a l l a t i o n g u i d e
English
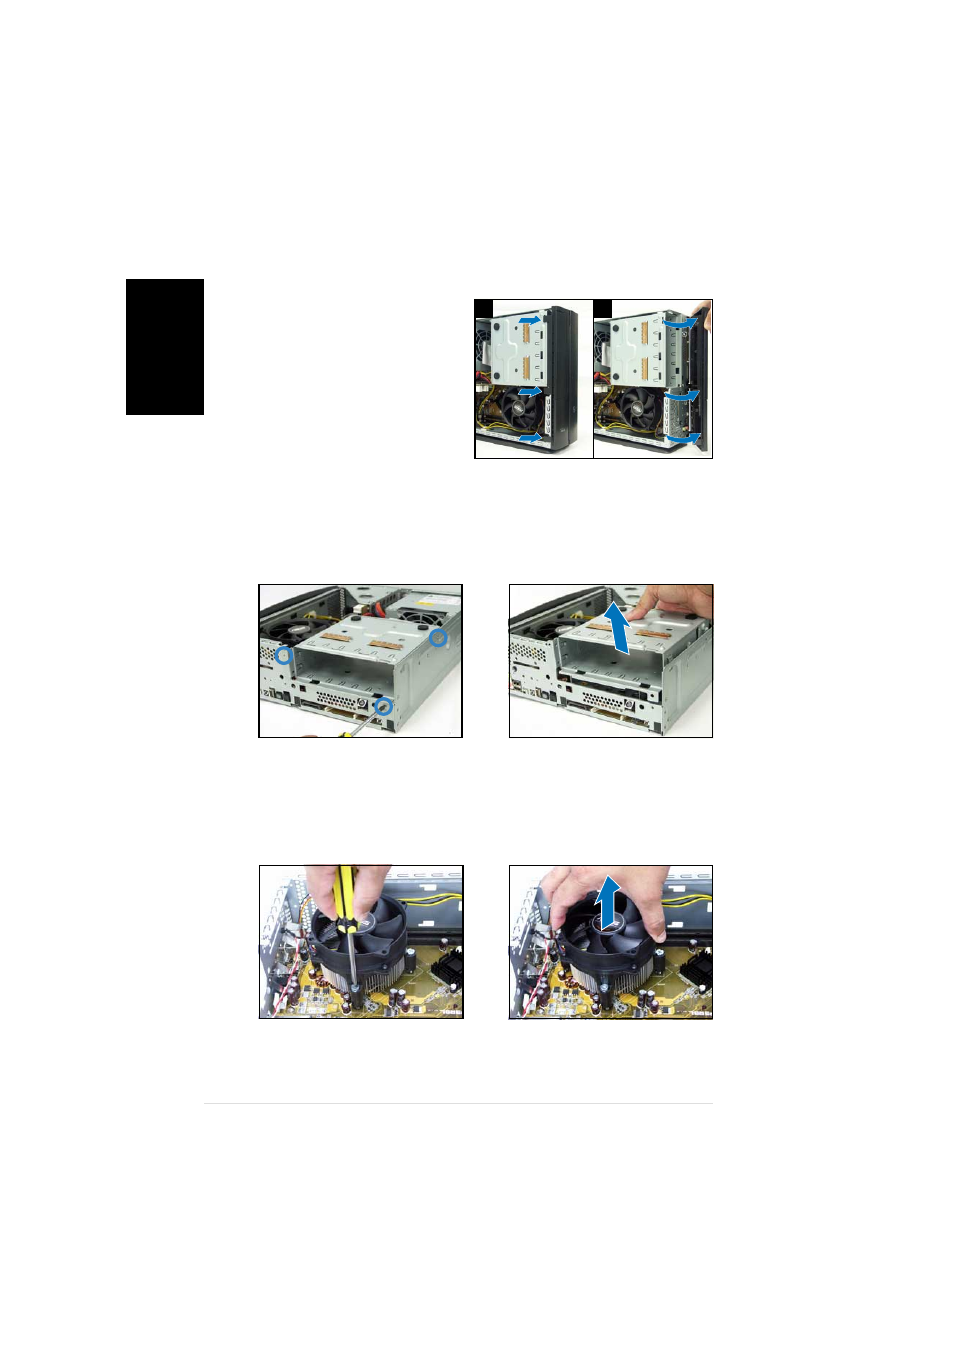
Removing the CPU fan and heatsink
Removing the front panel cover
1.
Lift the front panel cover
hooks outward.
2.
Carefully remove the front
panel cover, then set it aside.
1
1
1
1
1
2
2
2
2
2
1.
Lay the system on its side,
then locate and remove three
storage drive assembly screws.
Removing the storage drive assembly
2.
Lift the storage drive
assembly, then set aside.
3.
Lift the CPU fan and heatsink
assembly, then set aside.
1.
Disconnect the CPU fan cable.
2.
Loosen the CPU fan and
heatsink assembly screws.
See also other documents in the category Asus Computers:
- CG8565 (410 pages)
- CG8565 (246 pages)
- CS5111 (26 pages)
- CS5120 (1 page)
- ET1611PUK (38 pages)
- S2-P8H61E (80 pages)
- P2-PH1 (80 pages)
- P1-P5945G (80 pages)
- P2-P5945GCX (90 pages)
- CG8270 (362 pages)
- CG8270 (218 pages)
- CG8270 (536 pages)
- CG8270 (72 pages)
- CG8270 (76 pages)
- CG8270 (534 pages)
- P3-P5G31 (100 pages)
- P3-PH4 (80 pages)
- P2-M2A690G (80 pages)
- P2-M2A690G (8 pages)
- P4-P5N9300 (82 pages)
- P4-P5N9300 (1 page)
- P1-P5945GC (92 pages)
- P2-P5945GC (92 pages)
- P3-P5G33 (98 pages)
- T3-P5945GC (80 pages)
- T3-P5945GCX (80 pages)
- P2-M2A690G (94 pages)
- T3-PH1 (80 pages)
- T3-PH1 (82 pages)
- T5-P5G41E (76 pages)
- T5-P5G41E (82 pages)
- S1-AT5NM10E (68 pages)
- P6-P7H55E (67 pages)
- ES5000 (174 pages)
- T4-P5G43 (104 pages)
- T-P5G31 (92 pages)
- BT6130 (60 pages)
- BT6130 (54 pages)
- BT6130 (2 pages)
- CG8265 (210 pages)
- CG8265 (350 pages)
- CM1740 (330 pages)
- CM1740 (70 pages)
- CM1740 (198 pages)
- P6-M4A3000E (59 pages)