Billet Specialties Power Steering Hose Kit for Pump Mount Reservoir User Manual
Page 2
500 Shawmut Avenue • La Grange, Illinois 60526 • Tech Line 708/588-0505 • Fax 708/588-7181
Step 2: Measure For Hose
Double check your measurements.
Measure twice, cut once.
Measure the length needed from the pressure side of the pump to the rack/box.
Keep in mind tight bends in the hose are not recommended and may pinch off supply
select the appropriate fitting to route the hose as straight as possible.
Pressure line length
Step 3: Cutting The Hose
Start by tightly wrapping electrical tape around the hose in the area to be cut.
Place hose in a vise without crushing it. Cut hose square to length with a Fine tooth hack
saw or cut off wheel (
Important! Make sure that your cut is square!).
Remove hose from vise and remove tape slowly. Deburr the inner Teflon hose and trim
away any stray stainless braid.
Blow out the inside of the hose to clear any debris. Debris that is left in the line may
cause substantial damage.
Mark your measurements below.
Fitting to pump (must use a 90° fitting) Fitting to rack/box
90°
Straight
Return line length
Fitting to rack/box 90° Straight Fitting to reservoir
90°
Straight
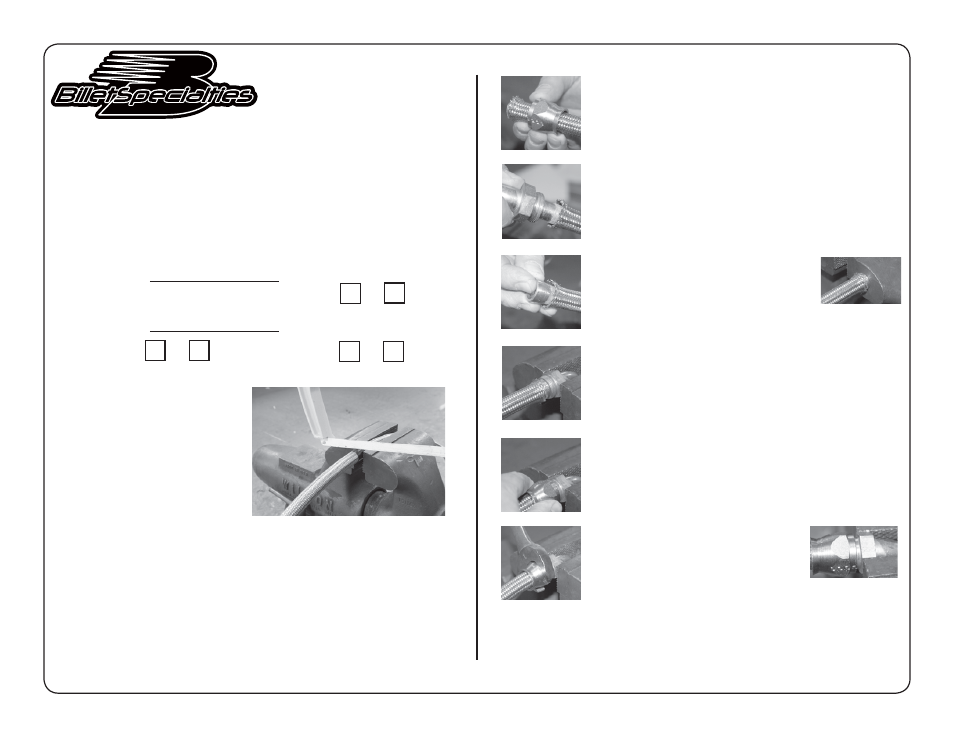
Step 4: Assemble Hose Ends to Hose
Install the threaded socket end on the hose and slide it back
out of the way.
Insert the nipple portion of the hose end into the Teflon part
of the hose to size it back up to shape then remove it.
Push the brass ferrule around the Teflon and
in between the braided hose. Seat the Teflon
hose squarely against the bottom of the ferrule;
this can be done by pushing the hose and sleeve
against a workbench or vise.
Example
Follow by placing the hose end in a vise, sparingly lubricate
the threads with 30wt oil or similar lubricant.
Insert the hose over the nipple making sure the ferrule does
not pop off the Teflon tube.
Finish by threading the socket end onto the nipple by hand.
Clean the hose and blow out with compressed air to clear any debris.
Now tighten with a wrench until the gap
between the nipple and the socket is no more
than 1/16”.
Step 5: Install Hoses
Install hose assembly to each component. Check and make sure the lines are
free and clear of any moving parts.
Example