Billet Specialties 95475 LS-3 Modular Valve Covers User Manual
Billet Specialties For the car
P95470/95475 LS-3 Modular Valve Covers.
Supplies Needed:
- Anti-Seize Compound
- 1/2” Socket
- Torque wrench that reads inch-pounds
- 5/32“ Allen wrench
- 5/16” 12pt. Socket
- 3/16“ Allen wrench
These valve covers are designed to work with GM LS-3 coils P/N 12611424 if you do not have this coil do not proceed until
you have the correct coils for installation.
(3) Mount the coils to the valve cover base with the 1/4-20 X 3/4 button head cap screws, at this time only attach the bottom
of the coil. Locate the 1/8 coil plug identified by the plug that has the pink/purple/brown & black wires.
Coil Cover Top Installation
Apply Anti-Seize to the threads of the 1/4-20 X 1-1/4 ARP
12pt. cap screws. Install top billet coil cover carefully not
to pinch coil harness and tighten.
Install spacer nuts into cylinder head and torque to 45 inch-pounds.
Do Not Over-Tighten!
Install gasket (not supplied) into gasket rail on valve cover base, place valve cover on cyl. head.
Place a 1/4” flat washer onto each of the 1/4-20 X 1-1/4” socket head cap screws and thread
thru valve cover into spacer nut. Torque each fastener to 96 inch-pounds.
Do Not Over-Tighten!
•Valve Cover Base Installation
Billet Specialties Inc. 500 Shawmut Ave. La Grange, IL 60526 - Tech Line 1 800 245-5382
08-12
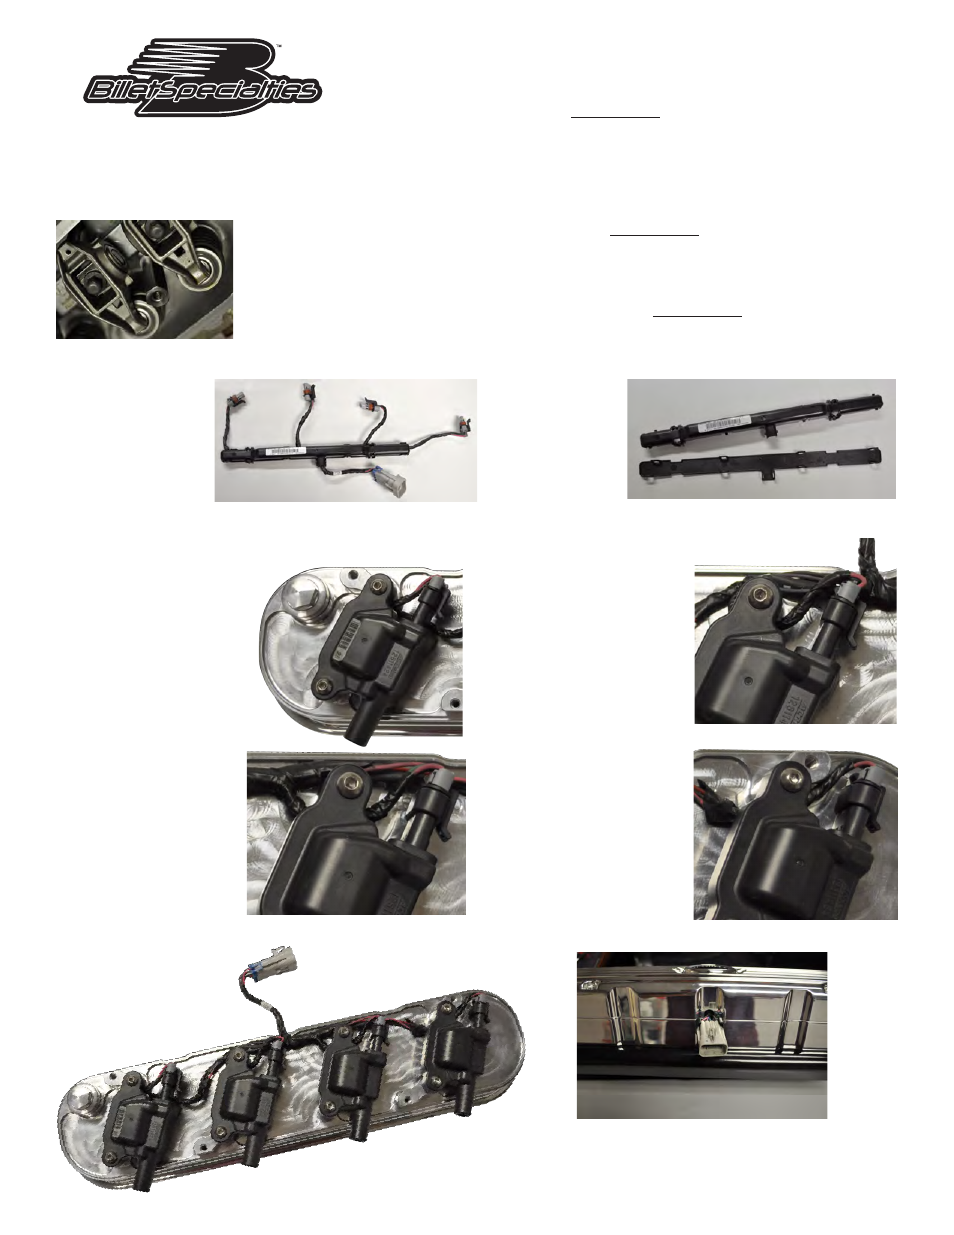
(1) Remove coils and
harness from the
factory metal
bracket.
•Harness Prep and Installation
(2) Remove the
plastic harness
cover.
Completed Coil Installation
(7) Finish by routing only the
coil wire under the boss
on the final coil.
Install and tighten all button
heads firmly at this time.
(4) Plug the 1/8 into the coil on
the left side of the valve
cover (nearest the oil fill).
(5) For the next coil, clip the
plug onto the coil and route
that wire under the coil boss
while routing the main trunk
over the top as shown.
The large plug will now be in
position to route through the
notch in the top cover.
(6) Repeat procedure with
the next coil, main trunk
on top and coil wire
under the coil boss.
Should look like this.