Billet Specialties Brake / Clutch Pad 199340 User Manual
Billet Specialties For the car
Tools Needed:
• 3/32” drill bit
• 5/16” drill bit
• Spray Adhesive
Applications:
• ‘58-‘65 Bel Air, Biscayne, Impala
• ‘63-‘67 Nova, Chevelle, El Camino
• Center punch
• 7/16” wrench
1. Remove rubber pedal pad
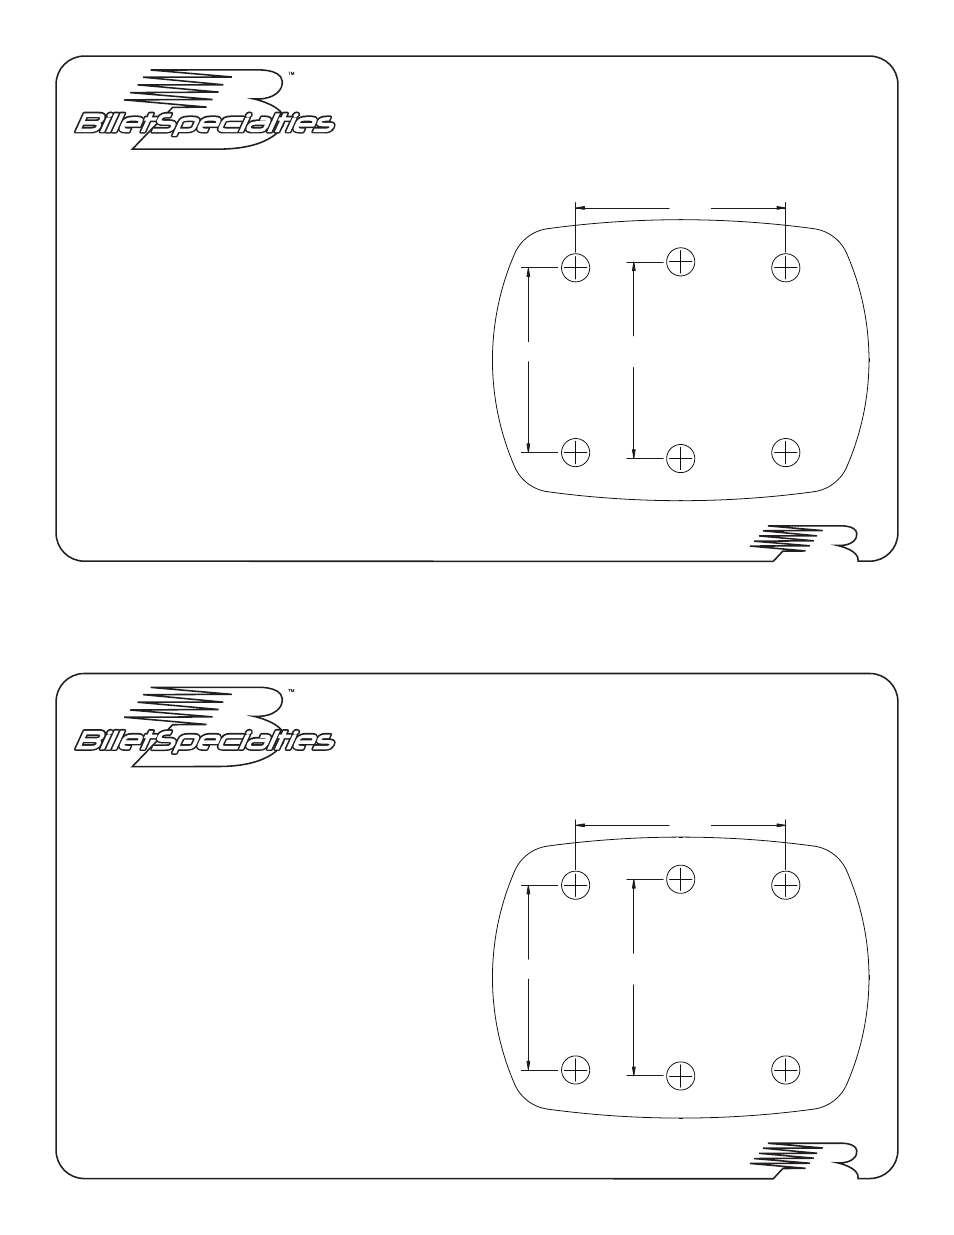
2. Cut out template and apply spray adhesive to the back,
align template with pedal and attach.
3. Center punch the pedal in the center of the appropriate
holes as marked on the template. (Clutch and Brake
require different holes to be drilled).
4. Drill 3/32” pilot holes in each center punch, follow by
drilling with 5/16” drill bit.
5. Install 1/4”-20 socket set screw* in appropriate holes in
billet pedal cover, install billet pedal cover on pedal then
attach washer and lock nut. Tighten firmly by alternating
turns at each nut with 7/16” wrench.
* Extra hardware is provided
1.870
1.644
1.750
Brake / Clutch Pad Installation Instructions
#199340/ #199345
Tools Needed:
• 3/32” drill bit
• 5/16” drill bit
• Spray Adhesive
Applications:
• ‘58-‘65 Bel Air, Biscayne, Impala
• ‘63-‘67 Nova, Chevelle, El Camino
• Center punch
• 7/16” wrench
1. Remove rubber pedal pad
2. Cut out template and apply spray adhesive to the back,
align template with pedal and attach.
3. Center punch the pedal in the center of the appropriate
holes as marked on the template. (Clutch and Brake
require different holes to be drilled).
4. Drill 3/32” pilot holes in each center punch, follow by
drilling with 5/16” drill bit.
5. Install 1/4”-20 socket set screw* in appropriate holes in
billet pedal cover, install billet pedal cover on pedal then
attach washer and lock nut. Tighten firmly by alternating
turns at each nut with 7/16” wrench.
* Extra hardware is provided
1.870
1.644
1.750
Brake / Clutch Pad Installation Instructions
#199340/ #199345
Due to multiple sources used by the auto manufacturer, some
pedals may have to be trimmed for the pedal cover to fit properly.
Due to multiple sources used by the auto manufacturer, some
pedals may have to be trimmed for the pedal cover to fit properly.