English, Drain body installation faucet function – Pfister F-042-ST0K User Manual
Page 3
ENGLISH
ENGLISH
8
9
11
12
7
10
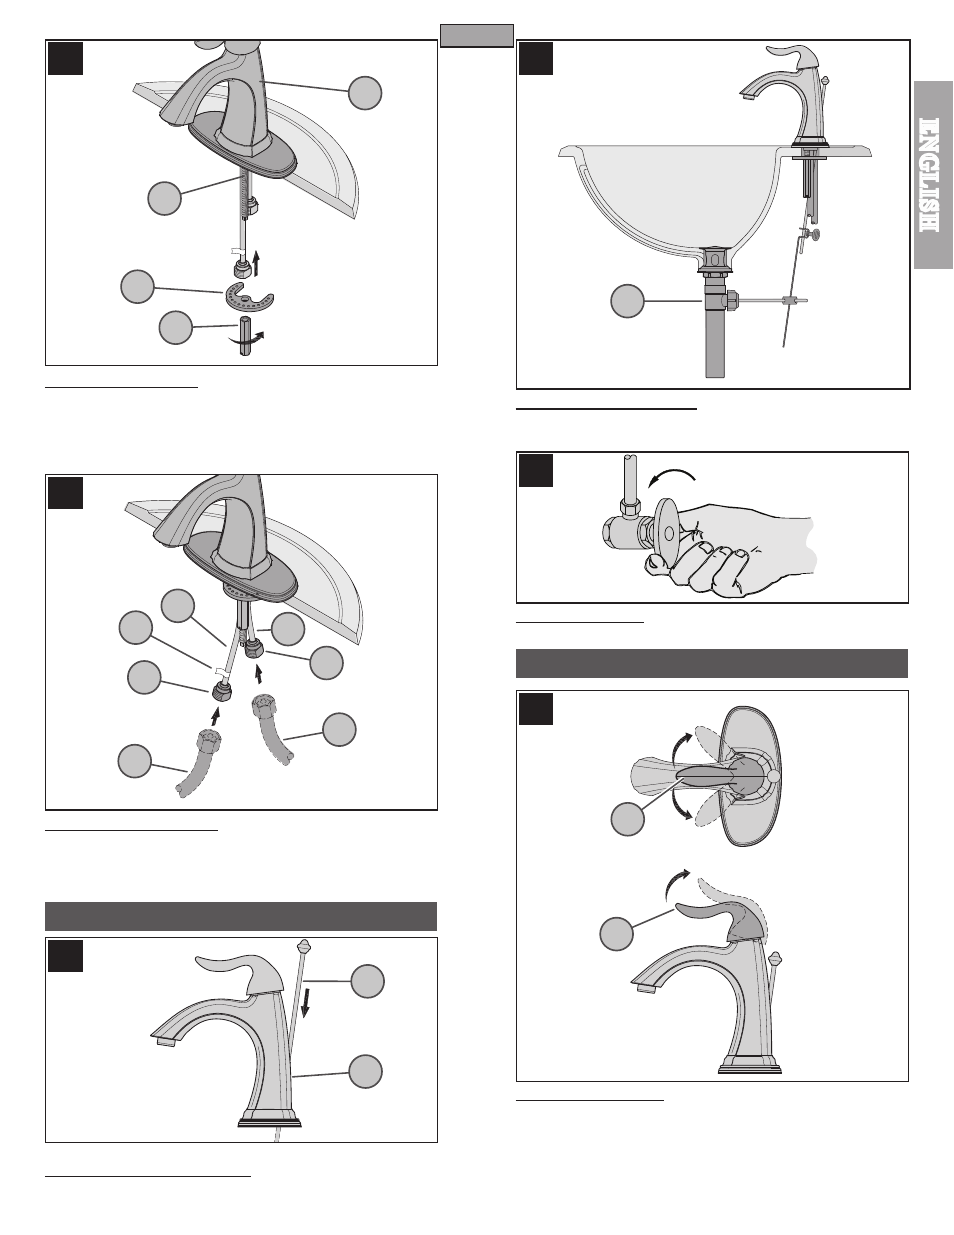
7 SECURING FAUCET
From underneath sink, secure Faucet Body (7A) by placing Metal Washer (7B) and
threading Long Nut (
7
/
16
Hex.) (7C) onto Mounting Post (7D). Make sure that the bumps
on Metal Washer (7B) are facing up. Firmly hand tighten Long Nut (7C). Secure Long
Nut (7C) not to exceed a 1/4 turn.
Caution: Do not over tighten!
8 WATER SUPPLY LINES
Gently separate hot and cold supply tubes (8A), approximately three inches apart.
Connect water Supply Lines (8C) to Faucet Inlets (8B). Hot water supply line goes to hot
inlet fitting indicated by red tag (8D). (Supply lines not included). Follow manufacturer’s
instructions when installing supply lines. Do not twist Inlets (8A)!
10 POP-UP INSTALLATION
Install and adjust Pop-Up (10A) using separate instructions supplied with the Pop-Up
assembly.
9 POP-UP ROD CONNECTION
Insert Lift Rod (9A) into hole at the back of Faucet Body (9B).
11 UNIT START UP
Turn on hot and cold water supplies, and check for leaks above and below the sink.
12 VALVE FUNCTION
By lifting the Lever Handle (12A) up, the valve will be activated allowing water to flow.
The water flow will increase by continuing to lift up the Lever Handle (12A). By rotating
the Lever Handle counter-clockwise, the water temperature will decrease to cold flow
only. By rotating the Lever Handle clockwise, the water temperature will increased to
hot flow only.
Note: Flush faucet before turning on valve (see step 13).
DRAIN BODY INSTALLATION
FAUCET FUNCTION
3
7B
7C
7D
7A
8B
8B
8C
8A
8C
8D
9A
9B
10A
12A
HOT
COLD
OPEN
12A
HOT
COLD
8A