Set-up and system configuration – Crown Audio DCi Series – Analog Input Models User Manual
Page 8
DCi Series
Power Amplifiers
Operation Manual
page 8
Connect Loudspeakers and Configure for Loudspeaker Load
Determine load impedances and power requirements
Before making any connections, carefully check and review the total impedance for loudspeaker systems to be connected to each amplifier output. If multiple loudspeakers
are connected to one output (in series, parallel or series-parallel) for Lo-Z operation, be certain the total system impedance is within allowed specification for the output.
When multiple loudspeakers are connected to one output for Hi-Z operation, be certain total tapped power is below the rated power output for the channel. For additional
information, please consult Crown’s Amplifier Application Guide (available online at www. crownaudio.com).
Note: Illustrations and some text references are for channel pair 1 - 2 only. Connections and settings are identical for channels 3 – 4 on
four-channel models and for channels 5 – 6 and 7 – 8 on eight-channel models. Each channel pair may be configured independently on
multichannel models.
Dual Mode Low-Z (8, 4 or 2 Ohm)
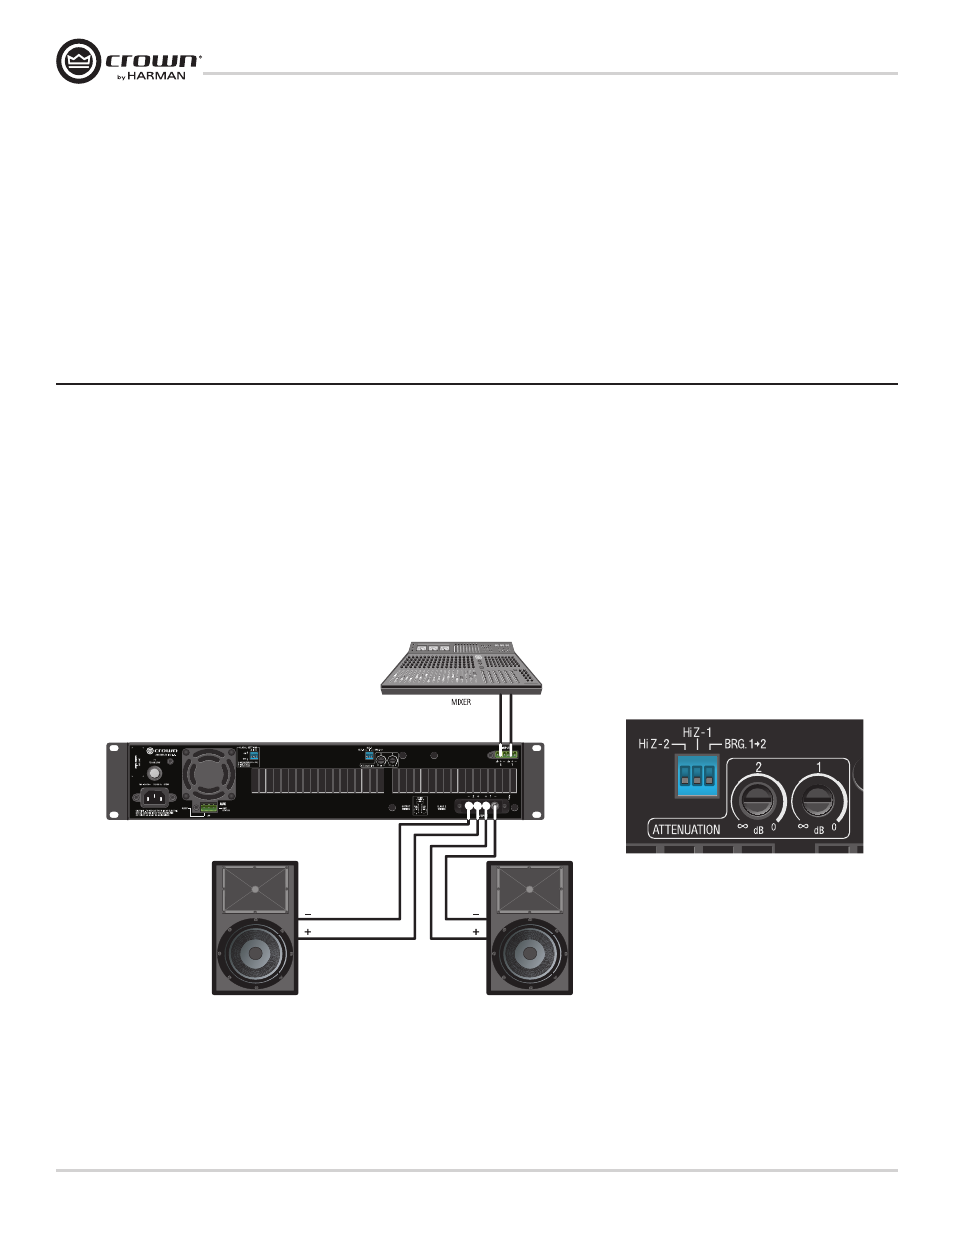
Typical input and output wiring, along with Attenuator and Mode DIP Switch settings are shown in Figure 6. Make sure DIP
Switches are in the default OFF (down) position.
INPUTS: Connect the input with wiring in place for each channel. If the same signal is to drive both outputs of a channel pair (“mono”), the signal
must be split externally and applied to both inputs.
OUTPUTS: Maintain proper polarity (+/–) on output connectors. Connect the Channel 1 speaker’s positive (+) lead to amplifier Channel 1 positive terminal;
repeat for negative (–). Repeat Channel 2 wiring as for Channel 1, and for any subsequent channel pairs on multichannel models. Refer to Page 7
for output connector terminal assignments.
Set-up and System Configuration
Always route the input and output wires in separate bundles.
Figure 6 System Wiring Dual Mode