Before installation, Installation procedure, Installing the in-wall tank system – Factory Direct Hardware Toto WT152M#01 In-Wall User Manual
Page 3: English
3
ENGLISH
BEFORE INSTALLATION
Read these instructions thoroughly before beginning work.
Please leave these instructions for the customer. They contain important mainte-
nance and warranty information.
If necessary, remove the existing toilet.
CAUTION! Be sure to properly bleed all air from the piping system prior to using
any TOTO products. Trapped/compressed air can cause damage to the flushing
system and toilet bowl.
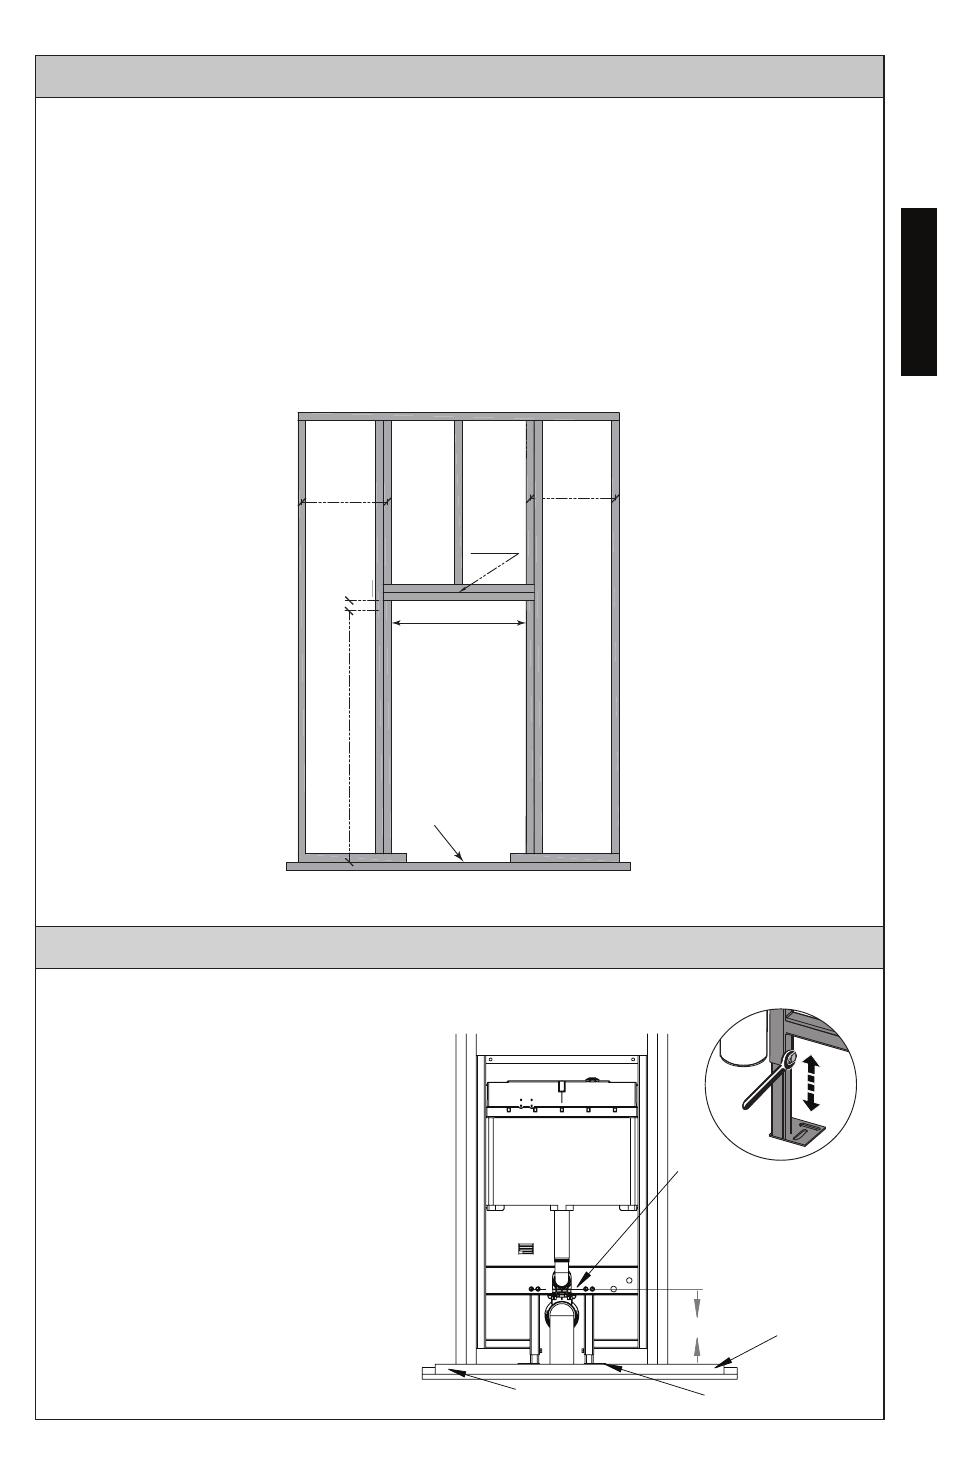
Prepare the support for the carrier as shown. Cosult with a building contractor and/or
local codes for any additional requirements. Add double wall studs, a double header
stuf and a jack stud per the shown dimensions. Confirm that the opening is square.
INSTALLATION PROCEDURE
2"
2" x 4"
or 2” x 6"
16"
16"
25-
⅜"
44-½" - 52"
Finished Floor
Installing the In-Wall Tank System
1) There is a space of 4-5/8” from the
toilet mounting holes to the top of
the toilet seat. Choose the height
at which you want your toilet seat.
Subtract that height from 4-5/8” to
get Dim A (see illustration). Adjust
the carrier legs so that the distance
from the finished floor to the center
of the mounting hole rods is equal
to DIM A.
2) Tighten the two screws on the legs
of the carrier to lock them to the
desired height.
DIM A
Mounting
Holes
Sole Plate
Mounting Plate
Finished
Floor