Airbagit Air Management User Manual
Page 14
12
After installation of the height sensors a calibration is required so the Smart-Ride can better understand your suspen-
sion. The calibration process converts the vehicles suspension travel into a scale 0.0 - 9.9. The Smart-Ride then
displays the vehicles position based on this scale. The 0.0 - 9.9 Scale is not a reference to ride height inches.
Cycle your suspension up and down to verify that the height sensors are communicating properly with the Smart-
Ride system and that the height values are changing with the suspension.
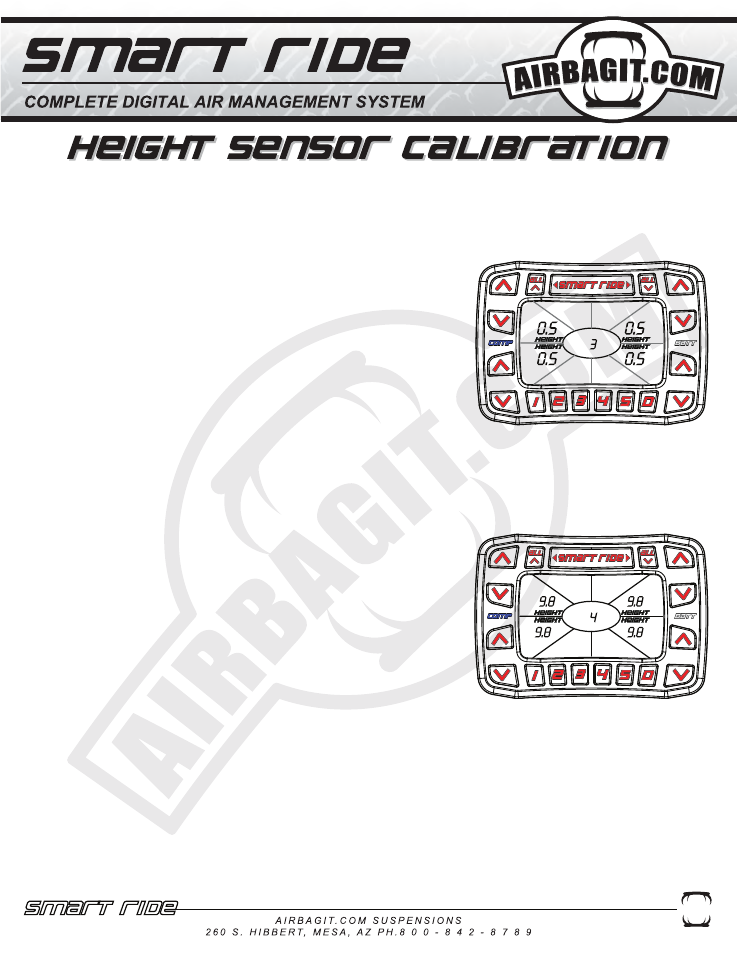
Setup Screen #3 Calibrate Minimum Height.
1. Lower the vehicle all the way down to its lowest point.
2. Press the center of the Smart-Ride Button once and then the press the
right side of the Smart-Ride button “>” button until you reach Setup
Screen #3.
3. Press and hold the “All” Down button until all of the height displays
read 0.5. Each individual control buttons can also be used to set the
display at 0.5.
4. Press the center of the Smart-Ride Button to exit out of the calibration
mode.
Safety Height Alarm
The software has an alarm that will beep when any of the vehicle’s height
sensors are between 0.0- 1.5 and 8.5 - 9.8. This option is controlled from
Setup Screen #3 by pressing the “D” button.
2 Beeps = Off and 4 Beeps = On
Setup Screen #4 Calibrate Maximum Height.
1. Raise the vehicle all the way up to its highest point.
2. Press the center of the Smart-Ride Button once and then the press the
right side of the Smart-Ride button “>” button until you reach Setup
Screen #4.3. Press and hold the “All” up button until all of the height
displays read 10. Each individual control buttons can also be used to set
the display at 9.8.
4. Press the center of the Smart-Ride Button to exit out of the calibration
mode.