Warning – Peerless-AV SPK811W - Installation User Manual
Page 4
Thread ball/cap assembly
onto mounting base (A) or
extension (B) by hand.
For heavier speakers, it
may be necessary to
tighten cap (C) with
channel locks. If so, wrap
a cloth around cap (C) to
prevent damage.
Attachment of Ball/Cap and Speaker to Mounting Base or Extension
OR
C
A
C
B
ISSUED:03-26-03 SHEET #: 087-9012-4 06-14-07
Visit the Peerless Web Site at www.peerlessmounts.com
For customer care call 1-800-729-0307 or 708-865-8870.
4 of 4
WARNING
• In order to adjust speaker, cap must be loosen and re-tightened after adjustment. The speaker cannot be adjusted
after the cap has been tightened down. This will cause damage to the mount and speaker.
3
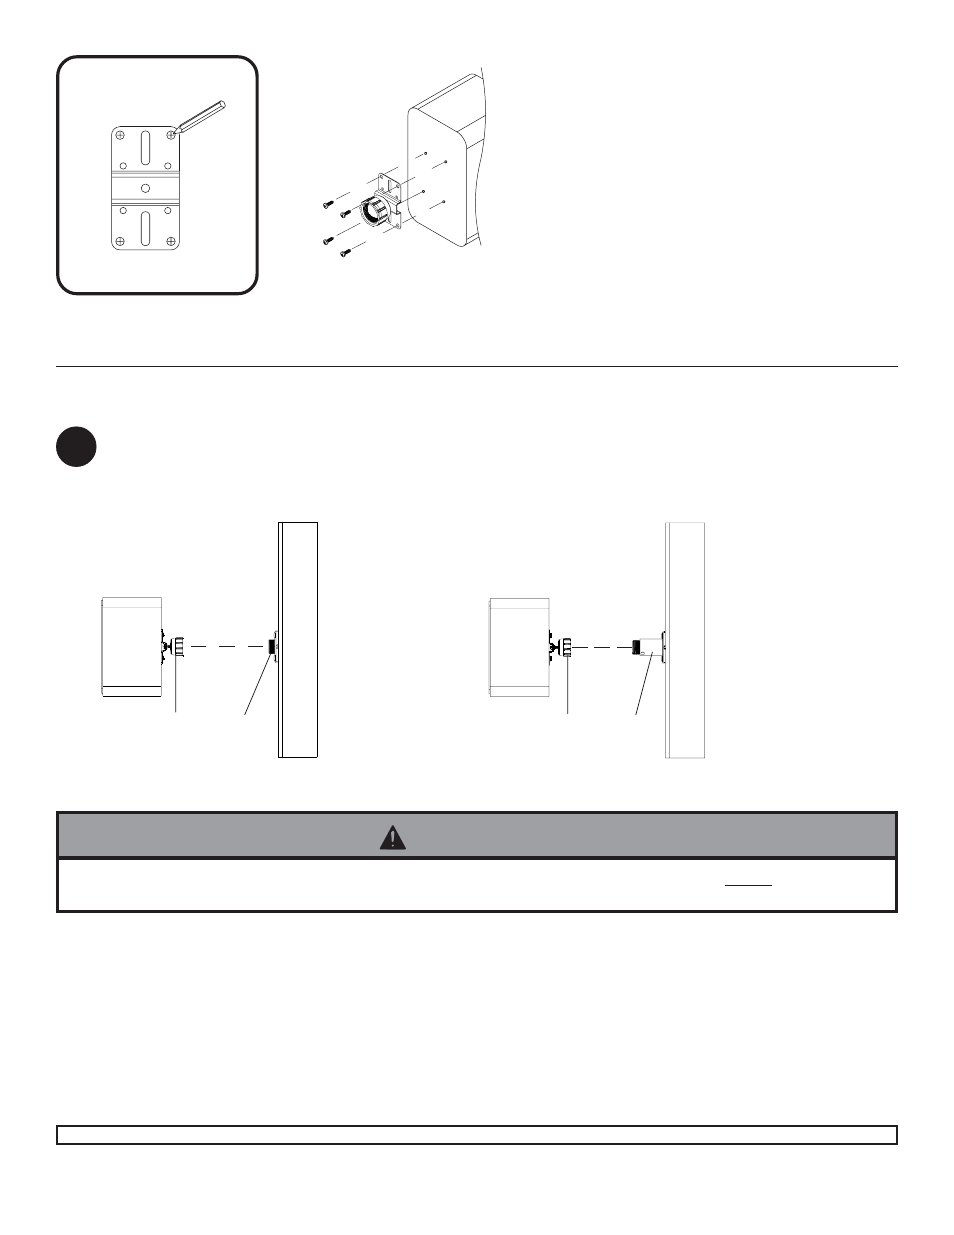
For Attachment to Speakers with
No Threaded Inserts: Insert ball (D)
through cap (C) and attach mounting
plate (Q) using two serrated locknuts
(K) as shown in DETAIL THREE. Use
mounting plate (Q) as a template to
mark four hole centers onto back of
speaker as indicated in DETAIL FOUR.
Using a 5/32" drill bit, drill four pilot
holes into back of speaker. Attach
mounting plate (Q) to speaker using
four #10-3/4" wood screws (J).
DETAIL FOUR
Back of Speaker
Q
J
© 2007, Peerless Industries, Inc. All rights reserved.
All other brand and product names are trademarks or registered trademarks of their respective owners.