Assembly – BabyTrend 8263BCC - DELUXE NURSERY CENTER - ZANZIBAR User Manual
Page 9
Copyright © 2007 - 2008, Baby Trend Inc., All Rights Reserved.
Copyright © 2007 - 2008, Baby Trend Inc., All Rights Reserved.
15
16
ASSEMBLY
ASSEMBLY
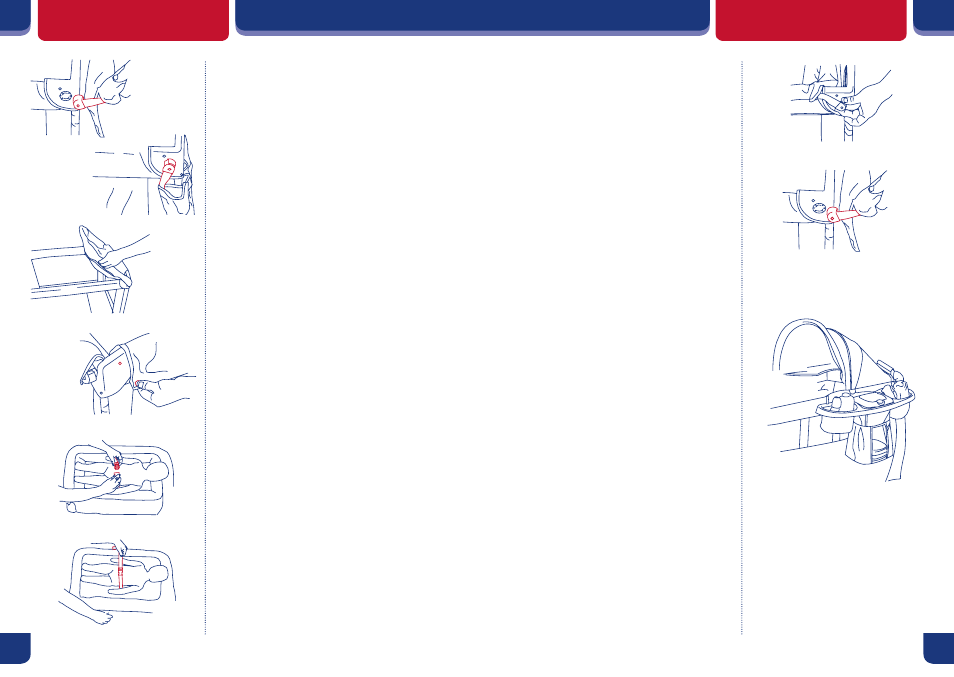
4. Insert Connector Knob Prongs into holes
located on both corners of the Playard
(Fig. 41).
5. Turn the Connector Knobs counter clockwise
to lock into place (Fig. 42).
6. Flip Changing Table over onto Playard
(Fig. 43).
7. Snap the two (2) buttons on the flap down
onto the Playard (Fig. 44).
IMPORTANT:
Check that the Changing Table
is correctly and securely installed BEFORE
each use.
TO USE CHANGING TABLE
RESTRAINT SYSTEM
1. Place child on changing table, make sure hand
and arms are clear of the restraint. Bring the
restraint around the child's waist and clip the male
and female ends of the buckle together. (Fig. 45)
2. Tighten strap until fits snug around child's
waist.
DO NOT OVER TIGHTEN
. (Fig. 46)
3. To remove, unsnap the buckle.
ATTENTION:
NEVER
use changing table if it is damaged or
broken.
Fig. 49
TO REMOVE CHANGING
TABLE
Flip Changing Table to the outside of the Playard.
Unsnap fabric flap of Changing Table from
Playard. Twist Connector Knobs clockwise to
unlock. (Fig. 47) Remove Changing Table from
Playard (Fig. 48) and disconnect the Short Bars
from the Curved Bar by pressing on the snap
buttons and pulling apart. Remove Curved Bar
from Changing Table sleeve.
PARENT ORGANIZER
ASSEMBLY
TO ATTACH PARENT ORGANIZER
1. Connect the Parent Organizer to the Playard
by sliding the two (2) connecting clips over
an open portion of the top rail of the Playard.
(Fig. 49)
NOTE: The Parent Organizer can only be
installed on open sides of the Playard where the
connecting clips can easily be attached without
interfering with other features.
Fig. 41
Fig. 42
Fig. 47
Fig. 44
Fig. 48
Fig. 43
Fig. 45
Fig. 46