Assembly – BabyTrend 8263BCC - DELUXE NURSERY CENTER - ZANZIBAR User Manual
Page 7
Copyright © 2007 - 2008, Baby Trend Inc., All Rights Reserved.
Copyright © 2007 - 2008, Baby Trend Inc., All Rights Reserved.
11
12
ASSEMBLY
3. Position Canopy in the center of Playard.
4. Attach each side of Canopy by firmly
pressing Canopy clips onto the center of the
top rails as close to the center as possible.
(Fig. 26)
5. Attach the other end of the Canopy to the
Playard by snapping the two (2) buttons
or velcro located near each corner of the
Playard. (Fig. 27)
TO REMOVE CANOPY
Unsnap the Canopy and pull upward on the ends
of the Canopy from the side of the Playard.
Fig. 26
Fig. 27
MOBILE ASSEMBLY
ATTENTION:
DO NOT
attach Mobile to Canopy until Canopy
is correctly installed as noted in the Canopy
instructions.
A crib mobile is intened for visual stimulation
and is not intended to be grasped by the child.
If attached to the crib or playpen, remove when
baby begins to push up on hands and knees. If
so designed, mount on wall or ceiling clearly
out of a standing baby's reach.
Always attach all provided fasteners (strings,
straps, clamps, etc.) tightly to a crib or playpen
according to the instructions. Check frequently.
DO NOT add additional strings and straps to
attach to a crib or playpen.
DO NOT
attach the Mobile with child in Playard
or Bassinet.
DO NOT
remove the Mobile before retracting the
Canopy or removing the Canopy.
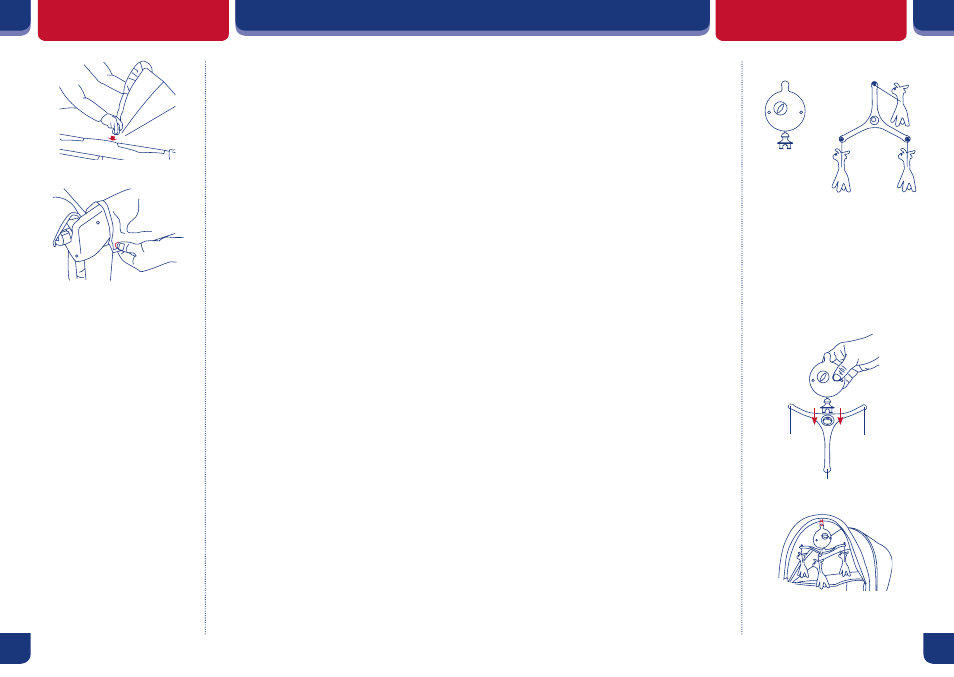
Wind Up Mobile
Contents: (Fig. 28)
(a) 1 Wind Up Mobile
(b) 1 Mobile Tri-shaped Arm (toys may vary)
1. Attach the Mobile (a) to the Tri-shaped Arm
(b) align slots on both pieces then gently press
the two pieces together. (Fig. 29).
2. Attach the Mobile to Canopy using the
Velcro® and connecting the straps together
through the hole in the top of the Mobile
housing (Fig. 30).
Fig. 28
Fig. 29
(a)
(b)
Fig. 30
(a)
(b)
ASSEMBLY