Assembly, Warning, Important – BabyTrend SS70762 - TAG-A-LONG LT - RED ROCK User Manual
Page 3
Copyright © 2009 - 2010, Baby Trend Inc., All Rights Reserved.
Copyright © 2009 - 2010, Baby Trend Inc., All Rights Reserved.
ASSEMBLY
IMPORTANT!
To ensure safe operation of your stroller,
please follow these instructions carefully. Please keep these
instructions for future reference.
IMPORTANT!
Before assembly and each use, inspect this
product for damaged hardware, loose joints, missing parts or sharp
edges. NEVER use if any parts are mssing or broken.
IMPORTANT!
Adult assembly is required.
ASSEMBLY
3
4
Remove stroller from box. The front wheels,
rear wheels, child tray, and parent tray
MUST
be
installed prior to use.
FRONT WHEELS
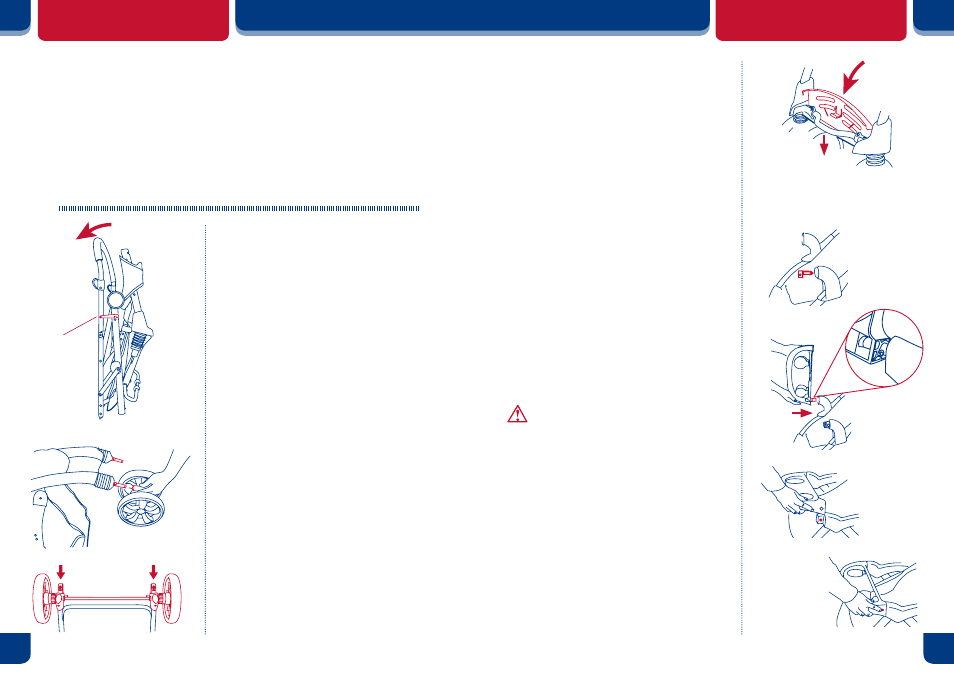
To attach the front wheels, unfold stroller as
described in the section following:
• Unlock the red release lever.
• Unfold stroller frame by pulling backward
on the stroller handle. (Fig. 1)
To attach the front wheels, lean the stroller back
so that it rests on the handle with the front and
rear legs pointing upward. Position the front
wheels over the front leg tubes so that the hole in
the housing lines up and will slide onto the legs.
(Fig. 2) Firmly push down until the wheels lock
securely into place. Tug on each wheel to ensure
they are both securely attached.
REAR WHEELS
Position rear axle over the rear leg tubes, brake
pedals facing the back. At the same time, push
down applying equal pressure to both sides until
they lock into place. (Fig. 3)
Note:
NEVER
use stroller if wheels do not lock into
place.
If you need assistance, please contact our
customer service department at 1-800-328-7363,
M-F, between 8am and 4:30pm, PST.
FOOT REST
Push downward on the foot rest until it snaps onto
the U-shaped frame cross member. (Fig. 4)
CHILD TRAY
To attach the child tray:
Insert the tray clip into the fitting on the stroller’s
fold joint. Check the tray clip locks into place.
(Fig. 5a) Push the angled side of the tray onto the
post at the end of the right armrest while pressing
downward on the snap button, until locking in
place. (Fig. 5b) Rotate the tray downward until it
latches onto the left armrest into place. (Fig. 6)
Note: Check that the snap button comes through
and securely in place.
WARNING:
The child’s tray
is not a restraint device: always secure
your child with the seat belt. DO NOT
lift the stroller by the child’s tray. Use
care when attaching the child’s tray on
the stroller with a child in the stroller.
To access the child seat:
Press the red snap button on the right side and lift
upward. The child tray will lift and rotate out of
the way to allow access to the seat. (Fig. 7)
Fig. 4
Fig. 5a
Fig. 6
Fig. 7
Fig. 3
Fig. 2
red release
lever
Fig. 1
Snap On
Push Down
Fig. 5b