Banks Power Ford Trucks: (Gas ’99 - 11 6.8L V10; 6.2L V8) Power Systems- PowerPack & Stinger '99-04 F250_F350 6.8L V10 (Pickups & Excursions) User Manual
Page 10
DO NOT CUT FACTORY
INTERMEDIATE PIPE AS IT WILL BE
REUSED
31.
Disconnect and remove the
factory tailpipe and muffler from the
rear of the catalytic converter. start
from the rear and work forward,
prying the pins from the rubber
hangers, removing the tailpipe, then
the muffler. if the slip joints will not
come apart, use a torch to heat the
connections until they separate, or cut
the pipes apart with a saw or torch. if
cutting the pipe from the rear of the
catalytic converter, be careful to not
cut the catalytic converter portion
of the pipe. save all hardware and
hangers as some items will be reused
in the PowerPack installation.
32.
Using a chisel or hacksaw, remove
the locating tab from the intermediate
pipe.
33.
On Excursions only: To allow
for a proper fit, the factory muffler
heatshield on the vehicle crossmember
may need to be removed or trimmed.
unbolt the heatshield and the hanger
assembly to remove the entire
heatshield and heatshield bracket.
reinstall the factory muffler hanger
bracket.
34.
For Crew Cab installation:
remove the hanger located near the
front of the muffler by unbolting it
from the frame. reinstall this hanger
approximately 18” forward of its
previous position, in the two available
holes on the frame rail. insert the pin
of the 3” hanger clamp provided into
the rubber hanger. slide the Dynaflow
muffler into place aligning the notch in
the muffler with the pin on the factory
intermediate pipe. lightly tighten the
hanger clamp.
For Standard Cab and Extended
Cab installations:
remove the hanger
located near the front of the muffler by
unbolting it from the frame. Because
the location of the Banks Dynaflow
muffler will be slightly forward from
the factory muffler position, this
hanger will not be reused. slip a 3”
exhaust clamp over the inlet of the
muffler and slide the muffler into place
on the end of the factory intermediate
pipe.
For Excursion installation:
slip the
inlet of the muffler onto the factory
intermediate pipe. install the hanger
clamp into the rubber hanger on the
vehicle and lightly tighten the clamp.
35.
slip the 3
1
⁄
2
” exhaust clamp over
the outlet of the muffler. install the
Monster tailpipe up and over the axle
and insert it into the muffler outlet.
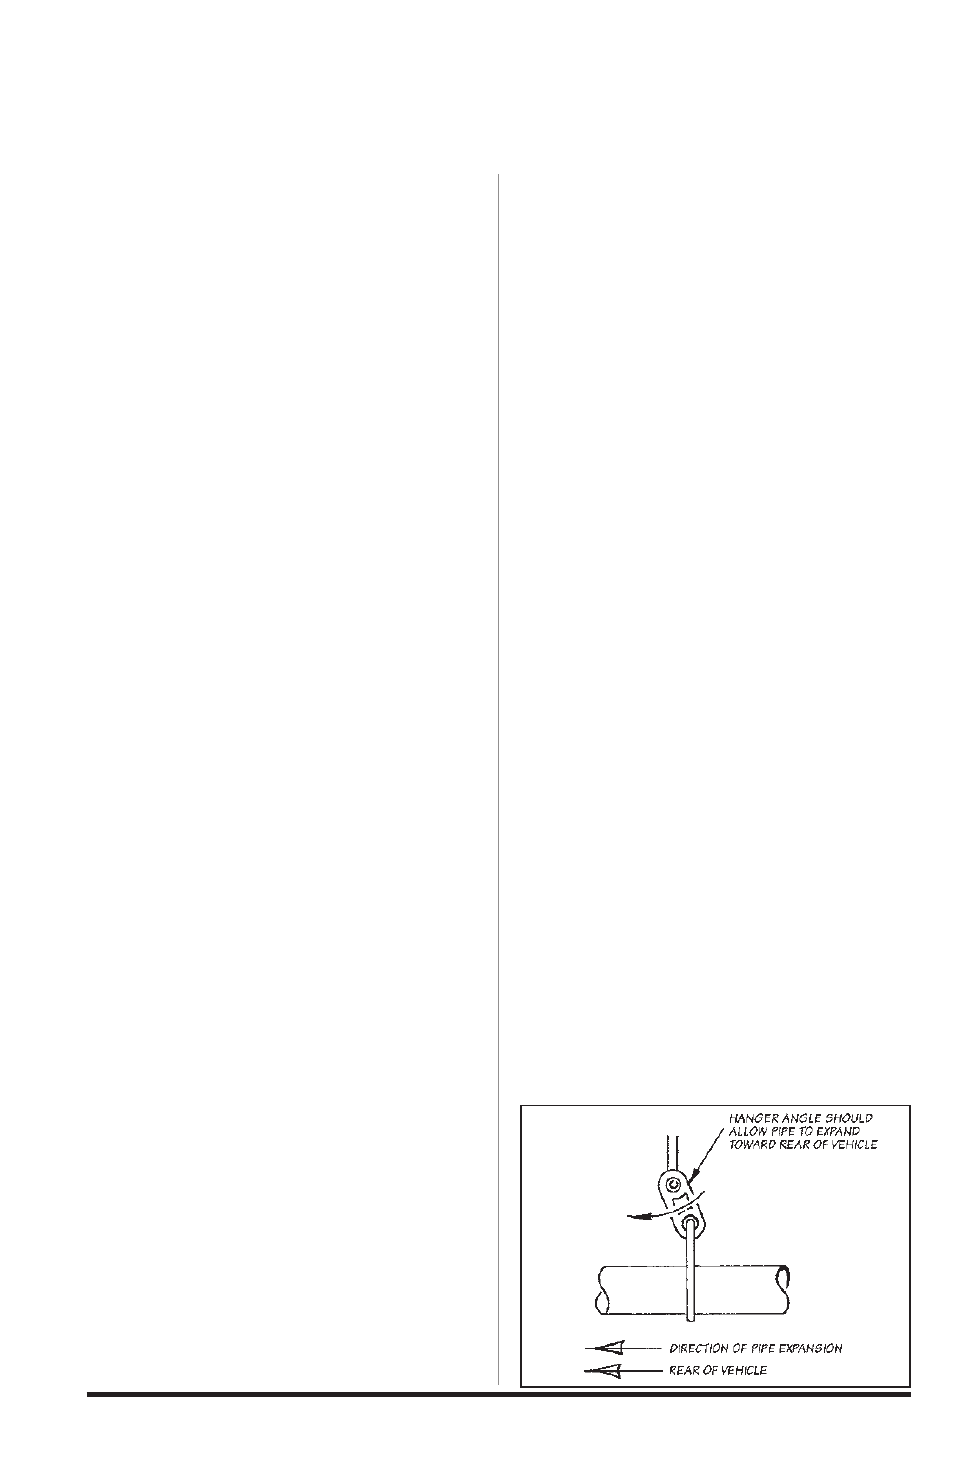
insert the tailpipe hanger pins into the
rubber hangers. Position the tailpipe
and muffler such that the hangers are
level with the ground and are hung
slightly forward. see Figure 6. once
the muffler and tailpipe are properly
positioned, tighten all the clamps to
35 ft-lbs. Torque
3
⁄
8
” hardware to 35
ft-lbs,
5
⁄
16
” hardware to 20 ft-lbs, and
1
⁄
4
” hardware to 10 ft-lbs.
36.
lower the vehicle and reconnect
the battery cables. start the engine
and listen for any exhaust leaks.
Tighten bolts or clamps to correct any
leaks or make adjustment as required.
it is recommended that tack welds
be placed on all slip connections to
prevent slippage.
Note: The vehicle exhaust may smoke
upon initial start-up. This is normal,
as grease used in the tube-bending
process burns out of the pipes.
-END, SECTION 2-
Section 2
MOnSTER
®
ExHAuST
Figure 6
10
96395 v.6.0