Velleman DVM205AM User Manual
Page 5
DVM205AM
05.01.2010
©Velleman nv
5
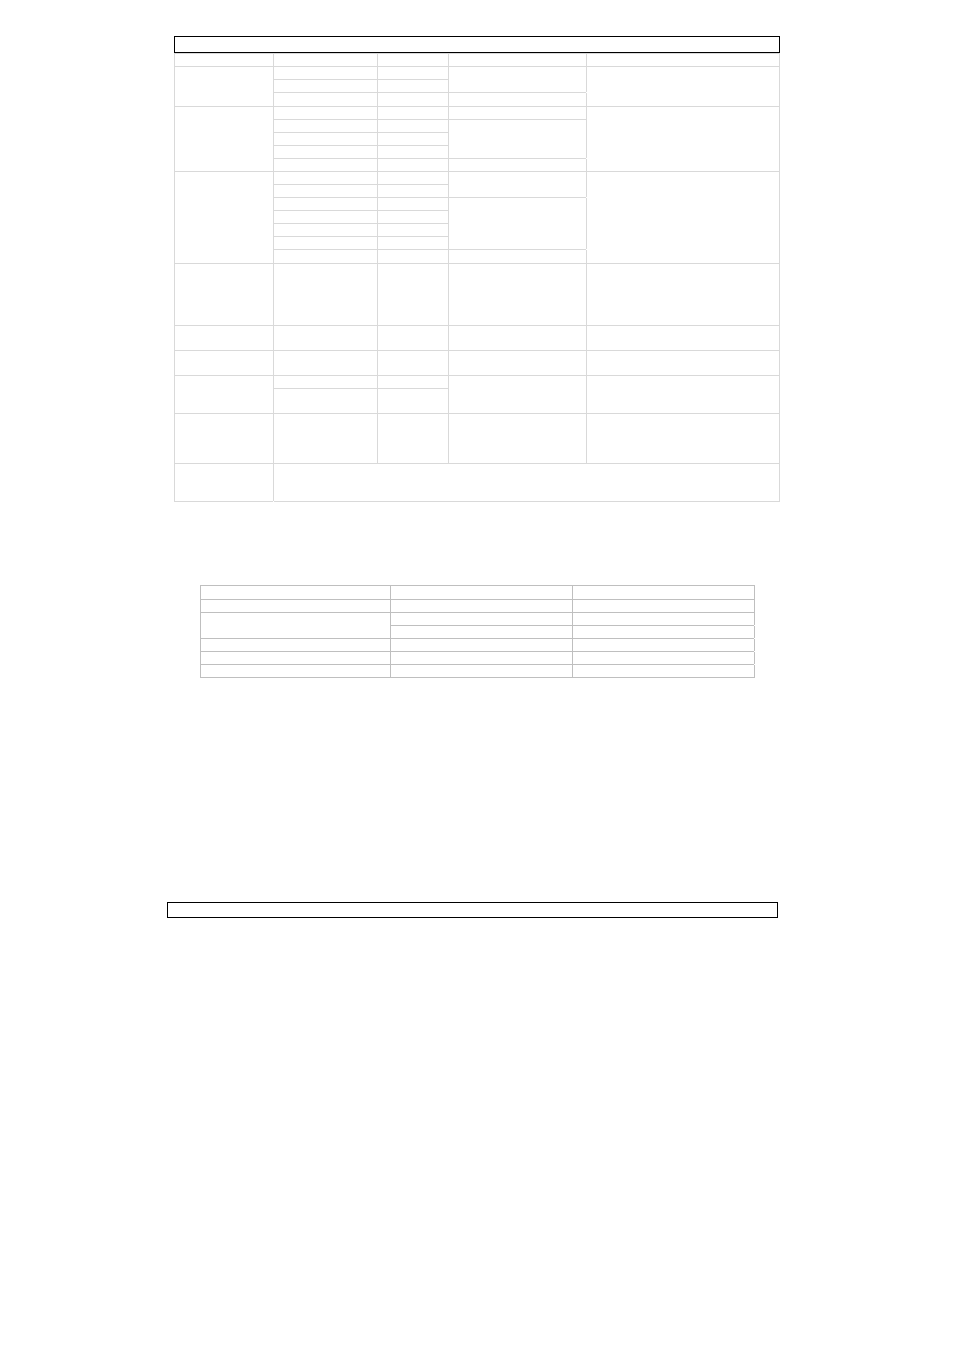
Range Resolution Accuracy other
400.0kΩ 100
Ω
4.000MΩ 1kΩ
40.00MΩ 10kΩ ±2.0%
rdg ±3 digits
Capacitance
(auto-
ranging)
40.00nF 10pF ±5.0%
rdg ±7 digits
Input protection: 250Vdc/ac rms
400.0nF 0.1nF
±3.0% rdg ±5 digits
4.000µF 1nF
40.00µF 10nF
100.0µF 0.1µF
±5.0%
rdg ±5 digits
Frequency
(auto-
ranging)
9.999Hz
0.001Hz
±1.5% rdg ±5 digits
Sensitivity:
<0.5Vrms while ≤1MHz
>3Vrms while >1MHz
Overload protection: 250Vdc/ac
rms
99.99Hz
0.01Hz
999.9Hz
0.1Hz
±1.2% rdg ±3 digits
9.999kHz
1Hz
99.99kHz
10Hz
999.9kHz
100Hz
9.999MHz
1kHz ±1.5%
rdg ±4 digits
Duty cycle
0.1%~99.9% 0.1%
±1.2% rdg ±2 digits
Pulse width: >100µs, 100ms
Frequency width: 5Hz-150kHz
Sensitivity: <0.5Vrms
Overload protection: 250Vac/dc
rms
Period
2.0ms~
20.0ms
0.1ms
±3% rdg ±10 digits
Overload protection: 250Vac/dc
rms
Pulse width
2.0ms
~10.0ms
0.1ms
±3% rdg ±10 digits
Overload protection: 250Vac/dc
rms
Temperature
-20~+760°C
1°C
±3% rdg ±3 digits
(meter only ; probe
accuracy not included)
Sensor: K-type thermocouple
-4~+1400°F
1°F
Diode test
0.3mA typical 1mV
±10% rdg ±5 digits
Open circuit voltage: 1.5Vdc
typical
Overload protection: 250Vac/dc
rms
Audible
Continuity
Audible threshold: less than 50Ω
Test current: <0.3mA
Overload protection on all ranges: 250Vdc/ac rms
5. Control Buttons
a) Hz / % Button (fig. p.2 #2)
This button allows you to choose between frequency and the duty cycle in a frequency range.
Press the HZ/% button to measure the frequency or the duty cycle while measuring voltage or current.
For the voltage/current requirements and frequency range, see the following table (for reference only):
Range (AC/DC)
Sensitivity
Frequency width
4V
≥1.5V rms
5Hz~10kHz
40V, 400V
≥6.5V rms
5Hz~20kHz
≥12V rms
5Hz~200kHz
1000V/750V
≥420V rms
50Hz~1kHz
400mA
≥45mA rms
5Hz~5kHz
10A
≥4A rms
5Hz~1kHz
Press the HZ/% button again to return to regular voltage or current measurement.
b) Range Button (fig. p.2 #3)
When the meter is switched on, it automatically goes into auto ranging ("AUTO" indication on the
display). This automatically selects the best range for the measurements being made and is generally the
best mode for most measurements. For measurements situations requiring a manually selected range,
perform the following steps:
1. Press the RANGE button; the "AUTO" indication on the display will disappear.
2. Press the RANGE button repeatedly to skip through the available ranges until the required one is
selected.
3. To return to auto ranging, press and hold the RANGE button for more than 2 seconds.
c) Relative Button (fig. p.2 #4)
The relative measurement feature allows you to make measurements relative to a stored reference
value. A reference voltage, current etc. can be stored and measurements made in comparison to that
value. The displayed value is the difference between the reference value and the measured value.
1. Perform any measurement as described in the operating instructions.