Taring, Connecting power, Weigh below hook – Ohaus ADVENTURER BALANCES Manual multi User Manual
Page 6: Security bracket, Operation turning the balance on, Turning the balance off, Weighing, Pan installation, Activating units and parts counting (pcs), Menu
2
2. If it is necessary to rezero the display, momentarily press
>O/T<.
3. Place item(s) to be weighed on the pan and read the weight
on the display. The stability indicator appears when the
reading is stable.
Taring
When weighing items that must be held in a container, taring
subtracts the container's weight from the total weight on the pan.
1. With an empty container on the pan, press >O/T< to zero
the display.
2. As material is added to the container, the net weight is dis-
played. Tared weight remains in balance memory until
>O/T< is pressed again.
Connecting Power
NOTICE:
The socket/outlet must be installed near the equip
ment and shall be easily accessible. For use with an
certified (CSA or equivalent) power supply, which
must have a limited and SELV circuit output.
Connect the AC Adapter cord to the connector located at the
rear of the balance and to a suitable power source.
Weigh Below Hook
For below balance weighing applications (eg. density determi-
nation), a weigh below hook is installed at the bottom of the
balance and is part of the balance. To use, remove the protec-
tive plug cover located at the bottom of the balance. The bal-
ance should then be supported on an elevated level surface
which allows access to the weigh below hook. The balance
should be releveled. Measurements are made by the use of a
fine wire attached to the internal weigh below hook.
CAUTION:
Do not attempt to remove the weigh below hook from the
balance as the balance may be damaged.
Security Bracket
A security bracket which is cast in the lower housing is provided
at the rear of the balance under the leveling bubble. This bracket
allows the balance to be secured by an optional cable and lock
accessory.
OPERATION
Turning the Balance ON
Press >O/T<, all segments will appear briefly followed by a soft-
ware revision number (when plugged in first time) or after a power
interruption and then
*
0.00g. Allow 20 minutes warm-up time.
When the balance is first turned on, it can be used to weigh in
grams or tare items
without
setting the menus.
Turning the Balance OFF
To turn the balance OFF, press and hold Mode Off until the dis-
play indicates OFF then release.
Weighing
With the balance turned ON, it is ready to weigh in grams.
1. If other measuring units are desired, refer to Menu Section
for setup procedure.
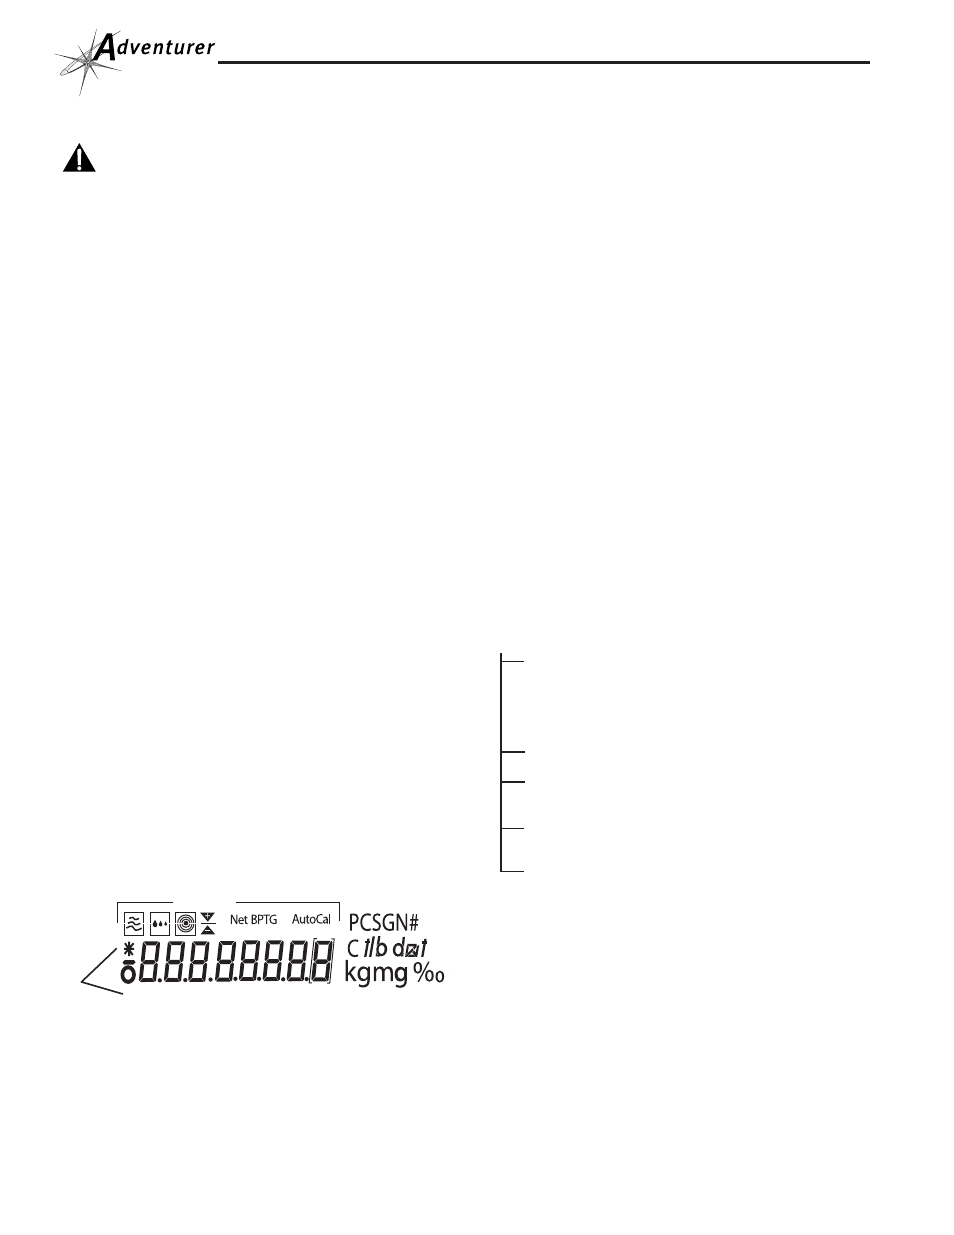
Stability Indicator
Not used
MENU
UNITS -
g, kg, mg, ct, N, lb, oz, ozt, GN, dwt, mo,
m, Hong Kong taels, Singapore taels, Tai
wan taels, cL, and PCS. - Set each to ON
or OFF. NOTE: Only one Tael may be on at
a time. See specifications table for available units.
LIN -
Performs linearity calibration.
SYS -
Permits setting tone ON or OFF, with
each keystroke.
PRINT -
Permits setting communication and print
parameters.
MENU -
Exit menu and return to weigh mode.
END
*
Pan Installation
Place the pan support and pan on the balance. The balance is
now ready for operation. Balances with a draft shield do not
have a pan support.
Activating Units and Parts Counting (PCS)
1. With the balance OFF, press and hold >O/T< until MENU
is displayed, then release, UNITS is displayed.
2. Press >O/T<, On g is displayed. To turn this unit of measure
ON or OFF, press Mode Off to select ON or OFF condition.
3. To advance through all of the measuring units including parts
counting and to set each ON or OFF, press >O/T< to advance
to next unit then press Mode Off to select ON or OFF. You
must continue until END appears. NOTE: Only one Tael can
be activated at a time.
4. When END is displayed, press >O/T< to store unit selections.
5. To exit the menu, repeatedly press Mode Off until MENU
END is displayed, then press >O/T<. Balance returns to a
weighing mode.
MENU
The setup menu permits you to activate available weighing
units, parts counting, linearity calibration, keystroke tone and
print parameters. To enter the menu, the balance must first be
turned off. Press and hold the>O/T< until MENU is displayed
then release. To advance through the menus, press Mode Off.
To enter a selected menu, press >O/T<. After you make selec-
tions in any menu, you may continue to make additional
changes in other menus before exiting and saving. To exit a
menu and return to weigh mode without saving settings, press
and hold Mode Off until full display appears, then release.
NOTE: Selecting END in the UNITS, SYS and PRINT menus
will save the settings for each menu.