Introduction, Description, Menus – Ohaus ADVENTURER BALANCES Manual multi User Manual
Page 5: Unpacking, Installation selecting the location, Setting up and leveling the balance
1
INTRODUCTION
This manual covers installation, operation and troubleshooting
for the OHAUS
®
Adventurer
TM
Balances. To ensure proper op-
eration of your balance, please read this manual completely.
DESCRIPTION
The Ohaus Adventurer
TM
balances are precision weighing in-
struments, designed to provide years of service with virtually no
maintenance. Models are available with capacities from 65 to
4100g. The 65g through 310g balances include a draft shield.
Weigh below operation is made possible with a built-in weigh be-
low hook.
The Adventurer
TM
balances are constructed with a durable hous-
ing, leveling feet, built-in leveling bubble, and a large custom
LCD. Control buttons are clearly marked as to their function,
with large Tare buttons located on either side of the front panel.
All Adventurer
TM
balances are initially factory set to measure in
grams and can be set to measure in *kilograms, milligrams,
carats, Newtons, pounds, ounces, troy ounces, grains, penny-
weight, mommes, mesghals, Hong Kong Taels, Singapore Taels,
Taiwan Taels, Ticals, and Parts Counting. Simple three button
operation allows for the selection of measuring units, calibra-
tion and printing parameters. A standard RS232 interface per-
mits communication to an external printer or computer.
*See specifications for measuring units which are available.
Power is supplied through an AC adapter. Accessories include:
an in-use cover, security device, calibration masses, printer,
and scoops. See accessory section.
Behind your instrument stands OHAUS Corporation, a leading
manufacturer of precision weighing equipment. An Aftermarket
Department with trained instrument technicians is dedicated to
provide you with the fastest service possible in the event your
instrument requires servicing. OHAUS Corporation also has a
Customer Service Department to answer any inquiries regard-
ing applications and accessories.
MENUS
Adventurer
TM
balances contain four display menus which en-
able you to select measuring units, calibrate the balance, turn
on a tone signal which operates with each key stroke, and set
up communication/print parameters.
• UNITS Menu - Allows up to 16 measuring units to be se-
lected plus parts counting.
• LIN Calibration Menu - Allows the balance to be calibrated
by using linearity calibration methods. Two masses are
required.
• SYS Menu - Enables tone signal with each keystroke.
• PRINT Menu - Allows communication parameters to be
set which include Baud rate, Parity, Data and Stop bits. A
Reset function permits returning the communication pa-
rameters to factory settings.
• MENU END - When selected, balance returns to weigh
mode.
M ode
Off
On
On
BUBBLE LEVEL
LEVELING FEET (2)
UNPACKING
All Adventurer
TM
balances are supplied with a weighing plat-
form, AC power adapter, built-in weigh below hook, instruction
manual and warranty card. Draft shields are supplied with 65g
through 310g balances.
Carefully unpack all items.
• Check the instrument for transport damage. Immediately
inform your Ohaus dealer if you have complaints or if parts
are missing.
• Store all parts of the packaging. This packaging guaran-
tees the best possible protection for the transport of your
instrument.
INSTALLATION
Selecting the Location
The balance should be used indoors only and in an environ-
ment which is free from excessive air currents, corrosives, vi-
bration, and temperature or humidity extremes (Max. 85%).
Maximum altitude not to exceed 4000 m above sea level. These
factors will affect displayed weight readings.
DO NOT install the balance:
•
Next to open windows or doors causing drafts or rapid
temperature changes.
•
Near air conditioning or heater vents.
•
Near vibrating, rotating or reciprocating equipment.
•
Near magnetic fields or equipment that generates mag-
netic fields.
•
On an unlevel or unstable work surface.
NOTE: Manufacturer cannot guarantee the safety of the prod-
uct if it is not used according to the instructions.
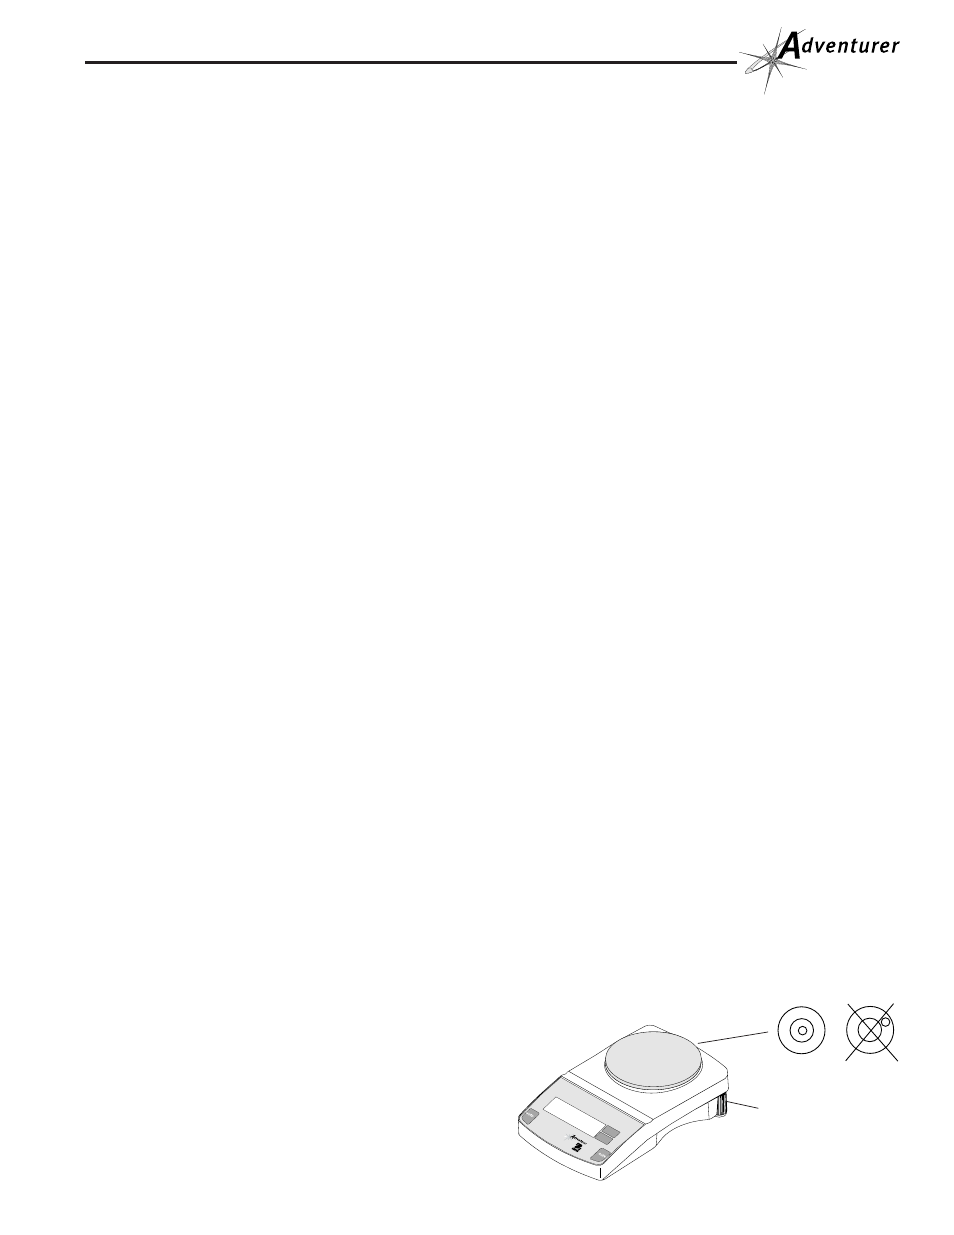
Setting Up and Leveling the Balance
Exact horizontal positioning and stable installation are prereq-
uisites for repeatable results. To compensate for small irregu-
larities or inclinations at the location, the instrument can be
leveled.
For exact horizontal positioning, the balance is equipped with a
level indicator and two leveling feet located at the rear of the
balance.
Position the balance in the intended operating location. Adjust
the leveling feet at the rear of the balance until the air bubble in
the indicator is centered.
NOTE: The instrument should be leveled each time its location
is changed.