In service cover kit, Installation – Ohaus TS Series Electronic Balance User Manual
Page 55
INSTALLATION
INSTALLATION
INSTALLATION
INSTALLATION
INSTALLATION
A phillips screwdriver, 1/16” hex wrench
and 9/64” hex wrench will be required to
install the leveling kit.
1.
Disconnect power to the balance.
2.
Remove the pan and pan support.
3.
Turn the balance over.
4.
Remove the FCC label. The label
covers two clearance holes that will
be used for mounting the leveling
assembly.
5.
Peel off the two rubber feet at the front
of the balance.
6.
Using a 9/64” hex wrench, remove
the socket head screw at the rear of
the balance. Leave the washer in
place.
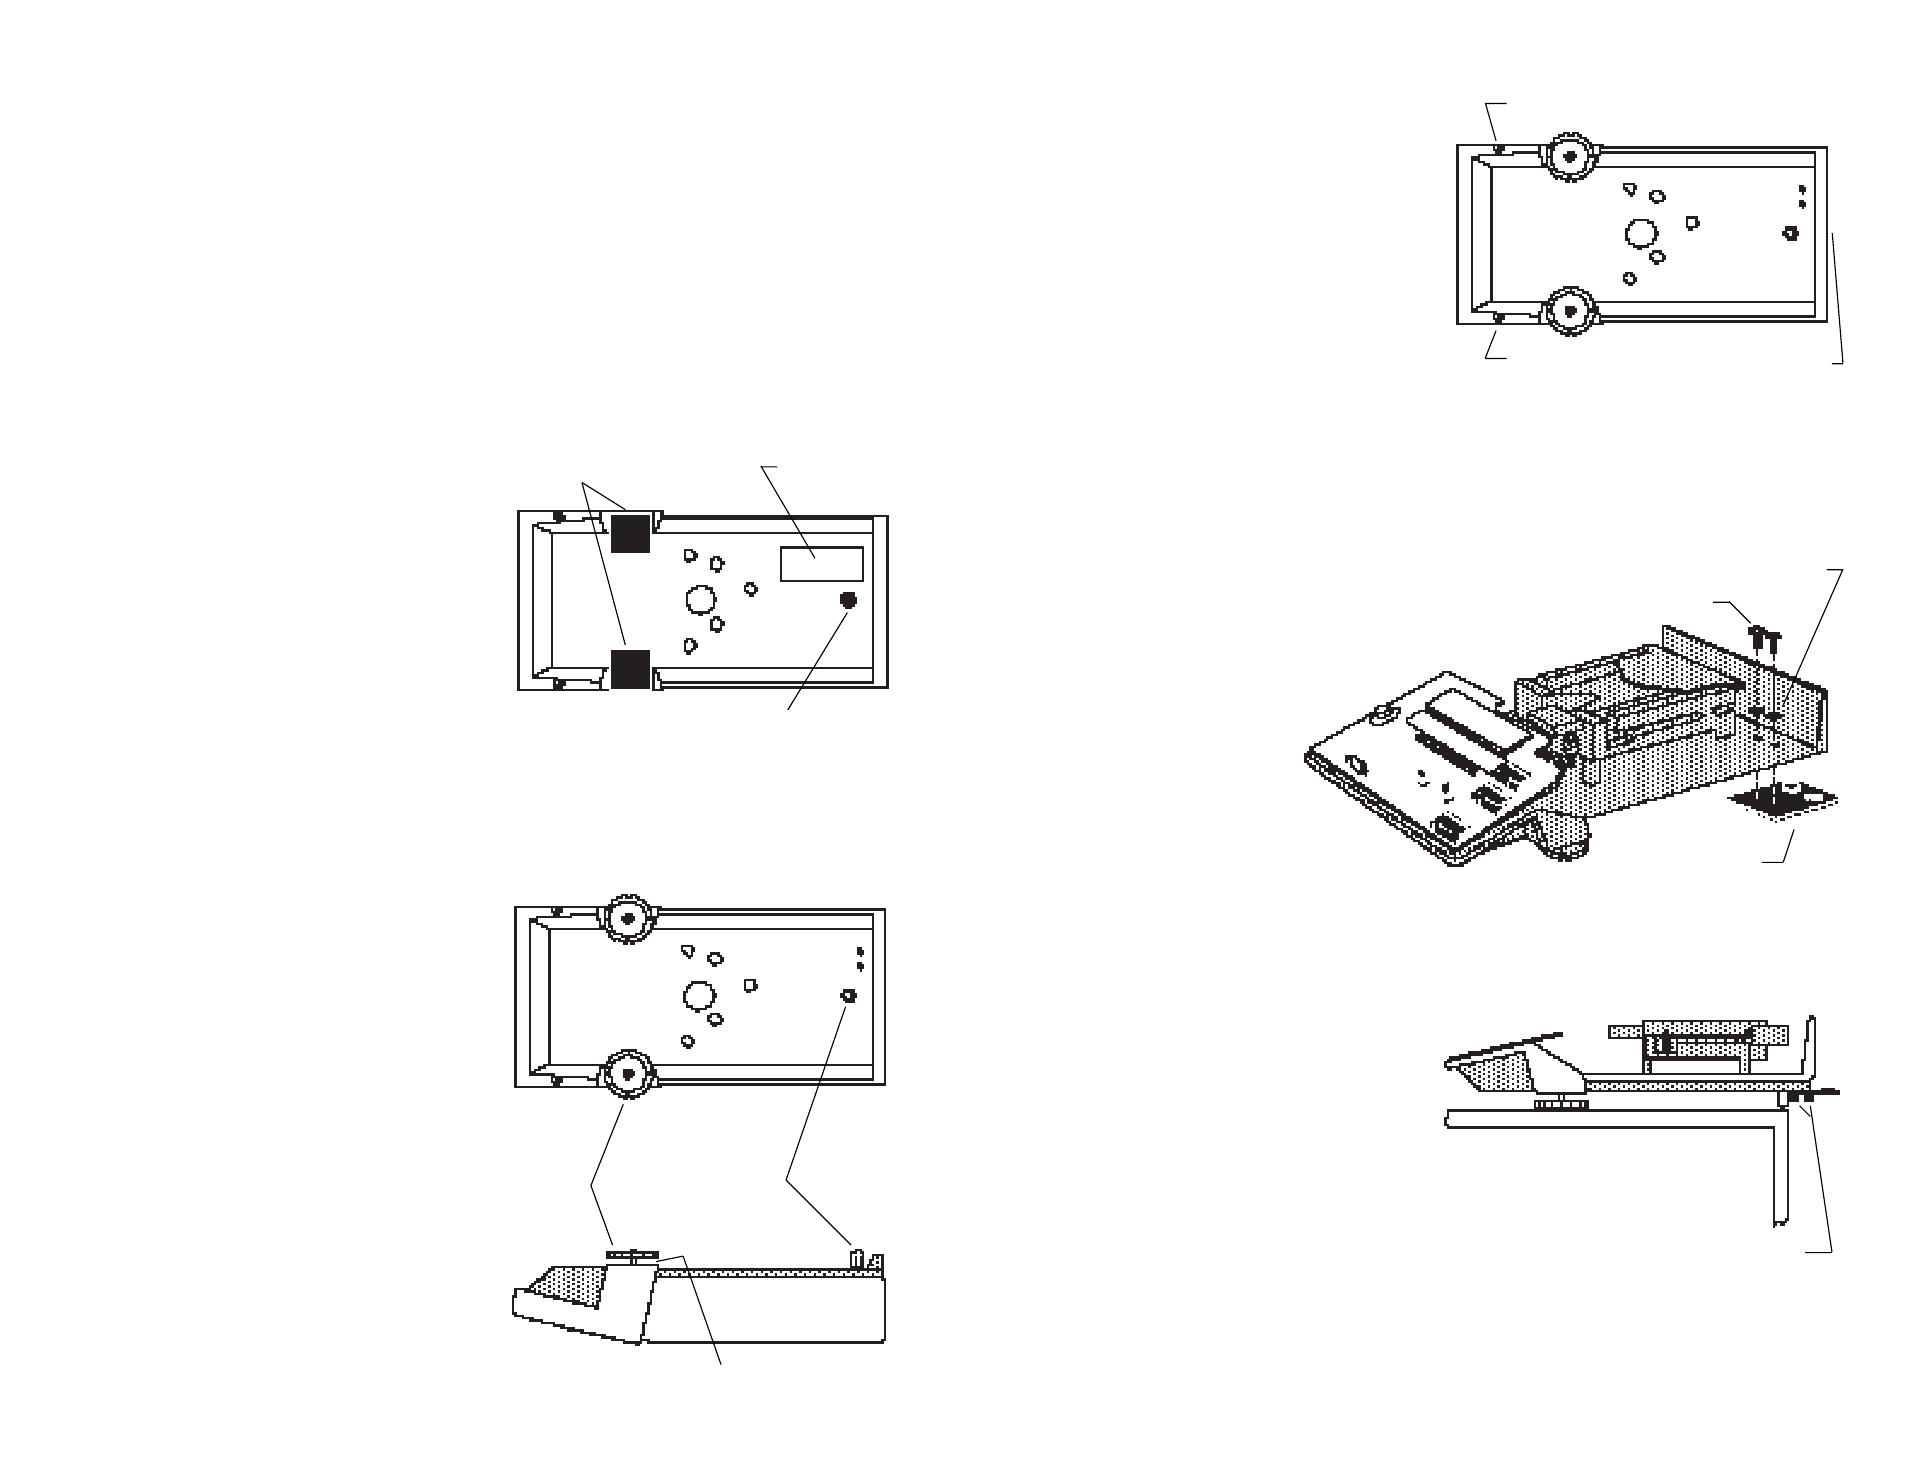
Leveling
Feet
Brass
Foot
3/16” Clearance
Rubber Feet
Socket head
Screw
FCC Label
9.
Remove the three phillips head
screws which secure the balance
cover to the base.
10. Hold the base and cover together
and turn the balance right side up.
11. Lift the cover off.
Remove screw
on rear panel
(not shown)
Remove
Remove
12. Using the two phillips screws and
lockwashers provided in the kit, fas-
ten the leveling assembly as shown
in the diagram.
Screws should be snug but not tight.
DO NOT COMPLETELY TIGHTEN
THE SCREWS.
Leveling
Assembly
Lockwashers
Phillips Screws
Adjust set screws as needed
13. Place the balance on a level work
surface. ENSURE SURFACE IS
LEVEL BEFORE CONTINUING. Po-
sition the balance so that the leveling
assembly extends from the edge of
the work surface.
14. Using a 1/16” hex wrench adjust the
three set screws in the leveling as-
sembly as needed to center the
bubble in the level indicator.
When the bubble is centered, tighten
the two phillips screws.
15. Apply the new FCC label (included in
the kit) to the bottom of the balance.
Do not to cover any screws or holes.
2
3
7.
Install the brass foot in place of the
socket head screw.
8.
Screw the leveling feet in leaving
approximately 3/16” clearance be-
tween the bottom of the balance and
the foot.
NOTE: Two pairs of leveling feet are in-
cluded in this kit. The all plastic feet are
for earlier TS Models. The leveling feet
with metal threaded shafts are for later
versions.