Brakelock installation – Blue Ox BX8881 User Manual
Page 2
292-2083 4/97 2 of 3
5.
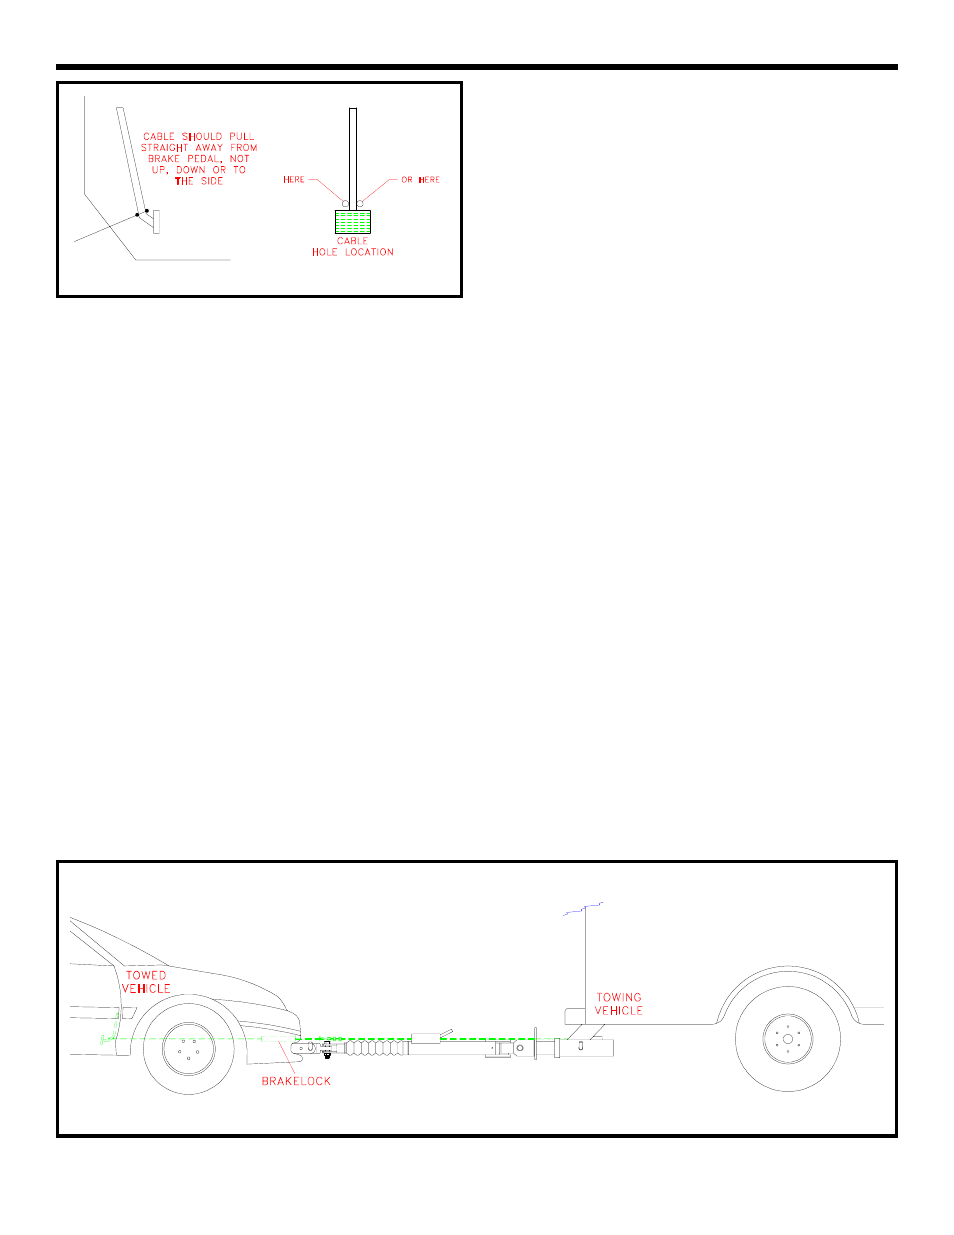
After you have confirmed that the location for the hole
will not cause any problems, pull the carpet back and
drill a 1/8 inch pilot hole. Allow the drill bit to just barely
break through the metal floor. Next, inspect where the
hole actually is from the engine compartment side to
verify that this location will not cause problems and to
see how the cable aligns with the brake arm. If the hole
needs to be relocated slightly, re-drill and seal the
previous hole with a rivet or sealant. When alignment is
correct, enlarge the pilot hole with a 1/4 inch bit.
6.
Cut a slit in the carpet to correspond with the hole in the
floor. Slide the large flat washer over the cable housing
then feed the housing through the carpet and hole in the
floor following your selected route as mentioned before.
Do not make a turn tighter than a four (4) inch radius. If
you need to make a bend in the housing you will need to
anchor the housing in the middle of the bend with plastic
cable ties available at most automotive and hardware
stores. When installed properly, the flared end of the
housing and the washer should be showing on top of the
carpet. Avoid abrupt bends in the cable housing. Hold
the end of the housing up to the rear of the Brakelock to
determine the length needed and cut off excess housing
with a pair of side cutters.
BRAKELOCK INSTALLATION
7.
Lubricate the brake cable with silicon spray and feed the
cable from the Brakelock back through the cable
housing. Secure the cable housing to the rear of the
Brakelock body using the #567 flag terminal #10 washer
and #10 screw provided in the parts bag.
8.
Loop the end of the cable around the brake pedal arm
allowing the cable to feed directly and straight into the
cable housing. Remove all of the slack in the cable,
double the cable back on itself and secure it with the two
U-bolt style cable clamps provided in the parts bag. Cut
off the excess brake cable with a pair of side cutters.
(Figure 2) IMPORTANT: Be sure to locate the cable
clamps so that they will not come in contact with the
floor when the brake pedal is depressed.
9.
Using the ring detent pin, attach the cable fork of the
connector cable to the fuse on the brake cable at the
front side of the Brakelock. Extend the connector cable
to determine the length needed for the S-hook to reach
the towing vehicle. NOTE: Most hitches have holes or
loops provided to attach safety cables while towing.
This is a good location to attach the S-hook of the
connector cable. If your hitch does not have these,
locate another suitable location in line with the Brakelock
to attach the S-hook.
10. With the S-hook attached there should be about 3-4
inches of vertical play in the connector cable. If this is
not the case, you must loosen the cable clamps and
adjust the length of the connector cable. When adjusted
properly, cut the excess cable off and discard. NOTE:
Be sure to tighten the cable clamps completely.
11. Install all other safety and towing equipment as required.
IMPORTANT: The Brakelock does not eliminate the
necessity of safety chains, towing lights, transmission
pumps or driveshaft disconnects. It is designed solely to
apply the brakes in the event the towed and towing
vehicles become separated.
Figure 2
Figure 3