Blue Ox BX8893 User Manual
Page 8
BX8893
AutoStop™
Operation Manual & Installation Instructions
292-2214 Rev A
Page 8 of 12
10/4/13
ASSEMBLY INSTRUCTIONS
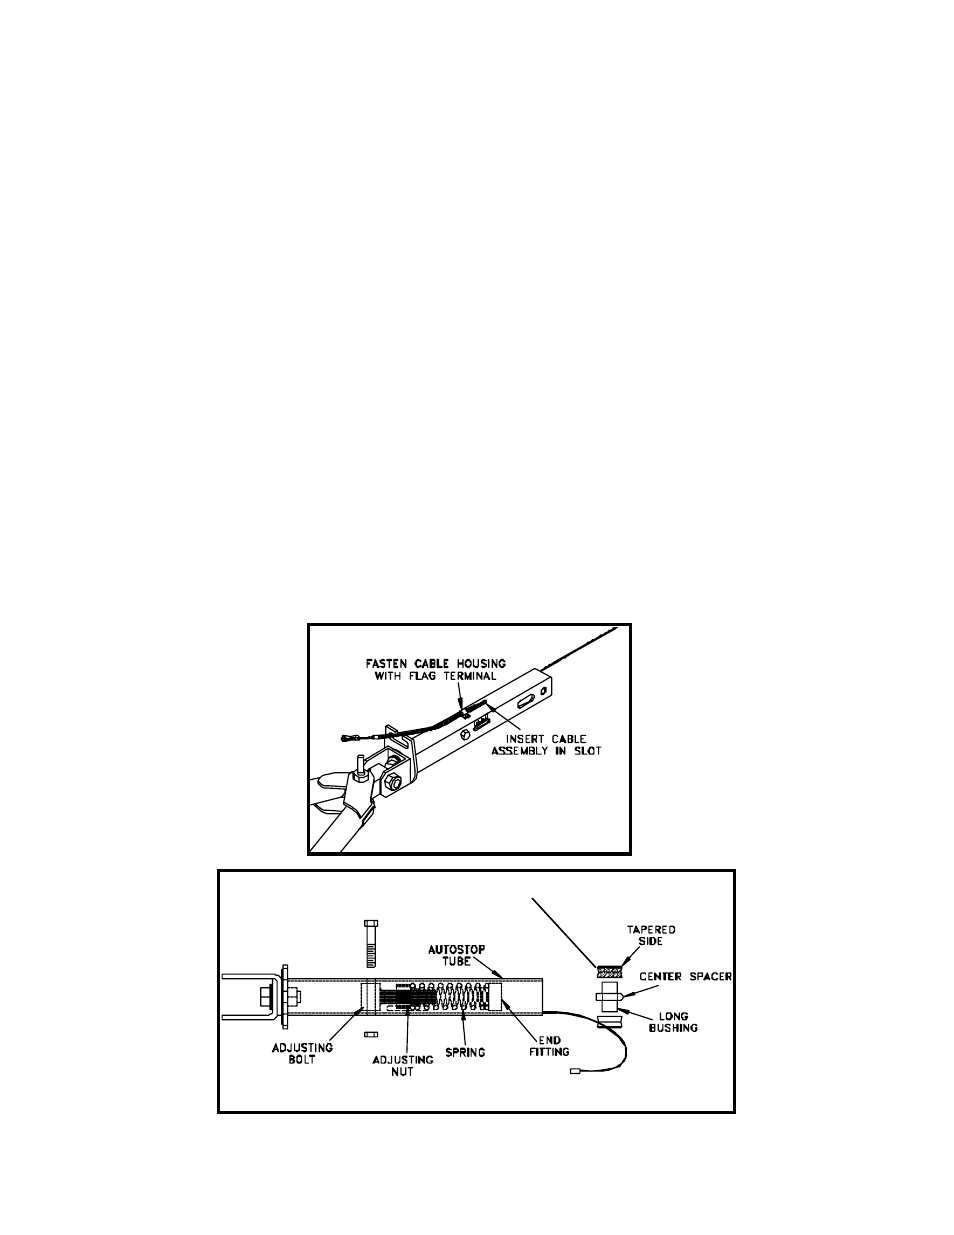
1. Slide the cable assembly back into the slotted hole in the AutoStop™ tube and secure the
cable clamp with the flag terminal and the round head screw. Be sure the plastic cable housing
is inserted in the slot so the inside cable does not rub at the slot, but also be sure the cable
assembly isn't inserted too far that it interferes with the spring inside the tubing. See Figure 10.
2. Lay the AutoStop™ tube on a table or bench with the hitch mount end towards you. (Figure
11) Thread the adjusting nut onto the adjusting bolt all the way on the threads. Slide the
compression spring onto the adjusting bolt all the way onto the adjusting nut. Then place the end
fitting on the other end of spring. Slide this assembly into the AutoStop™ tube until adjusting bolt
hole is lined up with the two front holes of AutoStop™ tube, then insert the 7/16" hex bolt through
the AutoStop™ tube and secure bolt with hex jam nut.
3. Place one of the two identical pulleys with the beveled edge on the table. Place the long bushing
through this pulley, next place the center spacer with chamfers on the bottom right side. Place on
top of the spacer the other pulley with the beveled edge on top.
4. Set the tube aside and find the narrow pulley. Please note that the narrow pulley's groove is off
center. Set the pulley on the bench with the groove oriented closest to the bench. (Figure 12&16)
Insert the short bushing into the pulley and the 5/8 rod into the bushing. (Figure 13)
continued to next page
Figure 10
Primary Pulley Assembly
Bottom View of AutoStop™
Figure 11