Bosch GLL 3-80 P Professional User Manual
Page 15

English | 15
Bosch Power Tools
1 619 929 L95 | (29.11.12)
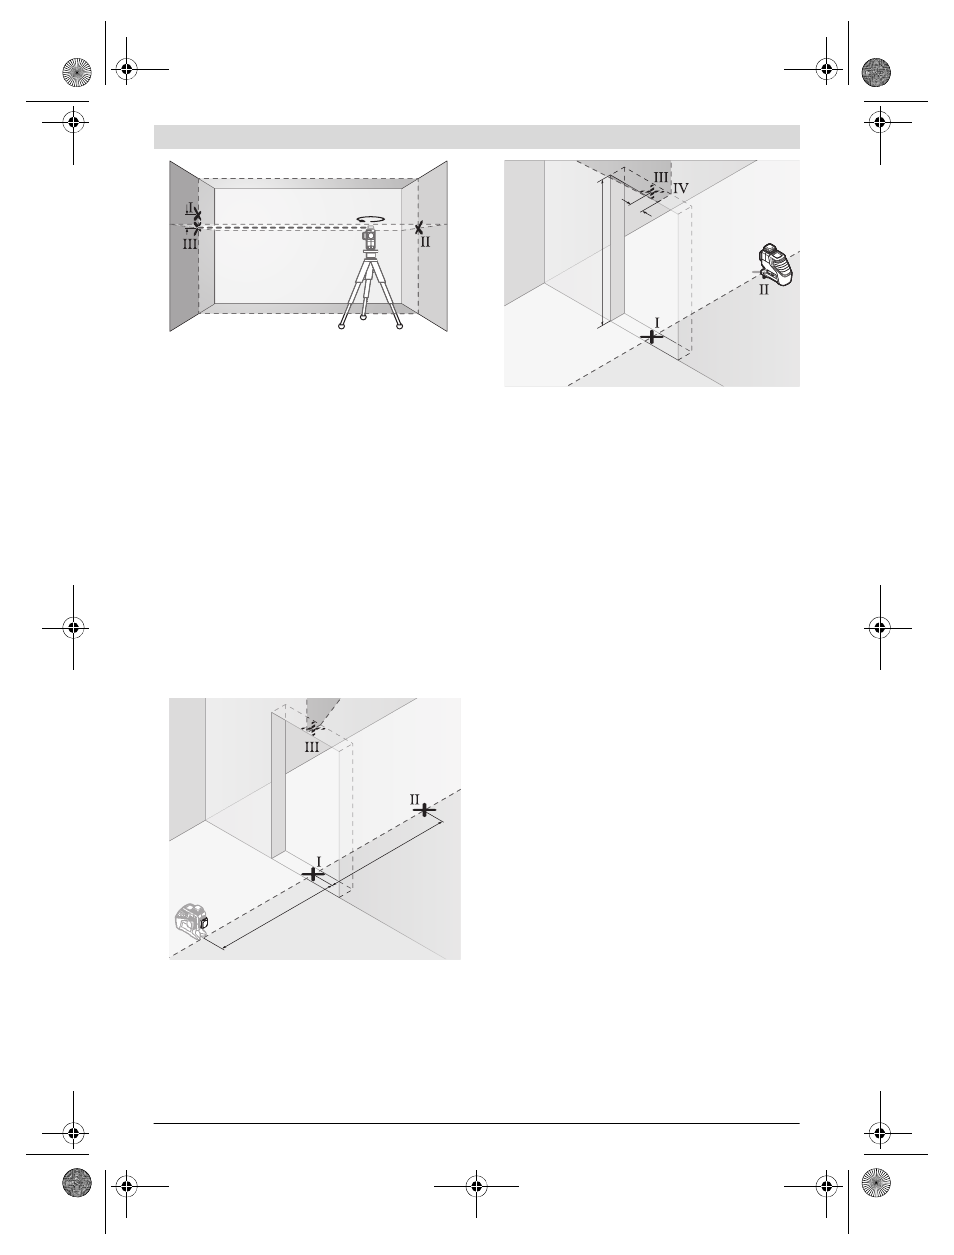
– Without changing the height, turn around the measuring
tool by 180°. Direct it against the wall A in such a manner
that the vertical laser line runs through the already marked
point
I. Allow the measuring tool to level in and mark the
cross point of the laser lines on the wall A (point
III).
– The difference d of both marked points
I and III on wall A
results in the actual height deviation of the measuring tool
alongside the lateral axis.
On the measuring distance of 2 x 5 m = 10 m, the maximum
allowable deviation is:
10 m x ±0.2 mm/m = ±2 mm.
Thus, the difference d between points
I and III must not ex-
ceed 2 mm (max.).
Checking the Levelling Accuracy of the Vertical Lines
For this check, a door opening is required with at least 2.5 m
of space (on a firm surface) to each side of the door.
– Position the measuring tool on a firm, level surface (not on
a tripod) 2.5 m away from the door opening. Switch on the
measuring tool to operation with automatic levelling. Se-
lect an operating mode in which a vertical laser plane is
generated in front of the measuring tool.
– Mark the centre of the vertical laser line at the floor of the
door opening (point
I), at a distance of 5 m beyond the
other side of the door opening (point
II) and at the upper
edge of the door opening (point
III).
– Rotate the measuring tool by 180° and position it on the
other side of the door opening directly behind point
II. Al-
low the measuring tool to level in and align the vertical laser
line in such a manner that its centre runs exactly through
points
I and II.
– Mark the centre of the laser line at the upper edge of the
door opening as point
IV.
– The difference d of both marked points
III and IV results
in the actual deviation of the measuring tool to the plumb
line.
– Measure the height of the door opening.
Repeat the measuring procedure for the second vertical laser
plane. For this, select an operating mode in which a vertical la-
ser plane is generated aside of the measuring tool, and turn
the measuring tool by 90° before beginning with the measur-
ing procedure.
The maximum admissible deviation is calculated as follows:
Doubled height of the door opening x 0.2 mm/m
Example: For a door-opening height of 2 m, the maximum de-
viation may be
2 x 2 m x ±0.2 mm/m = ±0.8 mm. Consequently, points
III
and
IV may be no more than 0.8 mm (max.) apart from each
other for each of both measurements.
Working Advice
Always use the centre of the laser line for marking. The
width of the laser line changes with the distance.
Working with the Laser Target Plate
The laser target plate 15 increases the visibility of the laser
beam under unfavourable conditions and at large distances.
The reflective part of the laser target plate 15 improves the
visibility of the laser line. Thanks to the transparent part, the
laser line is also visible from the back side of the laser target
plate.
Working with the Tripod (Accessory)
A tripod offers a stable, height-adjustable measuring support.
Position the measuring tool with the 1/4" tripod mount 9 onto
the thread of the tripod 22 or a commercially available cam-
era tripod. For fastening to a commercially available construc-
tion tripod, use the 5/8" tripod mount 8. Tighten the measur-
ing tool with the tripod mounting stud.
A
B
d
d
180°
2,5 m
2,5 m
2 m
d
OBJ_BUCH-1046-002.book Page 15 Thursday, November 29, 2012 12:07 PM
