Alarms tab – Garmin GPSMAP 496 User Manual
Page 114
106
GPSMAP 496 Owner’s Manual
Main Menu >
Alarms Tab
Alarms Tab
The Alarms tab allows you to define alarm settings.
To set an alarm:
1. Press
MENU twice to open the Main Menu.
2. Use the
ROCKER to select the Alarms tab.
3. Highlight the field below the alarm name you want activate, and
press
ENTER.
4. Change the mode to
On, and press ENTER. If necessary,
highlight the next field to the right, and press
ENTER, enter the
settings, and press
ENTER.
When an alarm goes off, the alarm message appears on the screen
and the unit emits five (5) beeps. When you select an alarm to be
persistent, the alarm message appears on the screen and the unit
beeps until you press EntEr to acknowledge the alarm.
To set a persistent alarm:
1. Press
MENU twice to open the Main Menu.
2. Use the
ROCKER to select the Alarms tab.
3. Highlight the box next to the alarm you would like to make
persistent (for example,
Next Turn).
4. Press
ENTER to place a check mark in the Persist box.
When an alarm goes off, it sounds until you acknowledge the
alarm message by pressing
ENTER.
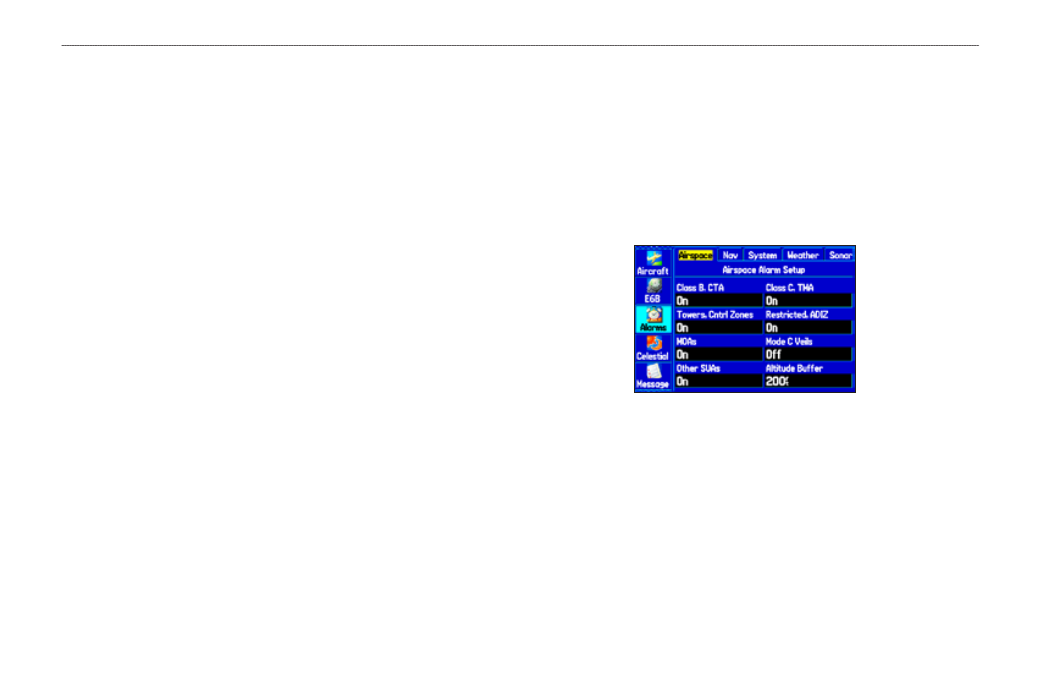
Airspace Alarms Sub Tab (Aviation Mode Only)
Class B, Cta; Class C, tMa; towers, Cntrl Zones; restricted,
aDiZ; Moas; Mode C Veils; other SUas—enables and disables
the alarms. Select on to enable or off to disable.
altitude Buffer—sets the buffer for the altitude alarm. Highlight
the altitude Buffer field, and press EntEr to select a different
value. Use the roCKEr to select the digits.
Airspace Alarms Tab
Navigation (Nav) Alarms Sub Tab
next turn—sets an alarm to indicate next turn in route. Select off
for no Next Turn alarm. Select Dist to enter a specific distance. For
example, if you enter 1 nm, the Next Turn alarm sounds one nautical
mile before you reach the next turn. Select time to enter a specific
time before the turn for the alarm to go off. For example, if you
enter 00:02:00, the Next Turn alarm sounds two minutes before you
reach the next turn. Select auto for the unit to provide a Next Turn