Battery and fuse replacement, Fig. 5, Fig. 6 – Actron AutoAnalyzer CP7665 User Manual
Page 7: Fig. 4
7
Fig. 5
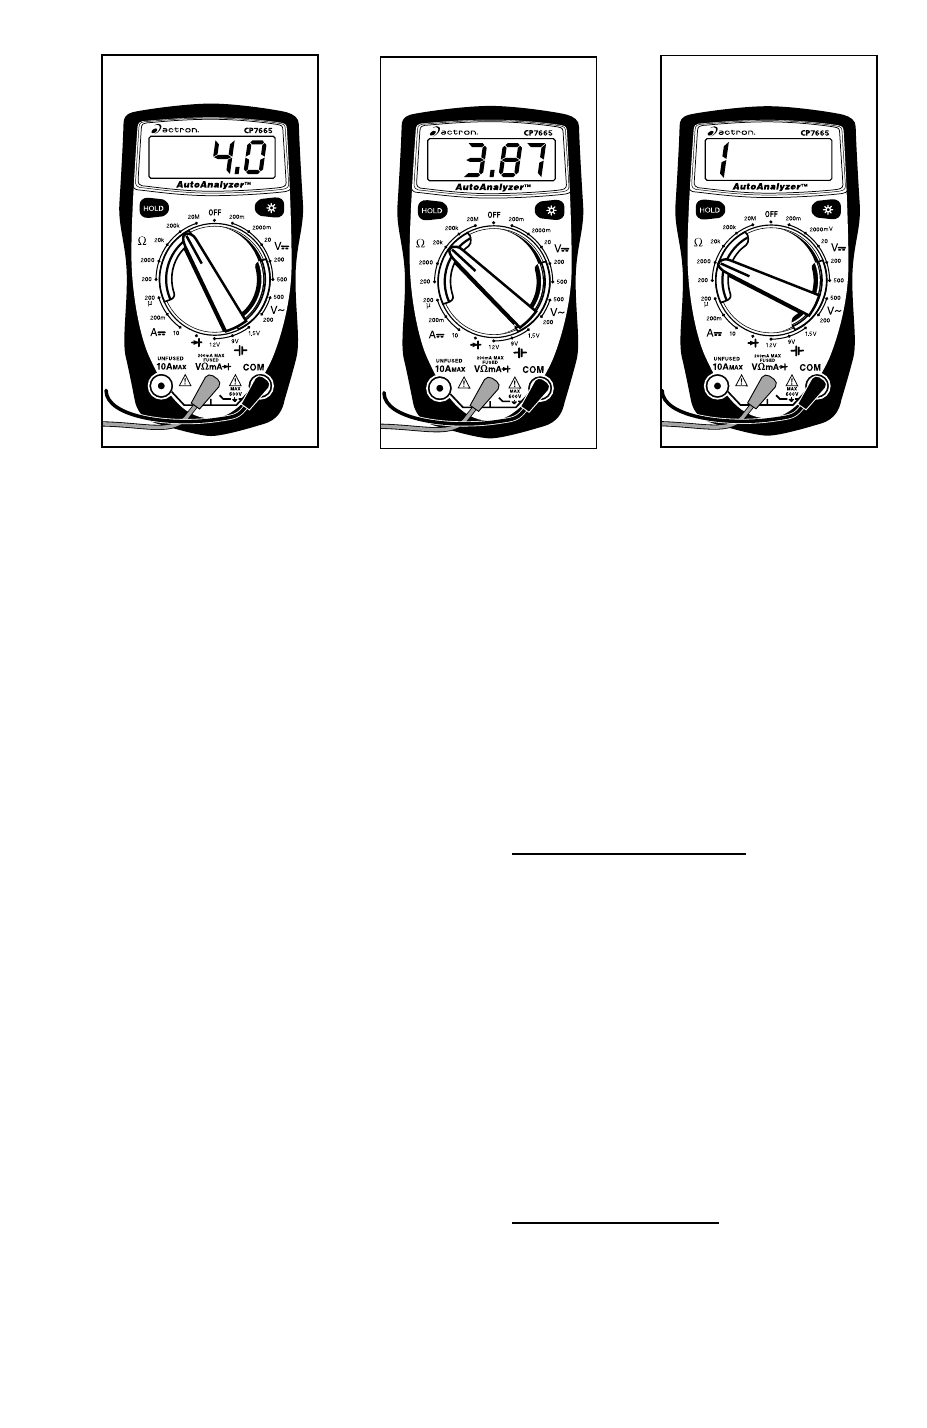
This sensor can’t be shorted so re-
duce the range setting until you get
a value of resistance.
At the 200K
Ω
range the multimeter
measured a value of 4.0. This means
there is 4K
Ω
of resistance across
the engine coolant sensor termi-
nals. (See Fig. 4)
If we change the multimeter to the
20K
Ω
range (See Fig. 5) the dis-
play shows a value of 3.87K
Ω
. The
actual value of resistance is 3.87K
Ω
and not 4K
Ω
that was measured in
the 200K
Ω
range. This is very im-
portant because if the manufacturer
specifications say that the sensor
should read 3.8-3.9K
Ω
at 70
°
F then
on the 200K
Ω
range the sensor
would be defective, but at the 20K
Ω
range it would test good.
Now set the multimeter to the 2000
Ω
range. (See Fig. 6) The display will
indicate an overrange condition be-
cause 3.87K
Ω
is larger than 2K
Ω
.
This example shows that by de-
creasing the range you increase the
accuracy of your measurement.
When you change the range, you
change the location of the decimal
point. This changes the accuracy of
the measurement by either increas-
Fig. 6
ing or decreasing the number of
digits after the decimal point.
Battery and Fuse
Replacement
Important: A 9 Volt battery must be
installed before using the digital mul-
timeter. (see procedure below for
installation)
Battery Replacement
1. Turn multimeter rotary
switch to OFF position.
2. Remove test leads from
multimeter.
3. Remove screws from back of
multimeter.
4. Remove back cover.
5. Install a new 9 Volt battery.
6. Re-assemble multimeter.
Fuse Replacement
1. Turn multimeter rotary
switch to OFF position.
2. Remove test leads from
multimeter.
Fig. 4