Acroprint E-Series (ET__ETC) User Manual
Page 3
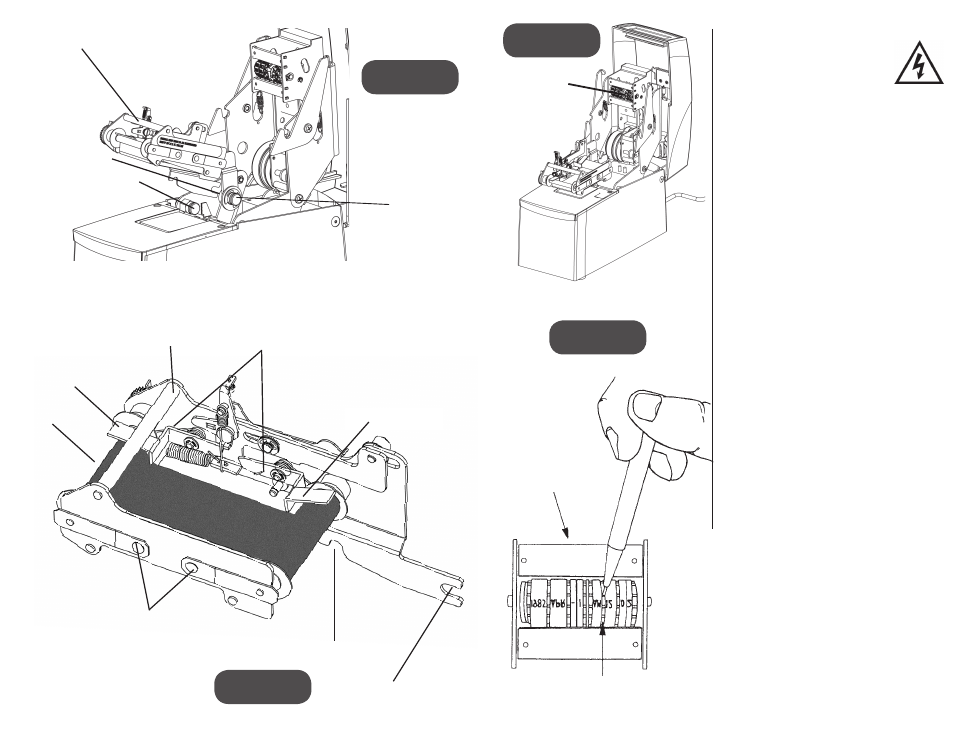
Front Support Pin
Mounting
Slot
Pivot Ribbon Drive Assembly
Upward or Downward
Upper Tie Bar
Rear Pivot Pin
Lower Housing
FIGURE 6
Front Ribbon
Feeler
Ribbon
Upper Tie Bar
Ribbon Tension
Springs
Front Mounting
Slot
Rear Mounting
Slot
Rear Ribbon Feeler
Depress to Raise
Ribbon Feelers
FIGURE 7
CAUTION:
Be sure the machine is disconnected
from the wall outlet when setting
typewheels.
SETTING
The stamp has a typehead with 6 or more
typewheels which print information such as
year, month, date, etc. It is necessary to set each
typewheel prior to using your new machine.
Open Cover
• Insert key.
• Turn key clockwise and tilt cover upward
.
Open Typehead
• Push down on the 2 lock levers, at the same
time pull up on the typehead (See Figure 2).
Setting Typewheels
• Set the typewheels by pushing the Ratchet
on the side of the typewheel down (See
Figure 4). Make sure the typewheel seats
correctly; you will hear a distinct click when
the typewheel seats.
Model Notes:
Time/Date Stamps (ET and ETC)
– After
setting, the machine will keep the time and
date automatically. The month typewheel
must be manually changed and the date
reset each month. The year typewheel must
be manually changed each year.
Date Stamps (ED)
– The date typewheels
must be set each day.
Numbering Machines (EN, END, EDN)
– The
first 6 typewheels advance automatically after
each punch. Any additional wheels (including
date) must be manually changed.
FIGURE 4
FIGURE 3
Typewheels
Typewheels
Advance Typewheel Ratchet
with Pointed Object