Vkr assembl y decals – Weider 8530 User Manual
Page 15
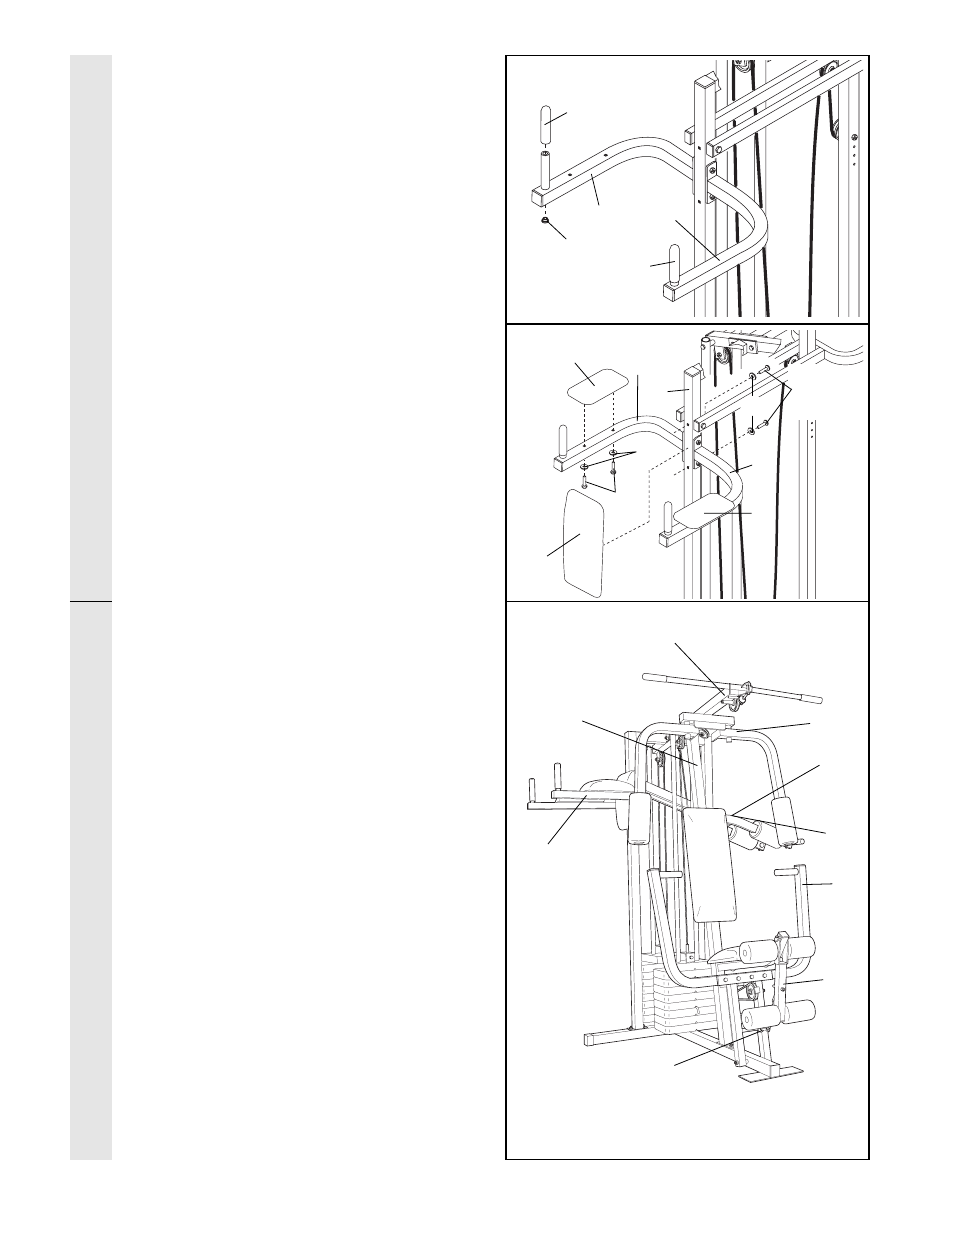
32. Wet the handle on the Right VKR Arm (80)
with soapy water. Slide a 5Ó Plastic Grip (83)
onto the Handle. Press a 1Ó Round Inner Cap
(49) into the bottom of the handle.
Attach a 5Ó Plastic Grip (83) and a 1Ó Round
Inner Cap (49) to the handle on the Left VKR
Arm (79) in the same manner.
33. Attach a VKR Armrest (78) to the Right VKR
Arm (80) with two 1/4Ó x 2Ó Machine Screws
(81) and two 1/4Ó Flat Washers (10).
Attach a VKR Armrest (78) to the Left VKR
Arm (79) in the same manner.
Attach the VKR Backrest (77) to the VKR
Upright (74) with two 1/4Ó x 2 1/2Ó Screws
(43) and two 1/4Ó Flat Washers (10).
34. Remove the decals from the Decal Sheet (not
shown) and apply them to the home gym sys-
tem in the locations shown:
A Ñ8530
B ÑHIGH PULLEY
CÑBUTTERFLY
DÑMILITARY PRESS
E ÑSQUAT STATION
F ÑBENCH PRESS
GÑLEG DEVELOPER
HÑLOW PULLEY
I ÑVKR
Make sure that all parts have been properly tight-
ened. The use of the remaining parts will be
explained in HOW TO USE THE HOME GYM
SYSTEM, beginning on page 16 of this manual.
Before using the home gym system, pull each
cable a few times to be sure that the cables move
smoothly over the pulleys. If one of the cables
does not move smoothly, find and correct the
problem. IMPORTANT: If the cables are not
properly installed, they may be damaged when
heavy weight is used. See the CABLE DIA-
GRAM on page 19 of this manual for proper
cable routing. If there is any slack in the
cables, the cables should be tightened. See
TROUBLE-SHOOTING AND MAINTENANCE on
page 18.
32
33
34
VKR ASSEMBL
Y
DECALS
78
74
80
43
79
78
77
81
10
A
B
C
D
E
F
G
H
I
15
79
80
49
83
83
10