Wayne-Dalton TORQUEMASTER 46 User Manual
Page 18
18
Please Do Not Return This Product To The Store. Contact your local Wayne-Dalton dealer. To find your local Wayne-Dalton dealer, refer to your
local yellow pages/business listings or go to the
Find a Dealer section online at www.wayne-dalton.com
Tools Needed:
Tools Needed:
Center bracket bushing
NOTE: If you are installing the
idrive
®
opener with your garage door, skip this
step and go to your
idrive
®
Installation
Instructions and Owner’s Manual. After
completing steps 1-13 of your
idrive
®
Installation Instructions and Owner’s
Manual, rear supports will need to be
fabricated/installed to support both
horizontal tracks, see step 27.
NOTE: If you are not installing the
idrive
®
opener on your garage door, you
must install the center bracket bushing
assembly. follow these instructions for
non-
idrive
®
operated garage doors.
Being cam shaped, the center bracket
bushing only fits one way.
Slide the center bracket assembly
towards the center of the TorqueMaster
®
spring tube, from the right side as
shown.
CENTER
BRACkET
ASSEMBLy
TORquEMASTER
®
SPRING TuBE
TORquEMASTER
®
SPRING TuBE
CENTER
BRACkET
BuShING
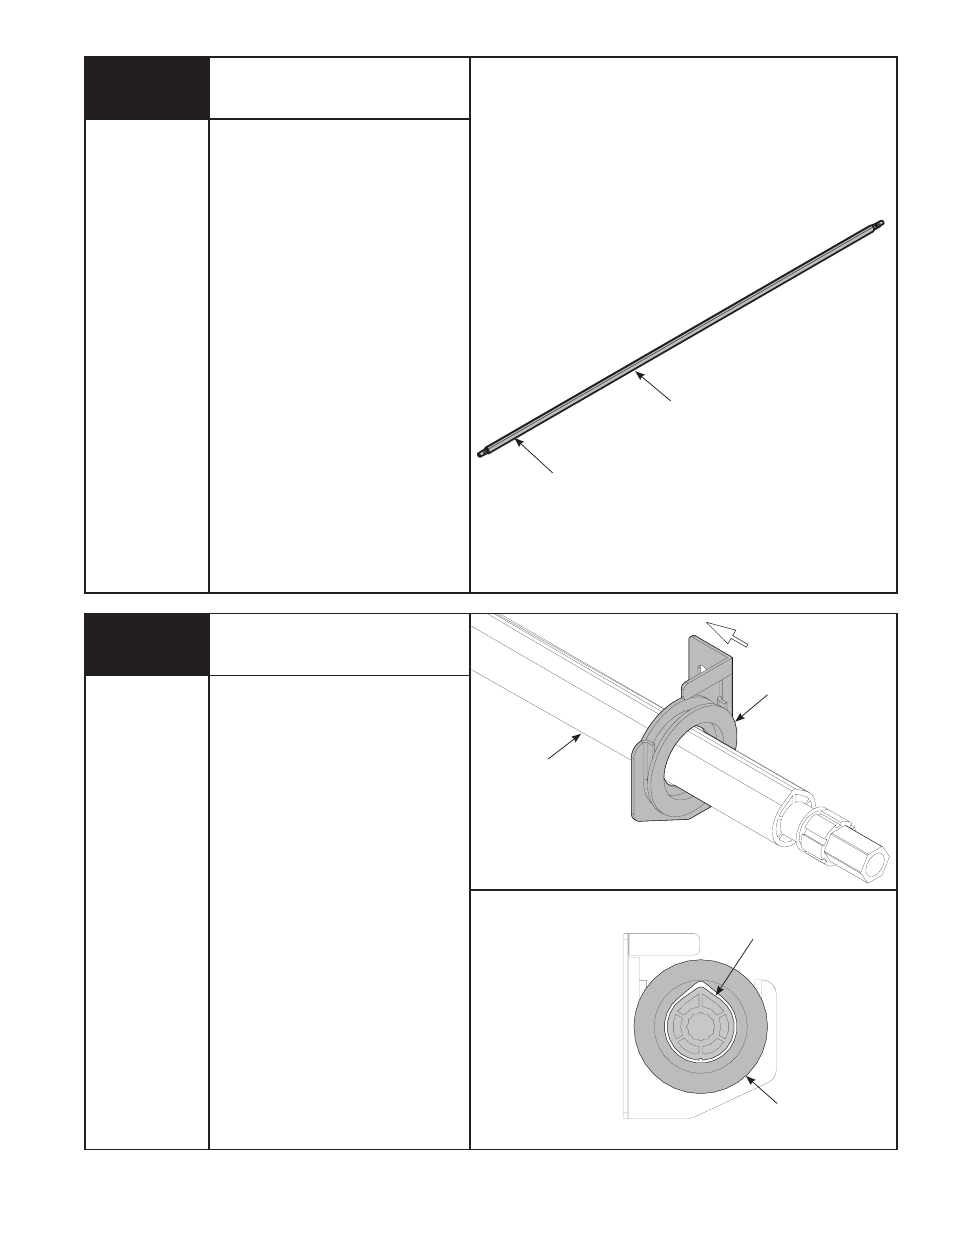
TorqueMaster
®
Spring Tube
TorqueMaster
®
springs come lubricated
and pre-assembled inside the
TorqueMaster
®
spring tube. To install, lay
the TorqueMaster
®
spring tube on the
floor (inside garage) in front of the door
with the labeled end to the left.
IMPORTANT: RIGhT AND LEfT hAND IS
ALWAyS DETERMINED fROM INSIDE ThE
GARAGE LOOkING OuT.
LABELED END
TORquEMASTER
®
SPRING TuBE
17
18
None
None