Cable assembly – Weider 831.159530 User Manual
Page 12
21
12
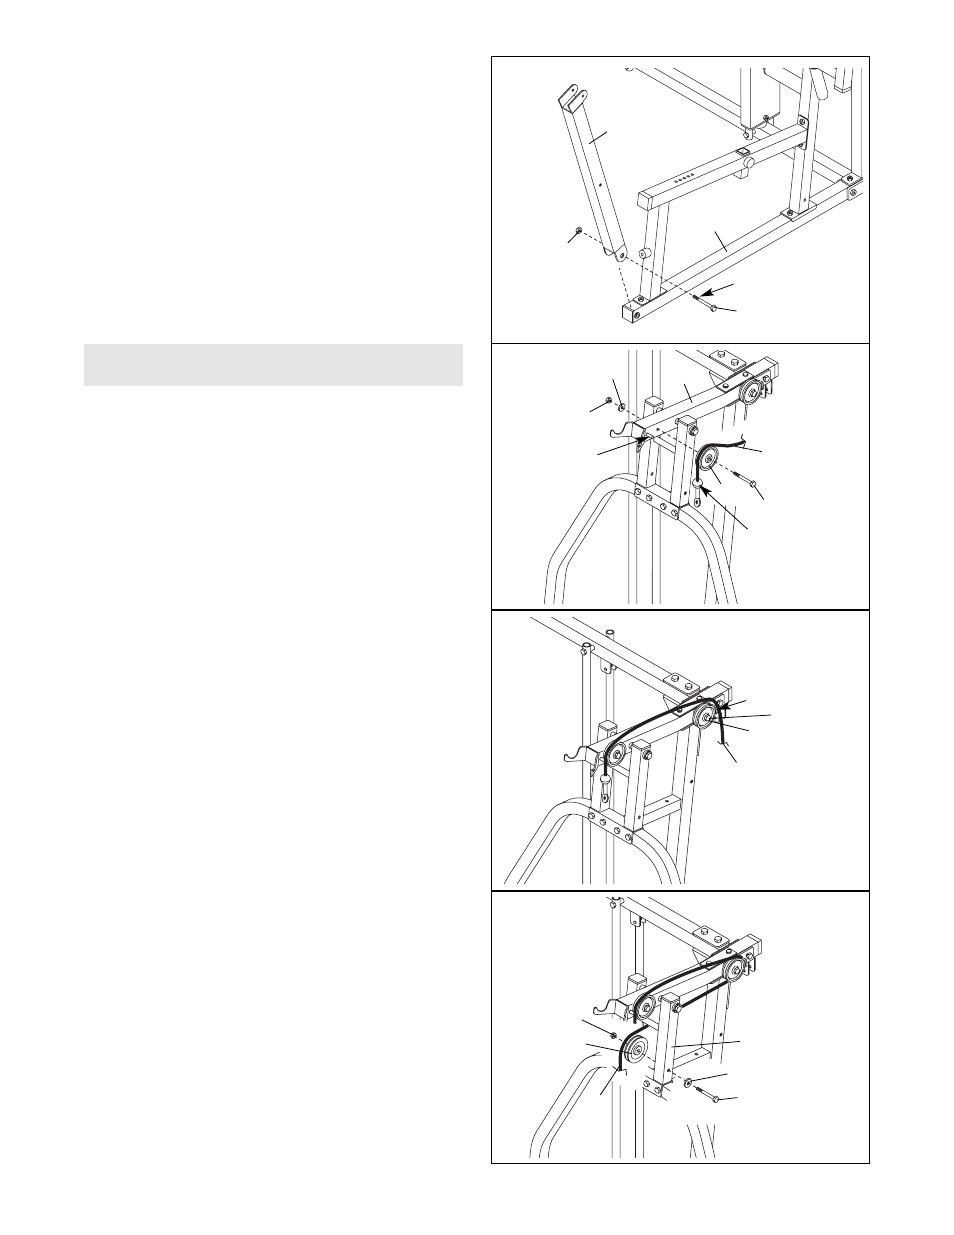
24. Wrap the Press Cable (80) around a 3 1/2” Pulley
(37). Attach the Pulley to the indicated side of the
Press Frame (14) with a 3/8” x 3 1/2” Bolt (65), a
3/8” Washer (75), and a 3/8” Nylon Locknut (74).
24
22. Locate and open the parts bag labeled
“CABLE ASSEMBLY.” For Cable identification
and routing during steps 22 to 52, refer to the
CABLE DIAGRAMS and CABLE ID CHART on
page 26.
Do not overtighten the nylon locknuts attach-
ing the pulleys to the weight system; the pul-
leys must be able to turn freely.
Identify the Press Cable (80). It is approximately
387.25” long and it has a ball on one end and a
loop on the other. Wrap the Press Cable around a
3 1/2” Pulley (37). Attach the Pulley to the Press
Top Frame (13) with a 3/8” x 3 1/2” Bolt (65), a
3/8” Washer (75), and a 3/8” Nylon Locknut (74).
Be sure the Cable is between the Pulley and
the rod on the Press Top Frame, and that the
ball is on the side shown.
22
23
37
75
80
74
Rod
Ball
13
65
44
91
21. Lubricate the 1/2” x 3 1/2” Bolt (96). Attach the
Leg Press Arm (22) to the Press Base (3) with the
Bolt and a 1/2” Nylon Locknut (95). Do not over-
tighten the Nylon Locknut; the Leg Press Arm
must be able to pivot easily.
3
95
22
Lubricate
96
80
74
80
37
75
14
65
37
Cable Assembly
23. Loosen the 3/8” Nylon Locknut (not shown) on
the 3/8” x 4” Bolt (91). Wrap the Press Cable (80)
around the 3 1/2” Pulley (37), making sure the
Cable is between the Pulley and the Cable Trap
(44). Re-tighten the Nylon Locknut.