Weider 831.15395.0 User Manual
Page 6
6
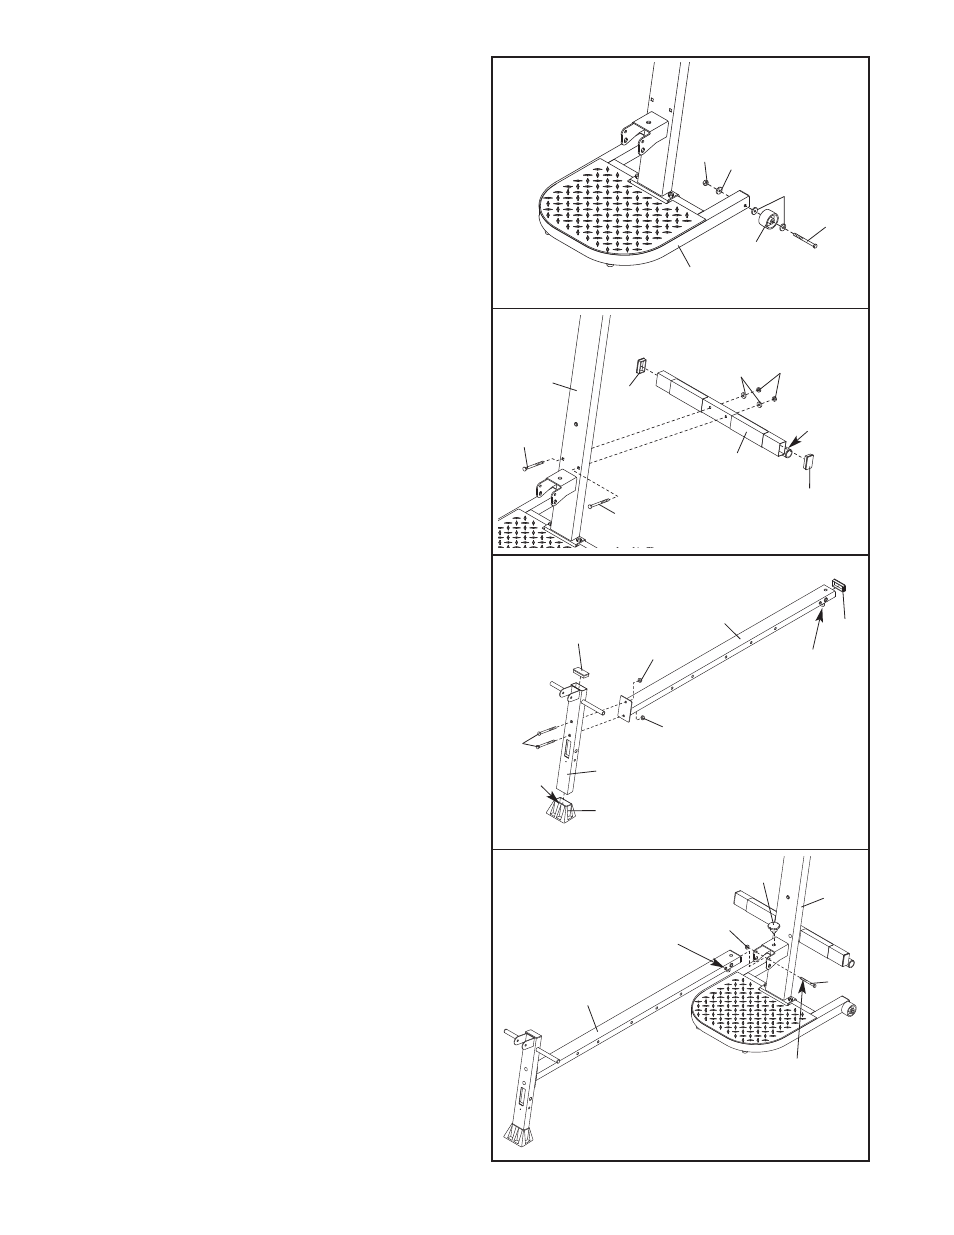
2.
Attach a Wheel (31) to the outside of the Base (1)
with a 3/8” x 4 1/4” Bolt (81), three 3/8” Washers
(75), and a 3/8” Nylon Jamnut (103).
Do not
overtighten the Jamnut; the Wheel must be
able to turn easily.
Attach the other Wheel (not shown) in the same
manner.
2
1
31
75
103
75
81
3.
Press a 1 1/2” x 2 1/2” Inner Cap (41) into each
end of the Cross Tube (11).
Orient the Cross Tube (11) as shown, with the
welded tubes at the bottom. Attach the Cross
Tube to the Upright (3) with two 3/8” x 5 1/2”
Carriage Bolts (73), two 3/8” Washers (75), and
two 3/8” Jamnuts (57).
3
41
3
73
41
Welded
Tube
11
57
75
5.
Lubricate a 3/8” x 4” Bolt (66) with grease. Attach
the Bench Rail (5) to the Upright (3) with the Bolt
and a 3/8” Nylon Jamnut (103).
Do not over-
tighten the Jamnut; the Bench Rail must be
able to pivot easily.
Tighten the Storage Knob (30) into the Upright (3)
and the Bench Rail (5).
4.
Press a 1 1/2” x 3” Inner Cap (99) into the top of
the Front Leg (6). Press the Front Leg Foot (27)
onto the bottom of the Front Leg.
Note that the
front of the Front Leg Foot is taller than the
back.
Press a 1 1/2” x 3” Inner Cap (99) into the end of
the Bench Rail (5).
Attach the Bench Rail (5), with the hook on the
bottom, to the Front Leg (6) with two 3/8” x 2”
Carriage Bolts (61) and two 3/8” Nylon Jamnuts
(103).
4
5
5
99
Hook
103
103
99
27
Front
61
6
103
30
66
Lubricate
Insert the bolt
through this hole
5
3
73