Installation instructions – Whirlpool 240-volt User Manual
Page 17
17
Center silver-colored
terminal block screw
External ground
connector
Neutral
grounding wire
(green/yellow)
3
⁄
4
”, U.L.-listed,
strain relief
Neutral wire (white)
Bare copper wire
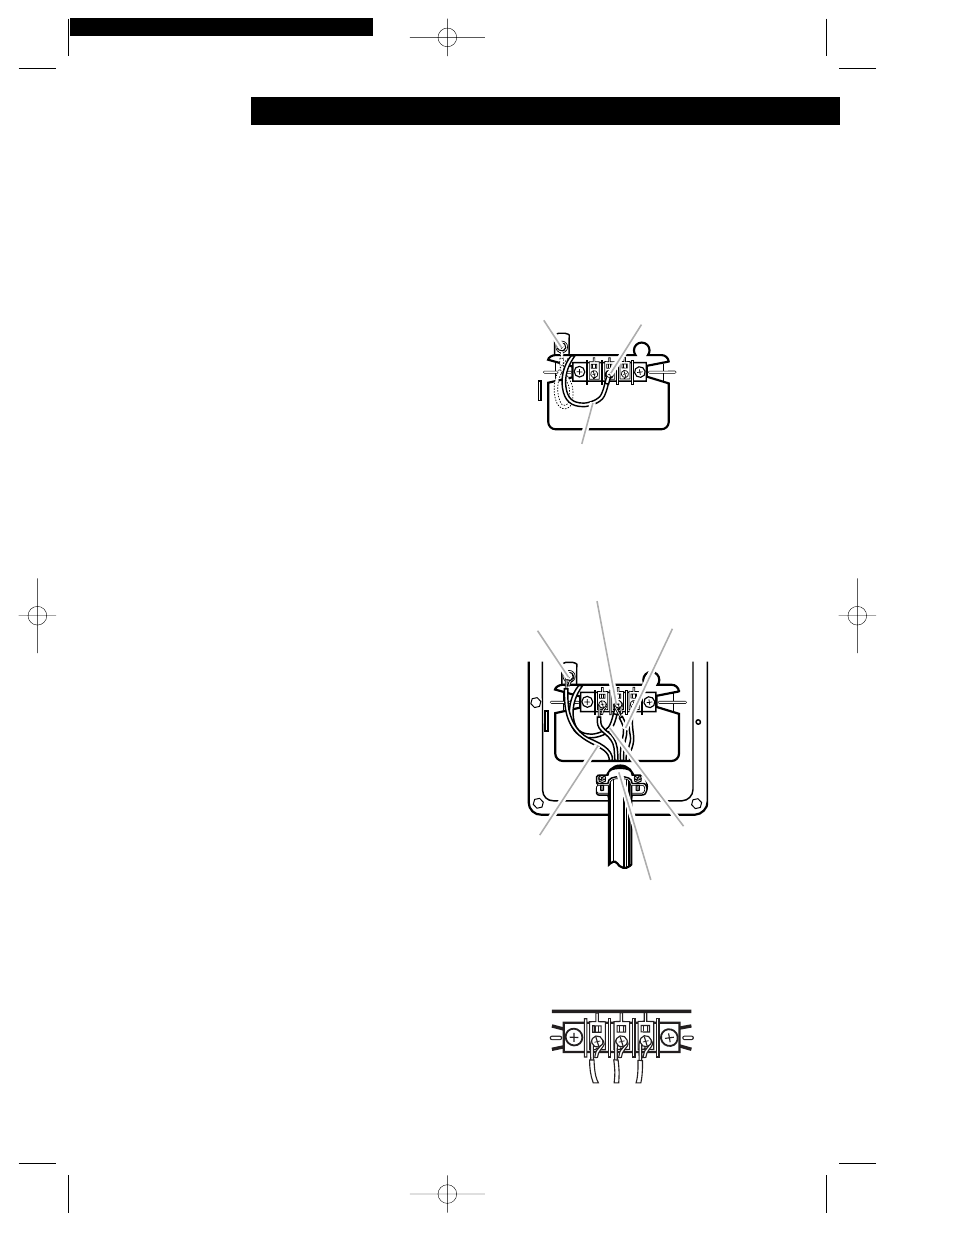
4-Wire Connection with Direct Wire and
Frame-Grounding Conductor
3. Attach a
3
⁄
4
-inch, U.L.-listed, strain relief to
the hole below terminal block opening.
Strain relief should have a tight fit with
dryer cabinet and be in a horizontal
position. Put the direct wire cable through
the strain relief.
4. Remove the center terminal block screw.
Remove the neutral grounding wire
(green/yellow wire) from external
grounding screw.
5. Connect neutral grounding wire and the
neutral wire (white or center) of direct
wire cable under the center screw of
terminal block.
6. Place the hook-shaped end of the wire
over the terminal block screw. The open
side of the hook should face to the right.
Squeeze hook end of wire together to
form a loop.
7. Connect the other two wires to outer
terminal block screws. Use the same
method described in Step 6.
8. Connect the direct wire cable (bare)
grounding wire to the external-grounding
conductor screw. Tighten all terminal
block screws firmly.
9. Tighten the strain relief screws.
10. Insert tab of terminal block cover into slot
of the dryer rear panel. Secure cover with
hold-down screw.
Green/yellow wire
of harness
External ground
connector
Center silver-colored
terminal block screw
INSTALLATION INSTRUCTIONS
(Steps 6-7)
3977625v09c27 4/1/99 4:46 PM Page 17