Rear view of the product, Getting started – VIEWSONIC VS12280-1A User Manual
Page 17
Getting Started
Contact ViewSonic service team at:
http://www.viewsonic.com.au/
or call our service team:
Australia 1800 880 818
ViewSonic
12
N3290w/N4290p/ N4790p
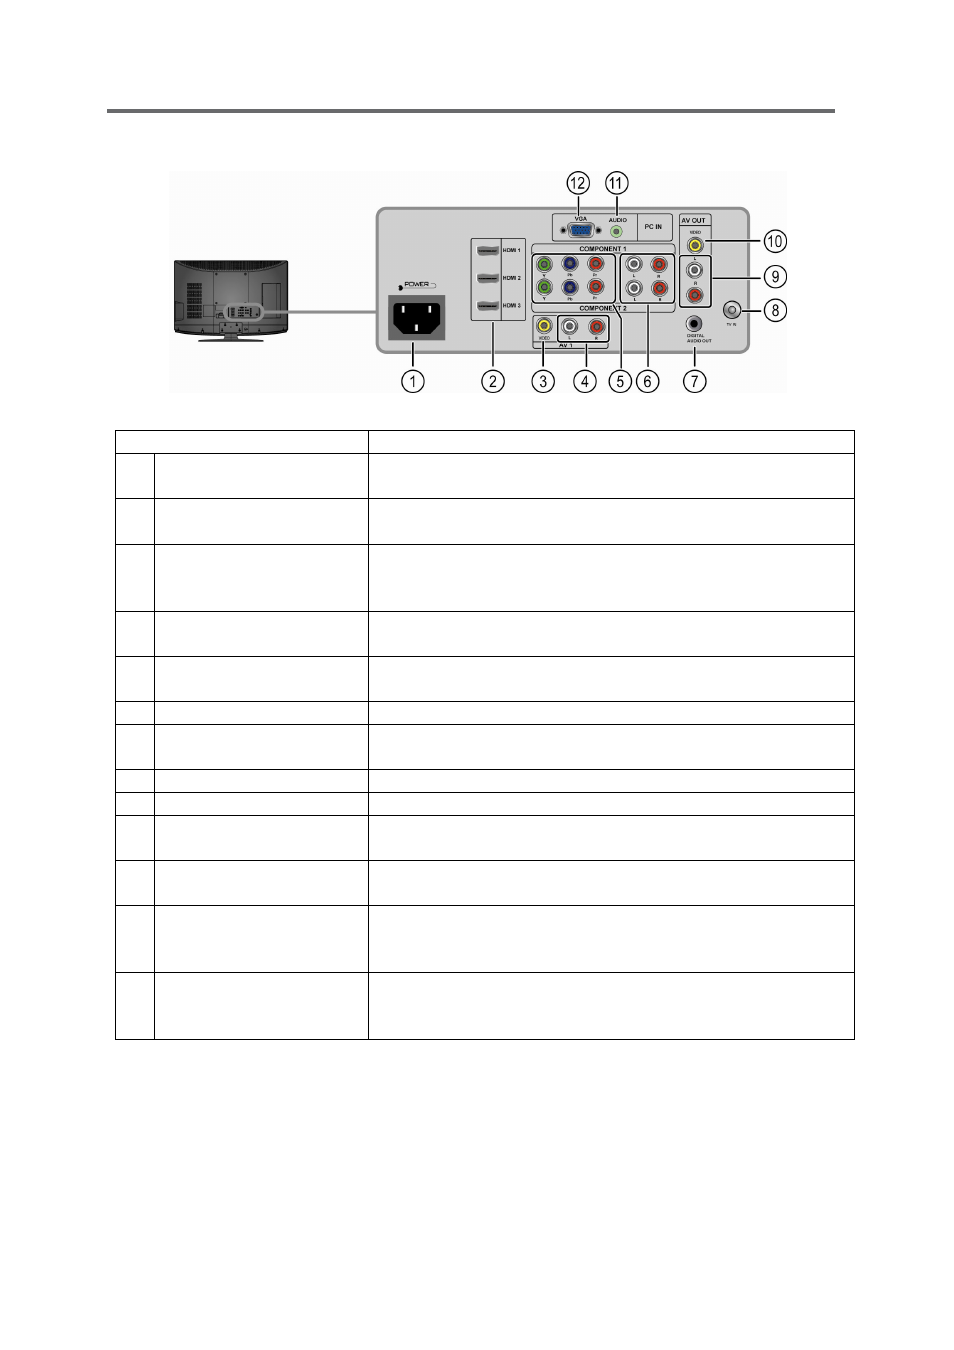
Rear View of the Product
Item
Description
1
Power (AC input)
Plug-in the supplied AC Power cord and connect to the
AC input power source.
2
HDMI Input
Connect this port to the HDMI/HDMI-DVI jack of the
compatible equipment.
HDMI Audio (left/
right)
Connect the DVI Audio Out on your device to the
HDMI Audio on the rear of the LCD TV display. This
jack is used for DVI Audio.
3
Composite Video
input
Connect this jack to the composite video output
connectors on your A/V equipment.
4
Composite/ Audio
input (left/ right)
Connect the Audio in cable for AV from this jack to the
corresponding connectors on your A/V device.
5
YPbPr signal input
Connect this jack to the YPbPr output of A/V device.
6
YPbPr Audio input
(left/ right)
Connect the Audio in cable for YPbPr from this jack to
the corresponding connectors on your A/V device.
7
Digital audio out
Connect to a Digital Audio device.
8
TV Input Jack
Connect this jack to your Cable or VHF/UHF antenna.
9
Composite Video
output
Connect this jack to the composite video input
connectors on your A/V equipment.
10 Composite/ Audio
output (left/ right)
Connect the Audio out cable for AV from this jack to the
corresponding connectors on your A/V device.
11 PC Audio input
Connect the RGB Audio Out on your computer to the
RGB Audio on the rear of the LCD TV display. This
jack is used for PC Audio.
12 VGA signal input
Connect a 15-pin D-sub RGB cable to the RGB output
of your computer and the other end to the RGB input
on the rear of the LCD TV display.