Anti-theft system, Installation, Continued) – Panasonic CQ-RG133W User Manual
Page 9: Place the removable face plate into case, Install removable face plate
E
N
G
L
I
S
H
CQ-RG133W
17
CQ-RG133W
16
E
N
G
L
I
S
H
13
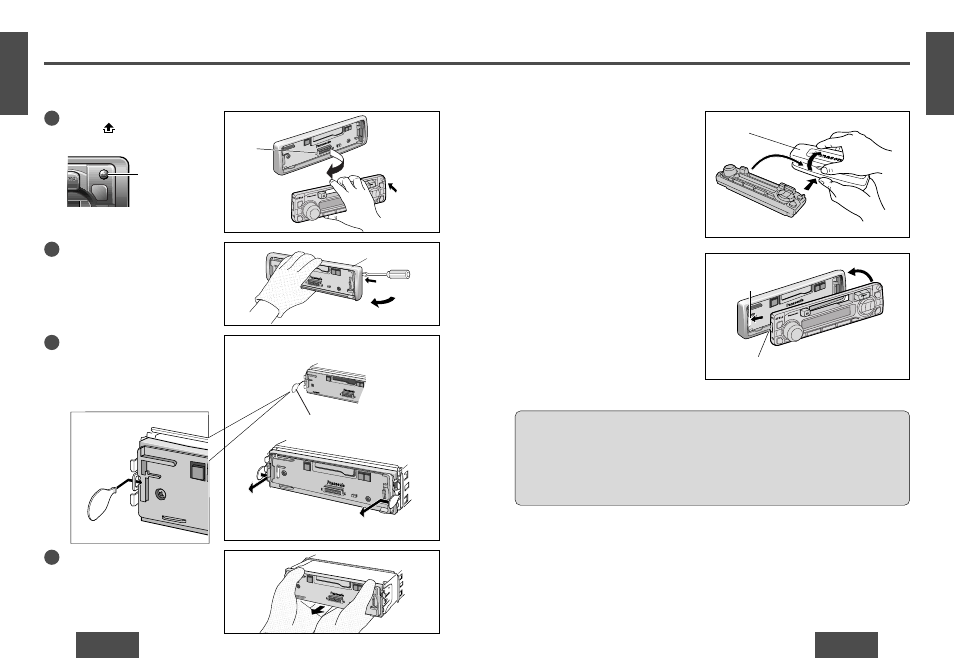
Anti-Theft System
This unit is equipped with a removable face plate. Removing this face plate makes the radio totally inoperable.
Place the Removable Face
Plate into Case
q Switch off the power of the unit.
w Remove the removable face plate. (
➡
page 16)
e Gently press the bottom of the case and open the
cover. Place the face plate into the case and take it
with you when you leave the car.
w
q
Install Removable Face Plate
q Slide the left side of the removable face plate in
place.
w Press the right end of the removable face plate until
“click” is heard.
Removable face plate case
tab
Cutout
Cautions:
• This face plate is not waterproof. Do not expose it to water or excessive moisture.
• Do not remove the face plate while driving your car.
• Do not place the face plate on the dashboard or nearby areas where the temperature rises to high level.
• Do not touch the contacts on the face plate or the main unit, since this may result in poor electrical contacts.
• If dirt or other foreign substances get on the contacts, wipe them off with a clean and dry cloth.
• Do not apply a strong downward force onto the face plate and do not put anything on it while it is open, or it might
be damaged.
Installation
(Continued)
To Remove the Unit
Switch off the power of the unit.
Remove the removable face plate.
q Press [
]. (release button). The
removable face plate will be released.
1
Remove the Trim Plate i with a screwdriver.
2
q Insert the Dismounting Plates u along
the grooves on both sides of the main unit
until “click” is heard.
w Pull out the unit while pushing the plates
further inside.
3
Remove the unit pulling with both hands.
4
Push
q
Contact
i Trim Plate
Screwdriver
u Dismounting Plate
Insert the tab
end in the
outer groove.
“Click”
q Insert
w Pull out
CD-C
release button
E
N
G
L
I
S
H
12
w