U-Line CLRCO2175 User Manual
Page 14
14
CLR2160, CLRCO2175
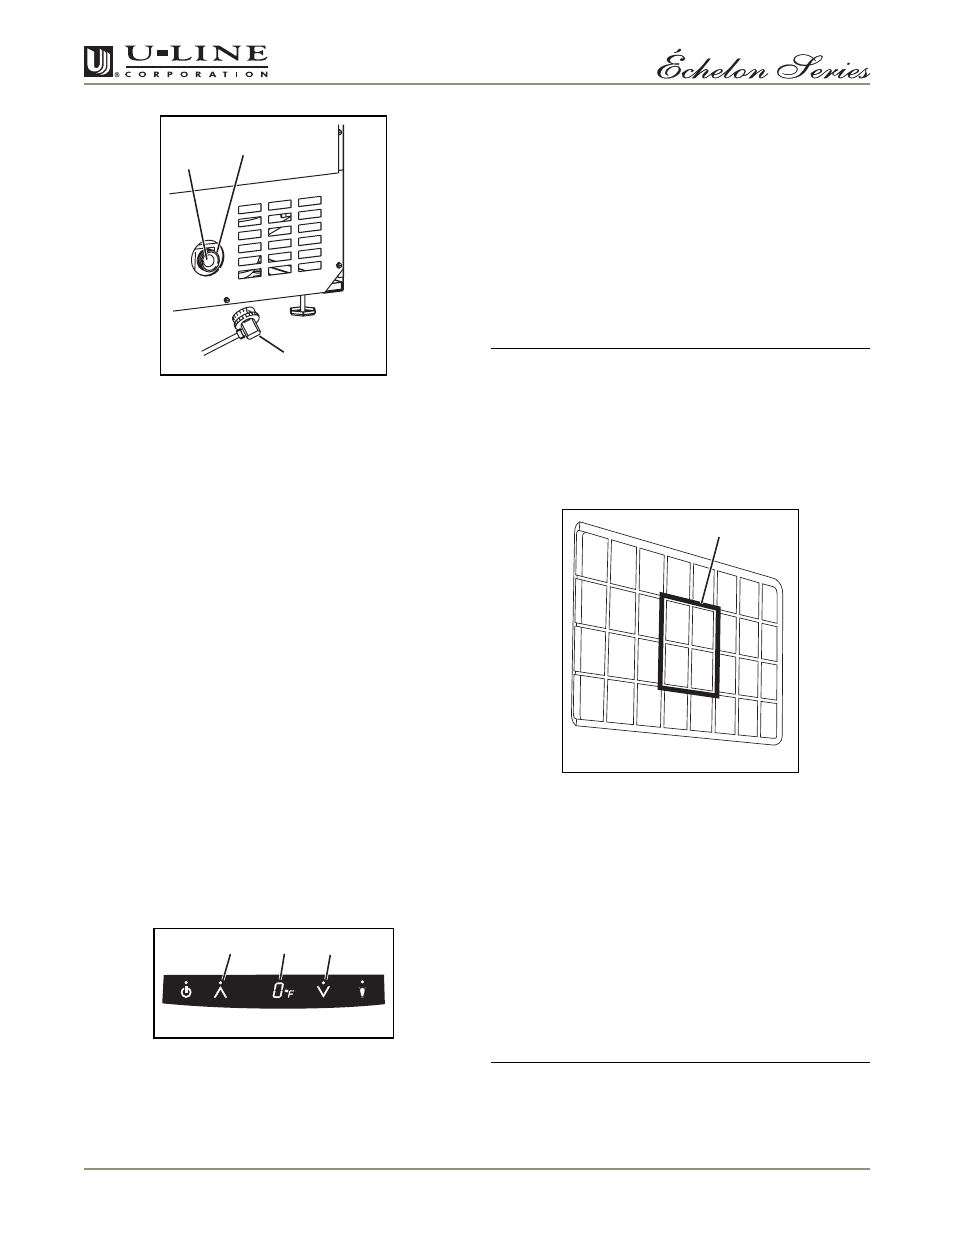
Figure 12
4. Disconnect the hose connector (Figure 12, 1) from the
water solenoid valve (Figure 12, 2).
5. DO NOT remove the inlet screen (Figure 12, 3) from
the water solenoid valve. Use a toothbrush to gently
clean any sediment from the inlet screen.
6. Re-connect the water supply hose connector (Figure
12, 1) to the water solenoid valve (Figure 12, 2).
Tighten the connector securely.
7. Open the water main supply valve and check for leaks
at the water hose connection. Ensure that the water
supply line is not kinked.
8. Reconnect power to the unit before re-installing.
9. Make sure the drain system is working properly and the
drain hose is not pinched or kinked. Pour 1 gallon of
cool, fresh water into the ice bin. The water should
drain freely. If your unit is equipped with a drain pump,
the pump should drain the ice bin.
10. To ensure that the drain system is working properly,
pour 1 gallon of cool, fresh water into the ice bin. The
water should drain freely. If your unit is equipped with
a drain pump, it should drain the ice bin.
Ice Cube Thickness Adjustment
Interval - As Required
Ice thickness adjustments are made using the control
panel as follows:
Figure 13
1. To enter the thickness adjustment mode:
a. Touch and hold the UP ARROW button (Figure
13, 1).
b. Touch and release the DOWN ARROW (Figure
13, 2) button three times, then release the UP
ARROW button (Figure 13, 1).
c. The display (Figure 13, 3) will switch to “0” to
confirm the thickness adjustment mode has been
selected.
2. The factory setting is “0,” and the total range of
adjustment is -5 to +5. Use the UP ARROW button to
raise the setting and thicken the ice bridge, or the
DOWN ARROW button to lower the setting to thin the
ice bridge.
IMPORTANT
IMPORTANT
Ice thickness adjustment should only be made one
increment at a time. Allow ice maker production to
stabilize for 24 hours before rechecking ice
thickness.
3. Touch and release the LIGHT (Figure 13, 4) button key
to exit the ice thickness adjustment mode.
4. Remove all ice from the storage bin.
Figure 14
5. Ice cubes in any given batch will vary, so it is necessary
to choose cubes from the sample area (Figure 14, 1)
for comparison when making adjustments. If further
adjustments are desired, repeat Steps 1 through 4.
Drain Pump
Interval - Not Required
A drain pump, if installed, requires no routine
maintenance. To check its operation, pour 1 gallon of
cool, fresh water into the ice bin. The drain pump will run
and water should drain freely from the bin.
Leveling
IMPORTANT
IMPORTANT
It is extremely important that Clear Ice models are
level. If not level, the ice mold will not fill evenly.
3
2
1
ULIN_0061_A
1
3
2
ULIN_0200_A
1
ULIN_0063_A