Service, Belt replacement – Troy-Bilt 340 User Manual
Page 15
Service
7
15
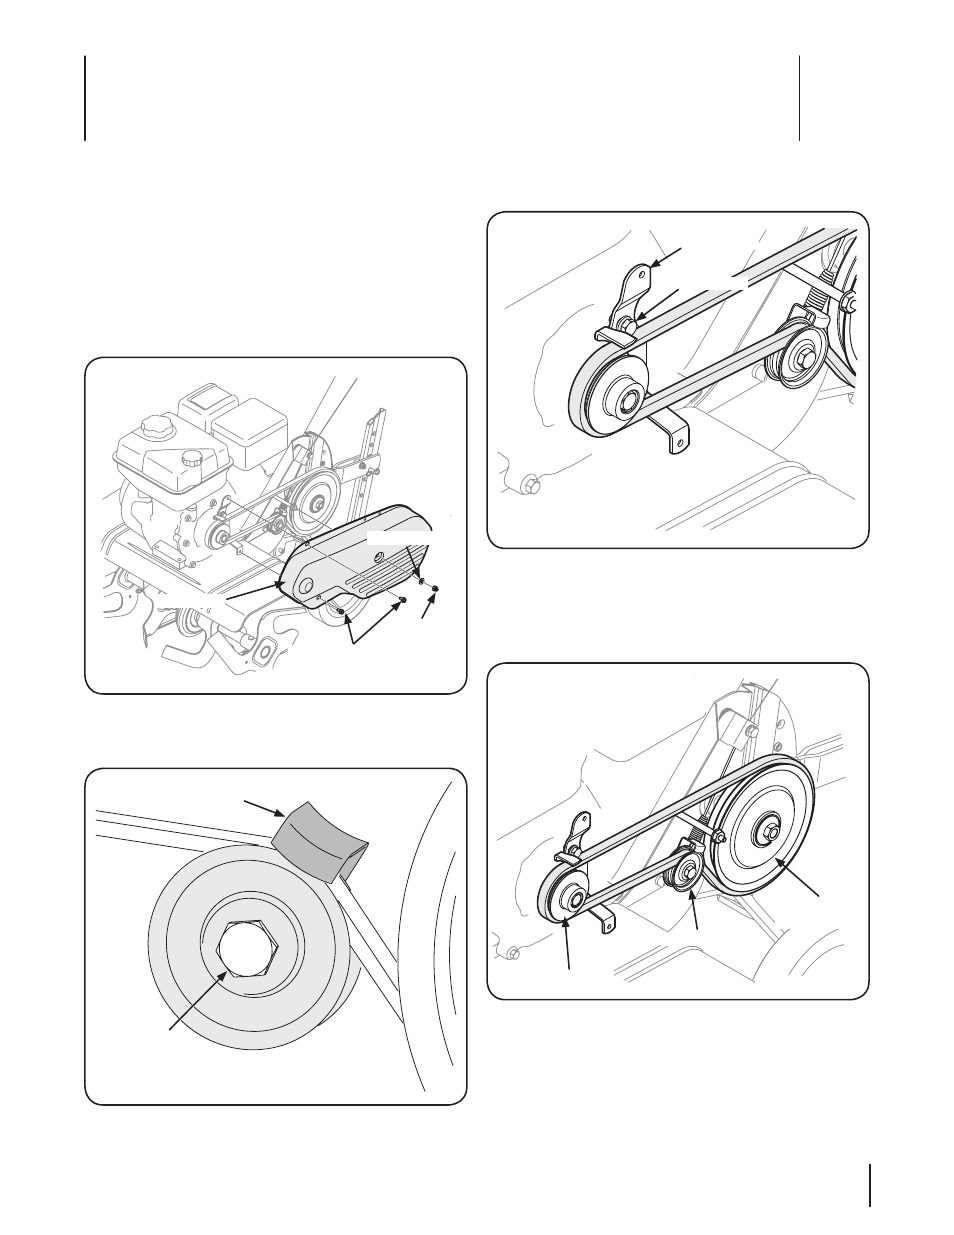
Belt Replacement
Your tiller has been engineered with a belt made of special
material (Kevlar Tensile) for longer life and better performance. It
should not be replaced with an off-the-shelf belt. Order all belts
through you authorized service dealer.
1.
Disconnect and ground the spark plug wire against the engine.
2.
Remove the belt cover from the left side of the tiller by
removing the two hex washer screws and the lock nut and
washer. See Fig. 7–1.
Hex Washer Screws
Lock Nut
Flat Washer
Belt Cover
Figure 7-1
3.
Remove the idler pulley bolt and move the belt from under
the idler pulley keeper. See Fig. 7–2.
Idler Pulley Keeper
Idler Pulley
Bolt
Figure 7-2
4.
Using a 1⁄2” wrench, remove the hex screw securing the belt
keeper to the engine. See Fig. 7-3.
Hex Screw
Belt Keeper
Figure 7-3
5.
Remove the belt.
6.
To install the new belt, follow the instructions in reverse
order and refer to Fig. 7-4. Be sure to place the wider side of
the belt away from the engine and transmission pulleys.
Transmission
Pulley
Idler Pulley
Engine Pulley
Figure 7-4
NOTE: Upon reassembly, make certain that the idler pulley
keeper is as shown in Fig. 7–2. Take note of the notch
on the bottom of the keeper and the alignment when
reassembling with the replacement belt.