Features – Tripp Lite PERIPHERAL SHARING B006-VUA4-K-R User Manual
Page 5
4
3
1
2
5
5
Features
continued
Front Panel
continued
3
Console Audio Connectors: A separate set of console speaker and microphone jacks
are located on the front panel of the unit for greater accessibility. Devices plugged
into these ports will take priority over devices plugged into the console speaker and
microphone jacks on the back panel of the unit.
4
USB 2.0 Peripheral Port: USB 2.0 devices (printers, scanners, etc.) can be plugged
into this port and shared between the connected computers.
Back Panel
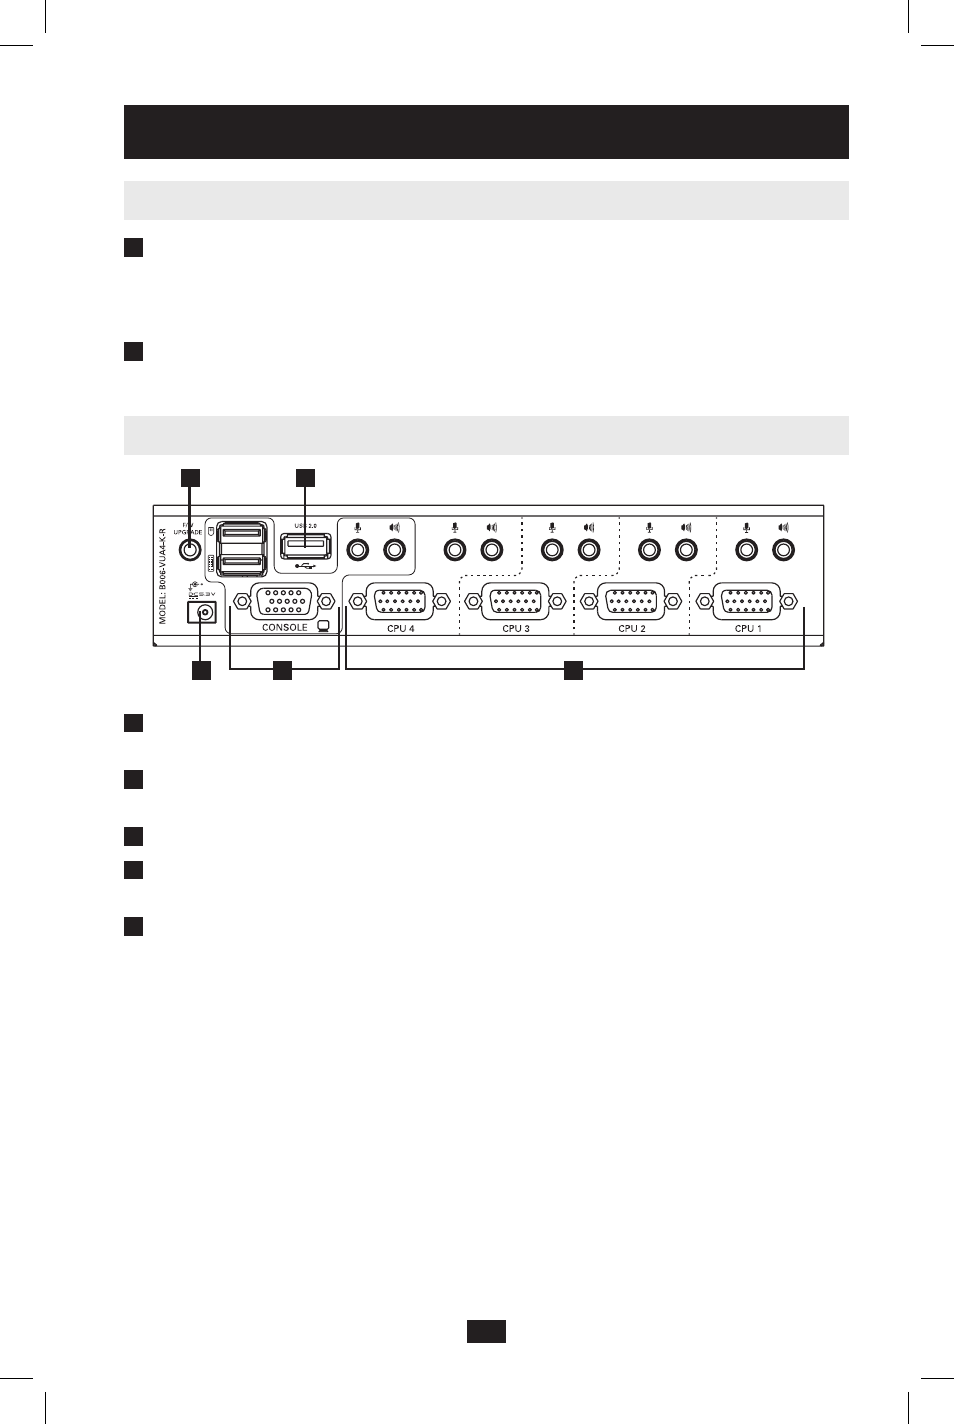
1
Firmware Upgrade Port: When performing a firmware upgrade, the included firmware
upgrade cable connects to the KVM switch here.
2
USB 2.0 Peripheral Port: USB 2.0 devices (printers, scanners, etc.) can be plugged
into this port and shared between the connected computers.
3
Power Jack: The included power supply connects to the KVM switch here.
4
Console Ports: Your monitor, keyboard, mouse, microphone and speakers plug into
these ports.
5
Computer Ports: The P756-Series (USB) and P757-Series (PS/2) KVM Cable Kits
connect to the KVM switch here. Note: These 17-pin connectors are shaped specifically
to work with P756-Series and P757-Series KVM Cable Kits. Do not attempt to use
ordinary VGA cable to connect a computer to the KVM switch.
201004198 93-2947.indd 5
4/23/2010 3:26:52 PM