1 recording with synchronized start, 4 - recording operations – Tascam CD-RW5000 User Manual
Page 17
4 - Recording operations
TASCAM CD-RW5000
17
2
Use the
DIGITAL INPUT
key
between the three possible digital audio
sources:
AES/EBU
,
COAXIAL
and
OPTICAL
.
It is assumed that the digital program material has
been edited so that there is no clipping. If a digital
signal goes over the maximum level, audible distor-
tion occurs. It is not possible to adjust the level of
digital audio signals input to the CD-RW5000.
If the program material which is to be recorded con-
tains track divisions (PQ code or START IDs on a
DAT) which you want to use as track divisions when
making the CD, use the
AUTO/MANUAL
key
to
set the track division mode to
AUTO
"Automatic track division" for details.
4.2.1 Recording with synchronized start
The synchronized start facility allows recording to
start when the digital start of a track is recognized
(coaxial or optical) or when the input level from
AES/EBU sources goes from below –36 dB to above
this level.
There are two different ways in which the sync start
facility can be used: you may wish to record only one
track from a digital source—
SYNC 1
.
Alternatively, you may simply want to start recording
when the source starts playing, and finish recording
when the source stops—
SYNC ALL
.
Neither of these modes is available when recording
from analog sources.
In both cases, it is possible to stop the recording
manually at any time.
NOTE
The CD-RW5000 needs between 150ms and
400ms to recognize the start of a track. If the
audio material starts too close (i.e. within this
time) of the logical track start, the
CD-RW5000 may not record the very first part
of the audio material.
When recording using the sync start feature,
therefore, make sure that there is a gap
between the track start and the start of the
audio. If there is not such a gap, you should
use a manual start.
1
If the audio source is not a CD connected dig-
itally to the CD-RW5000, locate the audio
source to a little before the start of the track
you are recording and enter pause mode on
the source player. If the audio source is a dig-
itally-connected CD (coaxial or optical),
make sure the CD player is stopped, not
paused.
2
Insert a recordable disc into the
CD-RW5000.
• To record one track only, press the
SYNC START
key once to show
SYNC-1
on the display.
• To record more than one track, press the
SYNC
START
key twice to show
SYNC
on the display.
• The CD-RW5000 will go into record ready mode
(the
RECORD
and
PAUSE
key indicators will
both light, and the
RECORD
indicator will flash
in the display).
3
Start playing back the audio source.
• If
SYNC-1
is selected and the source is input
through the coaxial or optical inputs, recording
starts automatically when the start of a track within
the digital audio signal is detected, and continues
until the start of the next track within the source
material is detected, when recording will stop.
• In the case of SYNC-1 being selected, and the
recorded signal being input through the AES/EBU
inputs, recording will start when the audio level
exceeds –36 dB. It will stop when the signal falls
below this level for 20 consecutive seconds.
• If
SYNC ALL
is selected, recording starts auto-
matically when the start of a track within the digital
audio signal at the optical or coaxial connector is
destected, or when the audio level exceeds –36 dB
at the AES/EBU connector.
When recording starts, the currently-recording track
number is shown, together with the elapsed track
time. To show how much recording time remains on
the disc, press the
DISPLAY
key
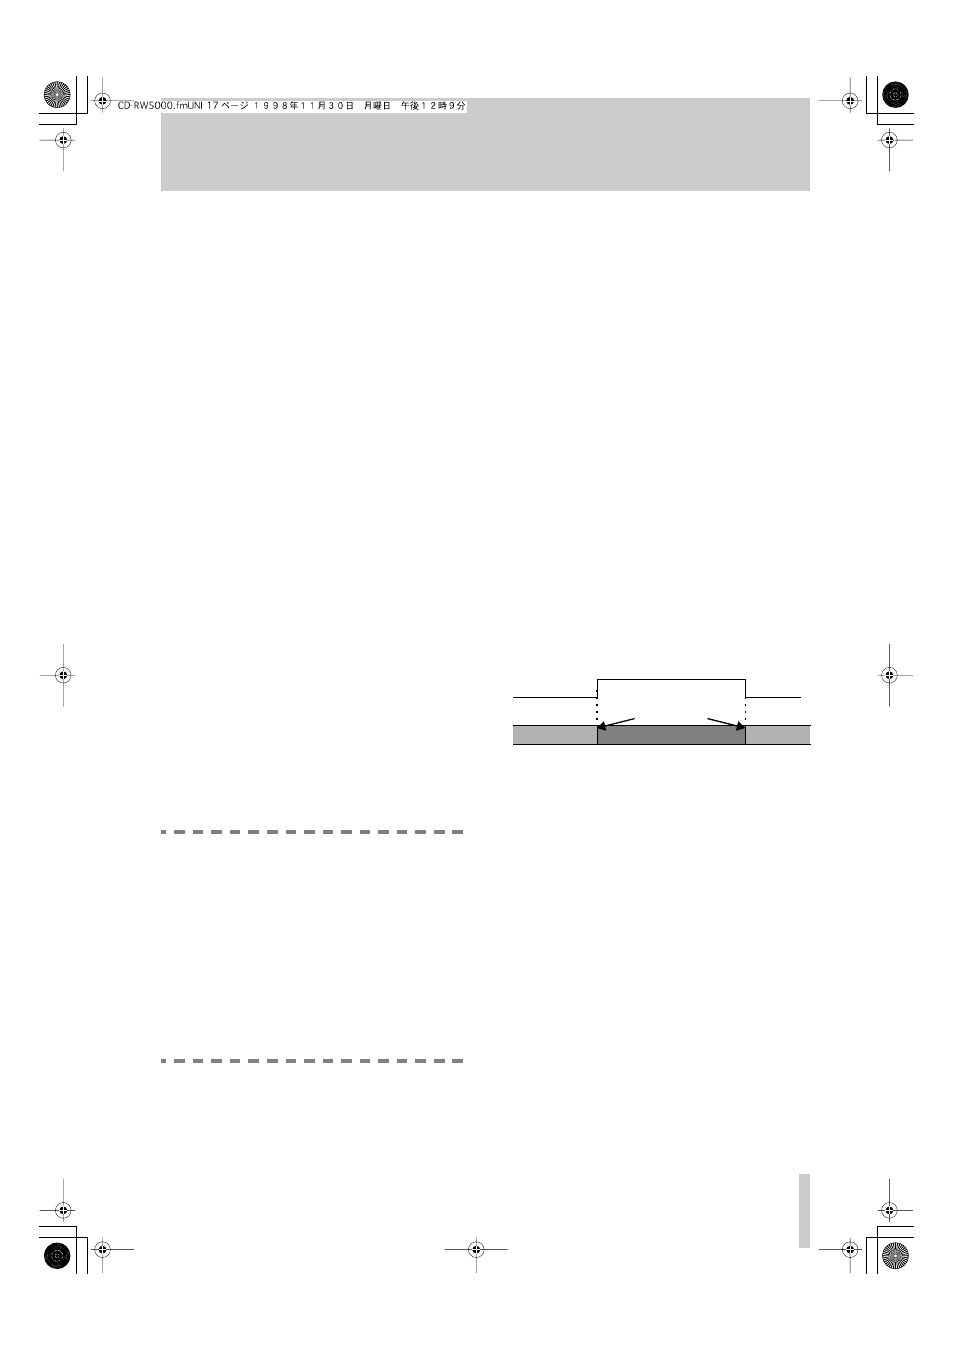
The recording may be stopped in either of the follow-
ing ways:
SYNC-1
• The start of the next track within the source mate-
rial is detected.
Record
Record pause
Stop
Source material
Track starts
CD-RW5000