Note, Figure 9: location of screw keyholes, Remove knockouts – Thermador PROFESSIONAL PH PH54 User Manual
Page 9: Connect additional ducting, Installation note, Figure 8
English 7
Duct covers, sold separately, are available to cover the
space between the top of the hood and ceiling. (See
page 3.)
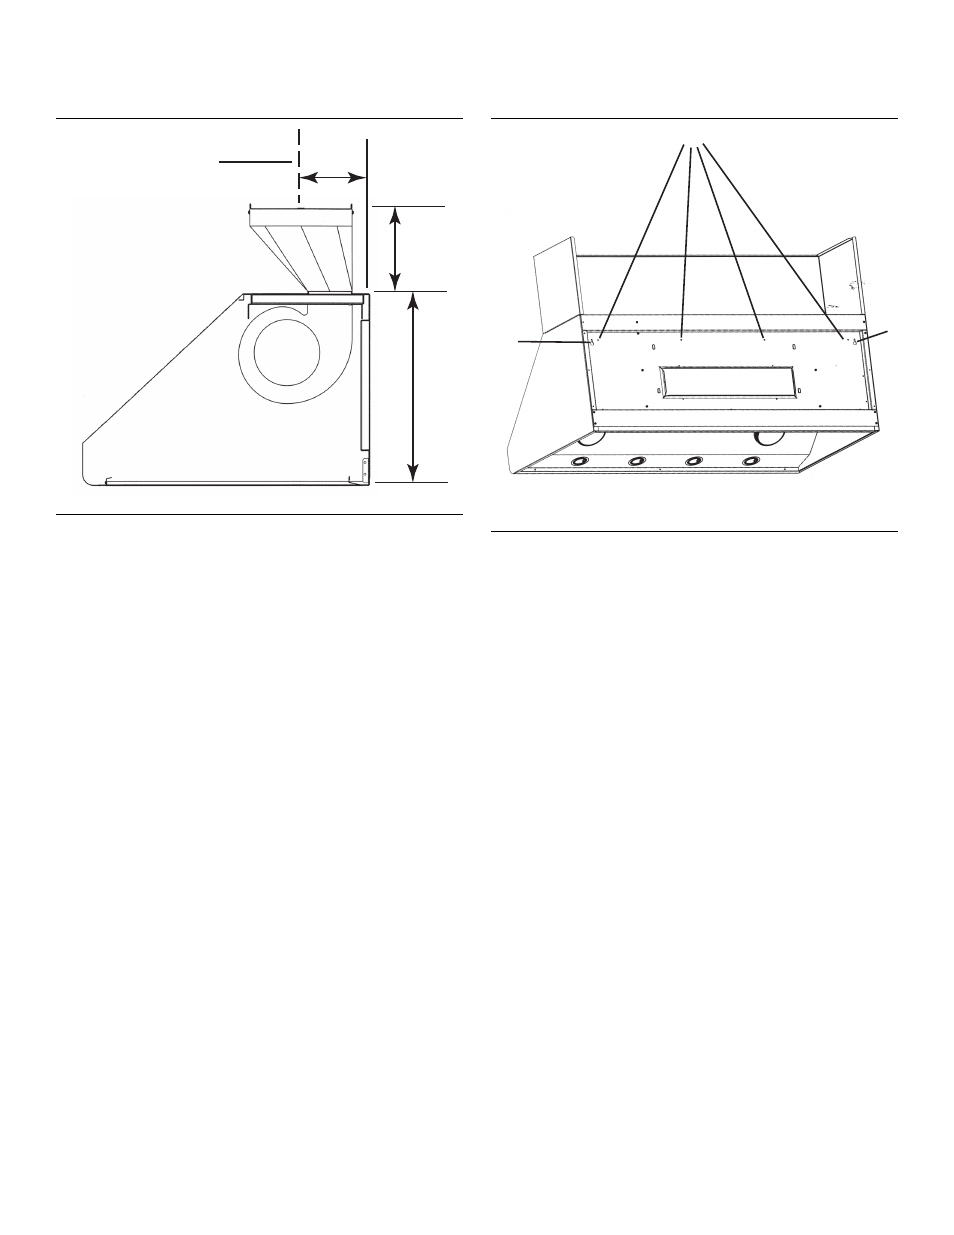
12. Before hanging hood, install transition per Figure 7.
Fasten transition with two (2) screws (#8 x 3/8 sheet
metal, supplied) and tape per all applicable codes.
Note:
Screws must not hinder damper operation.
13. Rest the hood on the screws in the wood bracket. Use
the keyholes labeled "I" in Figure 9. Make sure the
wood bracket fits into the recess on the back of the
hood.
14. Remove knockouts.
15. Tighten the screws in keyholes. Check hood levelness
and adjust if necessary.
16. From inside the hood, drive screws (#8 x 5/8”) through
holes in hood into wooden bracket. See holes labeled
“J” in Figure 9.
17. Connect additional ducting.
Installation Note:
If wall studs are within 8" of the center line, cut stud at an
angle to avoid any interference.
Figure 8: Transition Centerline for Vertical Discharge
Transition
Centerline
Wall
5-13/16”
10-1/4”
18”
Figure 9: Location of Screw Keyholes
I
I
J