Remote control battery, Slide the battery cover back and lift out – Telex Firefly P200 User Manual
Page 15
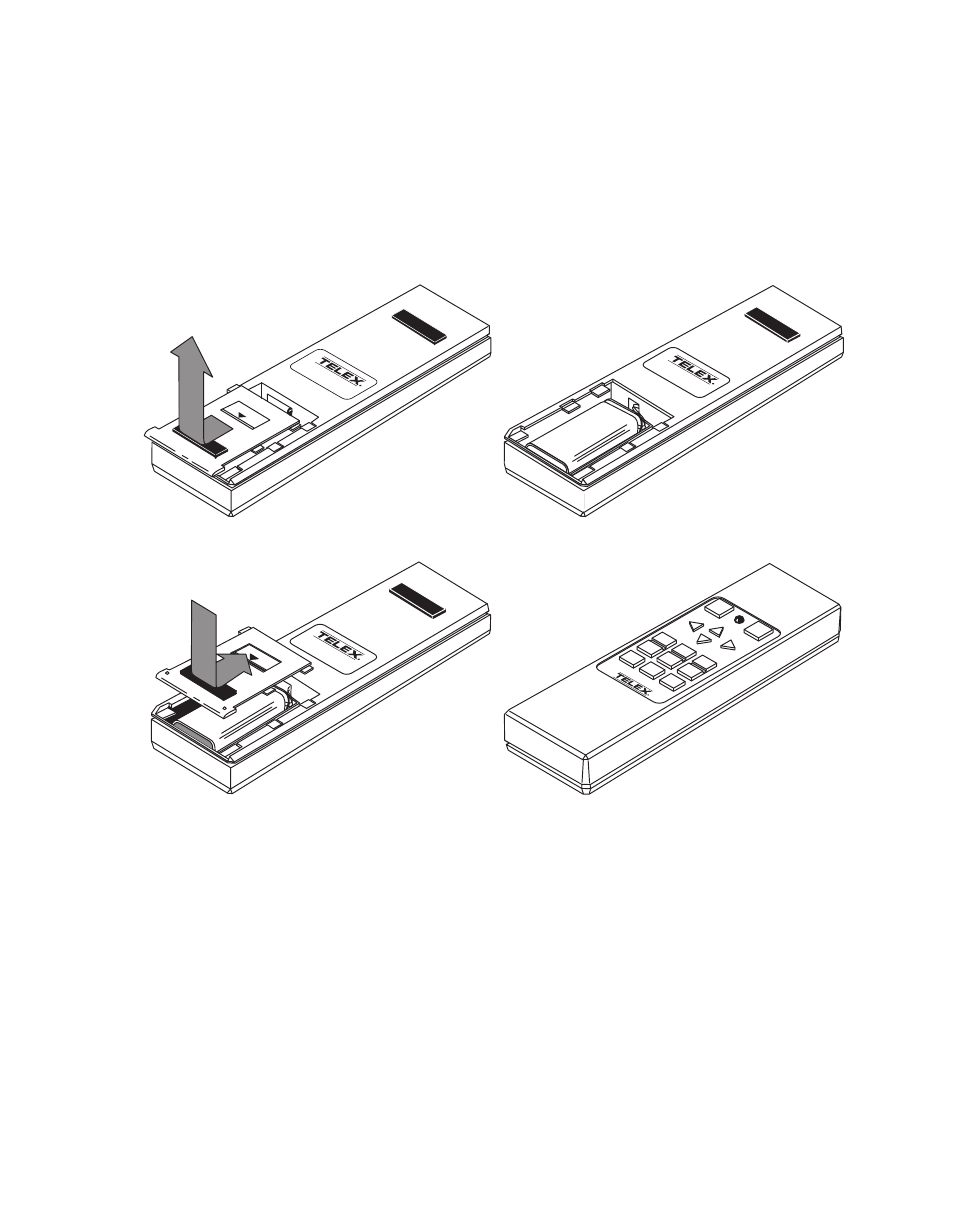
Remote Control Battery
The remote control requires one 9V alkaline battery installed as shown in
Figure 9.
A new battery should be installed in the remote control unit under the
following circumstances:
•
New remote control unit is received from the factory.
•
LED on the remote control no longer lights when keys are pressed,
indicating a “dead” battery
•
Operating distance between the remote control and the P200/P250
becomes too short for your purposes, indicating a “weak” battery
Continue with the Operation section of this manual for instructions on the
use of your Firefly
™
P200/P250 LCD Notebook Computer Projector.
1. SLIDE THE BATTERY COVER
BACK AND LIFT OUT.
OPEN
MINNEAPOLIS, MN U.S.A.
P/N: 47436-XXX
9VDC
2. PLUG IN THE BATTERY AND
POSITION IT IN THE BATTERY
COMPARTMENT.
MINNEAPOLIS, MN U.S.A.
P/N: 47436-XXX
9VDC
3. ALIGN THE TABS ON THE BATTERY
COVER WITH THE SLOTS IN THE
BACK CASE AND
REPLACE THE COVER.
OPEN
MINNEAPOLIS, MN U.S.A.
P/N: 47436-XXX
9VDC
4. CHECK THE OPERATION BY PRESSING
ANY KEY. THE LED INDICATOR
SHOULD BLINK RAPIDLY.
STANDBY
FOCUS
BRIGHT
CONTRAST
VOLUME
SOURCE
MODE
MENU
Figure 9. Remote Control Battery Installation
10 User Manual