Installation – QSC Audio S series User Manual
Page 12
12
•
First, locate the input sensitivity-selection jumper headers, which are in a row
of small groups of pins (6 in each group) on the topside of the circuit board,
somewhat midway between the front edge of the board and the rear edge.
You’ll see a row of 16 headers on a RAVE 161, or eight on a RAVE 188–one for
each input channel.
•
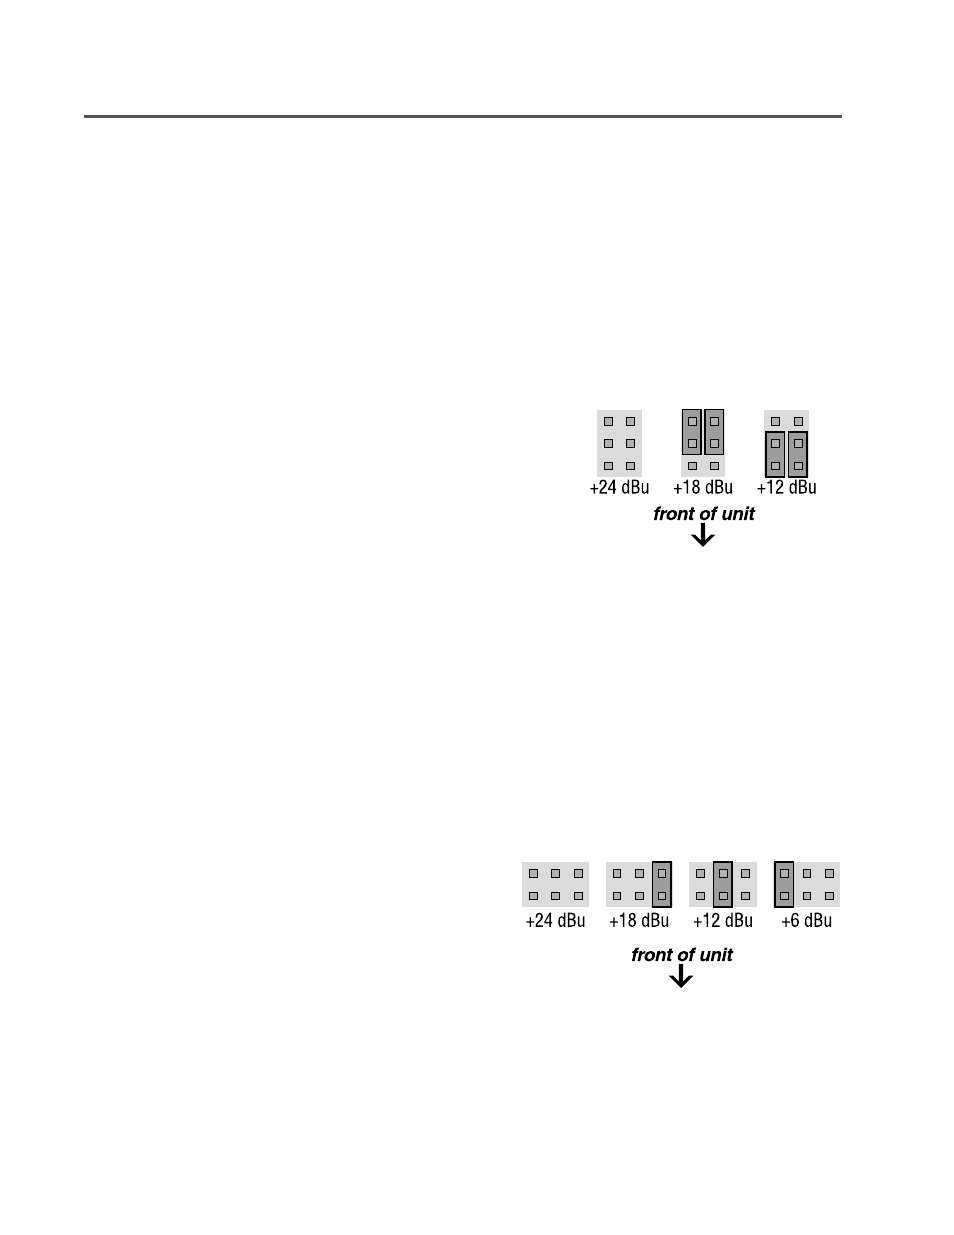
Determine what the correct setting should be for each channel, and set the
jumpers as shown in the illustration. There is also a legend printed on the
circuit board showing the jumper setting options. Save any unused jumpers for
future use.
Output Levels (RAVE 160s-24 and 188s-24 only)
The output level setting determines the absolute RMS level of an analog signal produced by a digital full scale
signal representing a sinusoidal waveform. The four selections available are +24dBu, +18dBu, +12dBu, and
+6dBu (reference: 0 dBu = 0.775 volt)—12.3 volts, 6.1 volts, 3.1 volts, and 1.5 volts rms, respectively. These
voltages respectively correspond to 17.4, 8.7, 4.4, and 2.2 volts peak.
Input Level Sensitivity (RAVE 161s-24 and 188s-24 only)
Input level sensitivity is the RMS analog signal level at which a sinusoidal waveform will produce a digital full
scale signal in the device. The available settings are +24dBu, +18dBu, and +12 dBu (reference: 0 dBu = 0.775
volt), which are 12.3, 6.1, and 3.1 volts rms, respectively. These correspond to 17.4, 8.7, and 4.4 volts peak. Check
the specifications of the audio equipment driving the inputs to determine the correct setting. Each channel’s
sensitivity is independent of the others and must be set individually.
•
As with setting the input level, the output level for each channel is
set by arranging jumpers on the pins of a header. These headers
are located near the rear edge of the circuit board, and there is one
header for each analog output: eight in the RAVE 188, and 16 in the
RAVE 160.
•
Place jumpers as required for the desired output level as shown in
this illustration. A legend printed on the circuit board also shows
the jumper settings. Save any unused jumpers for future use.
Installation:
Pre-Installation Level Setting (RAVE 160/161/188 only)