Identifying front and rear connectors, Rear panel – Olevia LT42HVi User Manual
Page 18
ANT
DTV
Audio Output
C
C
b
b
b
b
P
P
C
C
r
r
r
r
P
P
VIDEO-1
VIDEO-2
Component-1
Component-2
16
TV Installation and Connection Guide
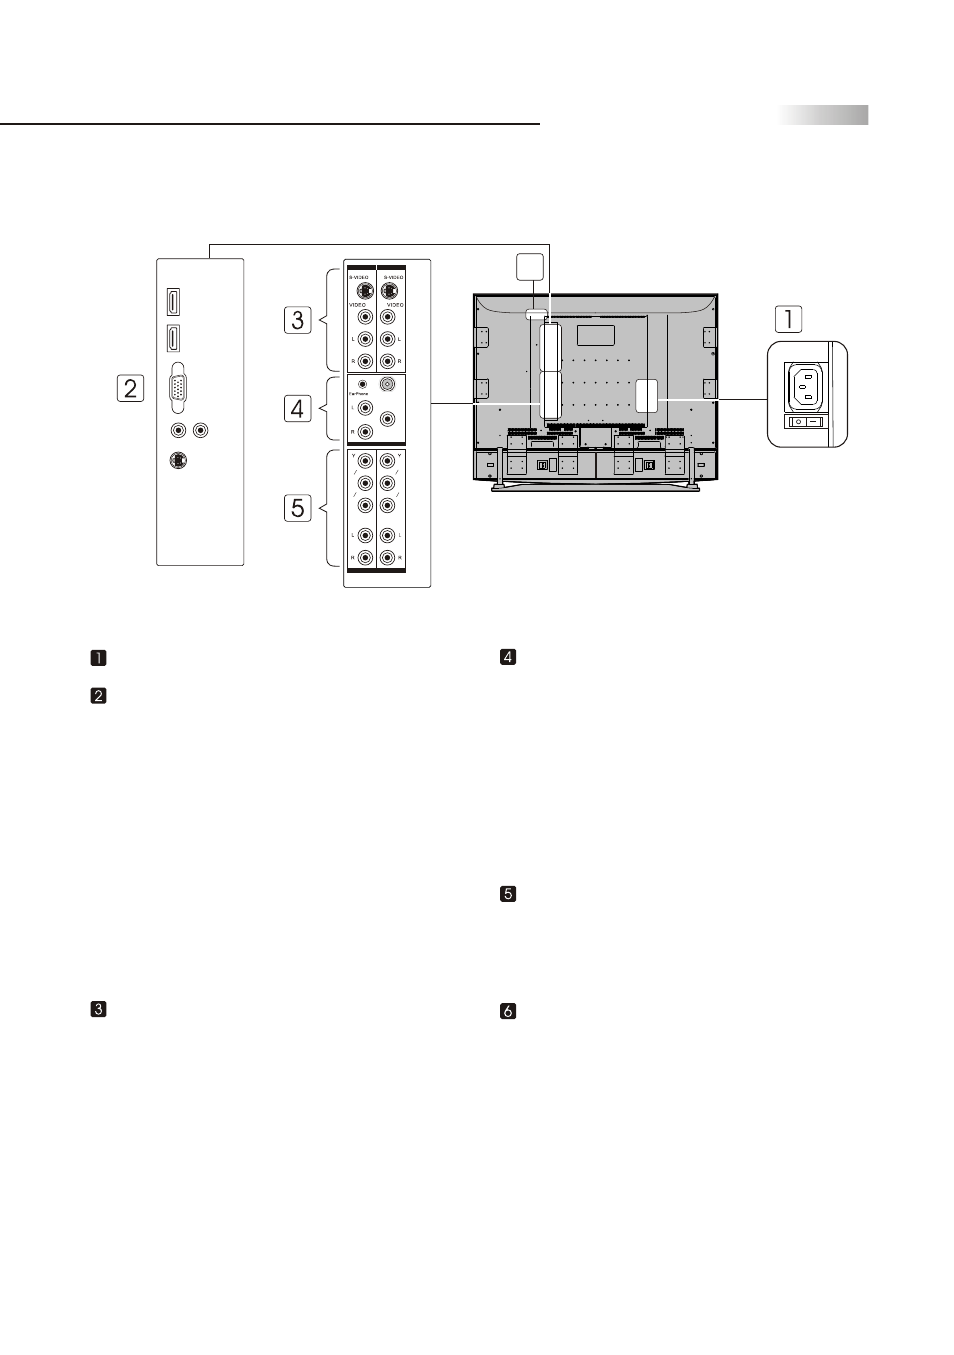
Identifying Front and Rear Connectors
Rear Panel
AC IN power cord connects here.
HDMI 1/ HDMI 2 and VGA Port This display
includes 2 HDMI inputs which can receive digital
video signals through the interface for the display
of high quality digital video signals. Both HDMI
ports are HDCP (High Bandwidth Digital Content
Protection) compliant and is fully compatible
with video equipment that features the HDCP
function. The VGA input can be used for analog
RGB signals from a HD Receiver or personal
computer. Resolutions supported are VGA,
SVGA, XGA and WXGA. The HDMI and VGA
ports share the one Audio L/R inputs.
Service Port is reserved for manufacturer use.
Incorrect use may damage the Display.
Video 1,2 These inputs can be used for the
connection of a VCR, Super VHS (S-VHS) VCR,
DVD player, or other video devices to the TV.
There is a Video and an S-Video input for Video1
and video 2. When both inputs are used
simultaneously on Video 1, only the S-Video
input will be recognized. Same behavior for
Video 2. The display will automatically detect
the input being used.
NOTE: The S-Video input has a better quality of
picture than a composite Video signal.
Audio Out The Audio Output sends the TV's
connected audio signals to an A/V receiver or
other equipment. Display features a R/L stereo .
Antenna (ANT) Antenna receives signals from
VHF/ UHF antennas or a cable system.
DTV Digital Audio Cable Input
The DTV input receives digital audio signals
from an ATSC digital receiver and broadcasts
programs on VHF/UHF TV signals.
Component 1, 2 These inputs can be used for the
connection of A/V equipment with component
video outputs, such as a DVD player, Digital
Satellite Receiver, or compatible Video Game
System.
AV-light lights up during connection process for
user viewing assistance.
To Activate: Press "Source" & "Vol+"
simultaneously to turn AV-light on. It will
automatically turn off after 60 seconds.
Service
Port
L
R
VGA
HDMI 2
HDMI 1
6